Remove the selector for replacement or repair
To check the automatic transmission control selector, turn on the ignition, press the brake pedal and move it from the “N” position to the “D” position, the car moves forward, and when switching to the “R” position, it moves backward
If the test result does not meet the requirements, we check the parking / neutral position sensor and the fastening of the automatic transmission control selector
We prepare the car and disconnect the negative battery terminal
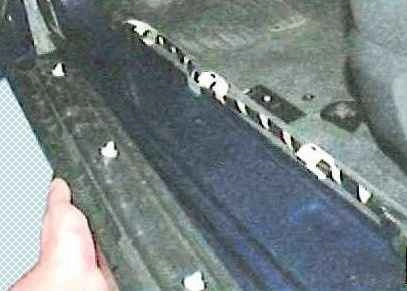
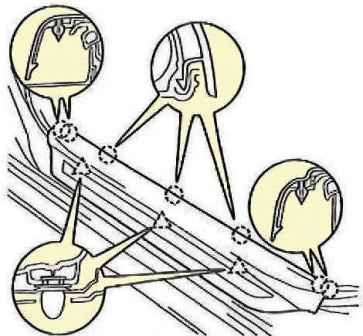
We take out the holders and fasteners for fastening the door sill trim to the body panel and remove the trim
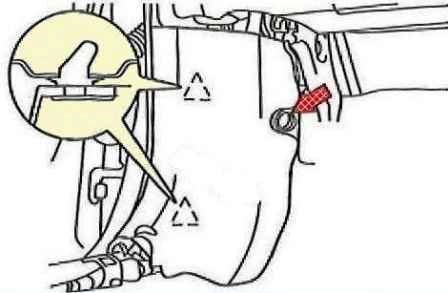
Remove the holder for the side trim of the instrument panel casing
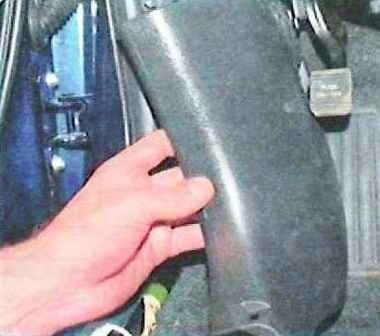
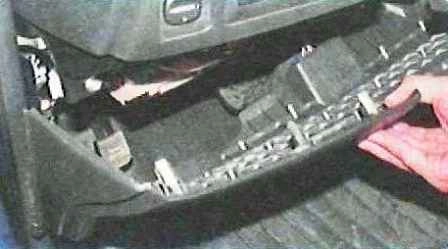
Remove the lining, overcoming the resistance of two clamps
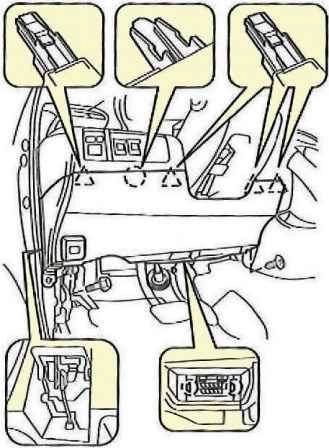
We unscrew the bolt and screw securing the left lower trim of the instrument panel and remove the trim, overcoming the resistance of the clamps
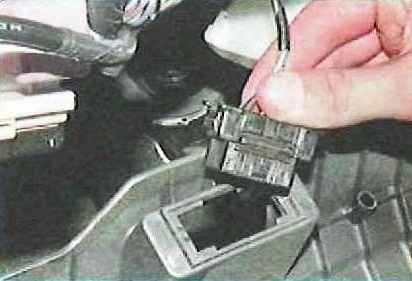
Remove the two latches and the connector from the cladding
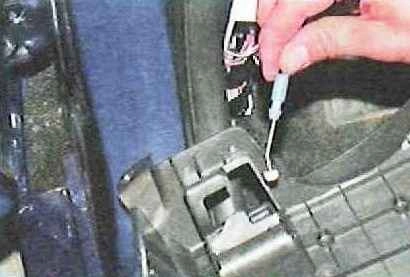
Disconnect the hood lock control cable from the lining
Disconnect the air supply hose from the lining and remove the left lower trim of the instrument panel
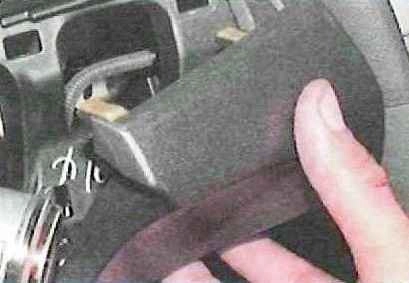
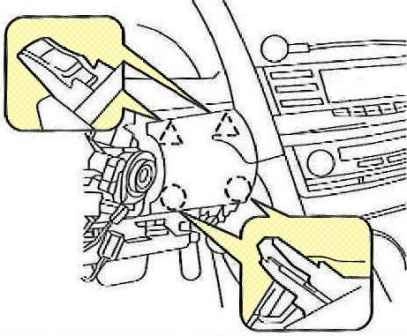
We remove the two holders and, overcoming the resistance of the two latches, remove the decorative overlay
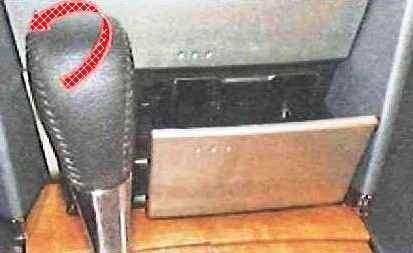
Turn the shift knob counterclockwise and remove it
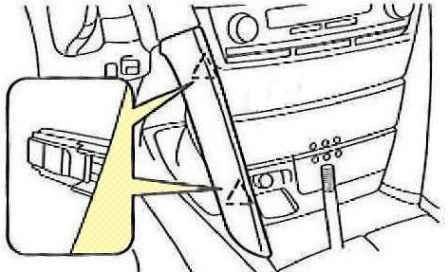
Remove the left lining of the center console of the instrument panel, overcoming the resistance of the two clamps
In the same way, remove the right trim of the center console of the instrument panel
Overcoming the resistance of the latches, we take the lining of the central lining of the floor tunnel to the side and disconnect the wire blocks from the front seat heating switches.
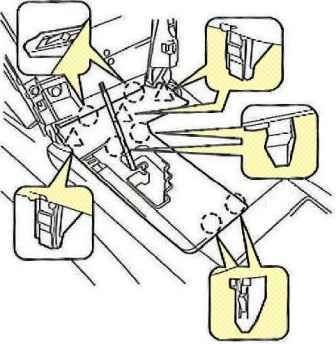
Remove the central lining of the floor tunnel
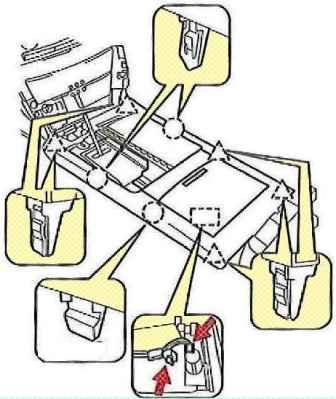
Overcoming the resistance of the clamps, we take the top panel of the floor tunnel lining to the side and disconnect the wiring harness blocks from the switches
Remove the top panel
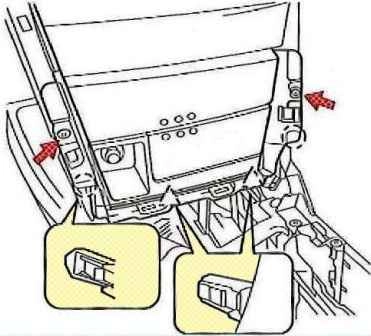
We unscrew the two screws securing the lower trim of the center console of the instrument panel
Overcoming the resistance of the clamps, we move the lining to the side, and disconnect the wire blocks from it.
Remove the bottom lining of the floor tunnel
Set the selector rocker to position "D"
We take out the glove box from the niche in the floor tunnel lining
Remove the glove box mat in the lining of the floor tunnel
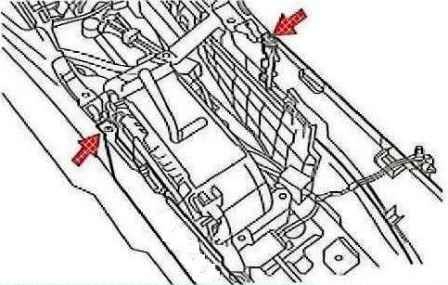
We unscrew the two screws securing the lower trim of the instrument panel
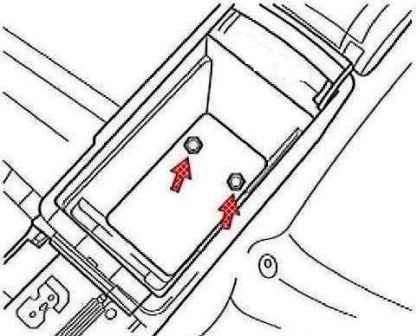
We unscrew the two bolts and remove the glove box in the lining of the floor tunnel
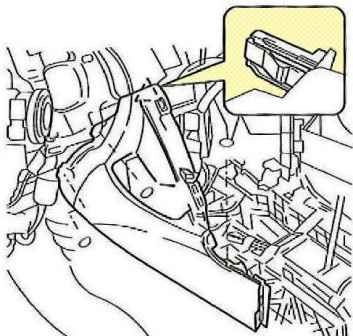
We unscrew the three screws, and, overcoming the resistance of the latch, remove the front lining of the glove box of the floor tunnel
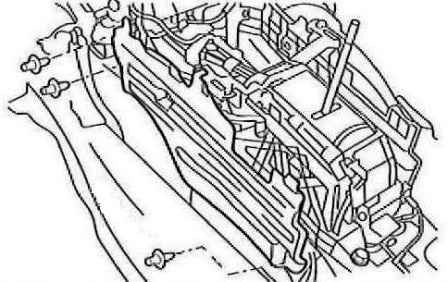
Remove the three clips and remove the interior mat holder
Disconnect the tip of the shift cable assembly from the selector lock control mechanism
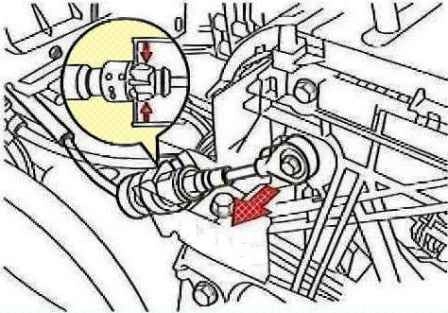
Disconnect the shift cable assembly from the selector lock control device
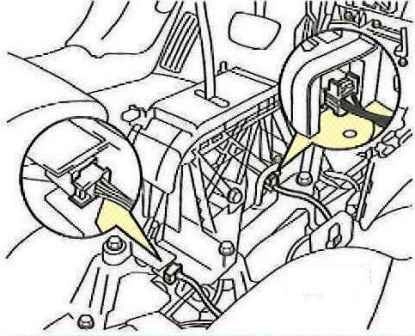
Disconnect the wiring harness pads from the electronic control unit (ECU) of the selector lock system and from the selector position sensor
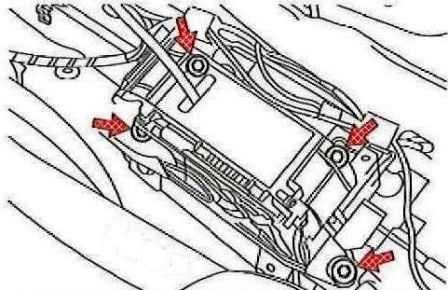
We unscrew the four bolts securing the gearbox control selector to the body panel and take it aside
Disconnect the selector position indicator wire block from the automatic transmission control selector
Install the parts in reverse order and adjust the position of the selector lever
Adjusting the position of the selector lever
Set the lever to the "N" position
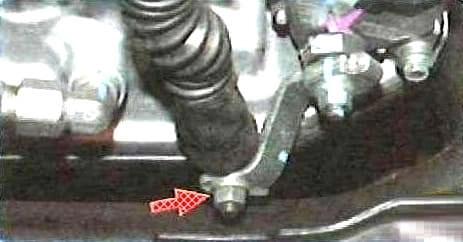
Unscrew the nut securing the lever to the drive shaft
Disconnect the gearshift cable from the lever ha drive shaft
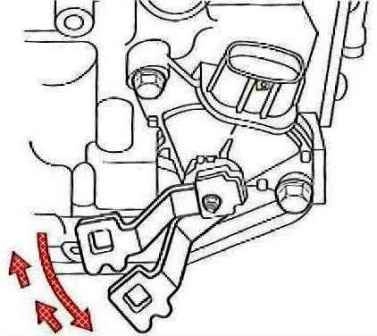
Move the drive shaft lever all the way down
Combine the mark on the drive shaft lever with the second mark on the gearbox housing (this position corresponds to the “N” (neutral) position of the selector)
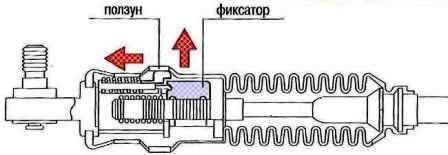
Move the slider in the directions indicated by the arrows and remove the retainer

Be careful not to damage the gearshift cable protector when removing the retainer
Install the gearshift cable in the reverse order of removal. Set the latch to its original position
Press the latch until the lock of the slider is fixed
We start the engine and make sure that when the lever is moved from the "N" position to the "D" position, the car moves forward, and when the "R" is moved, it moves backward
If the gear selector lever is hard to move, repeat the adjustment


