The need to replace or repair the clutch slave cylinder is the leakage of working fluid from it
We prepare the car and disconnect the negative battery terminal
Remove the air filter
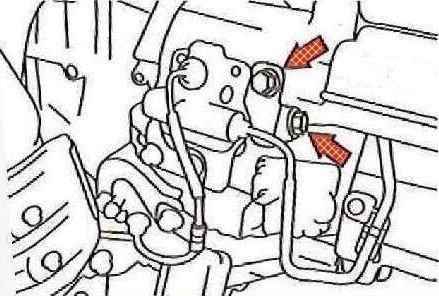
We unscrew the two bolts and remove the accumulator bracket
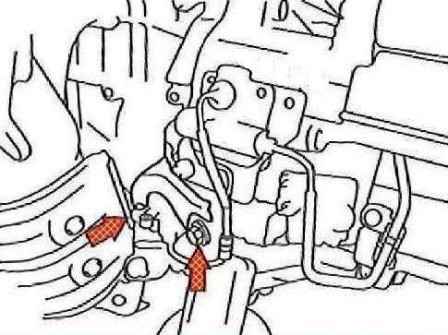
We unscrew the two bolts and remove the thermal insulation of the clutch release slave cylinder
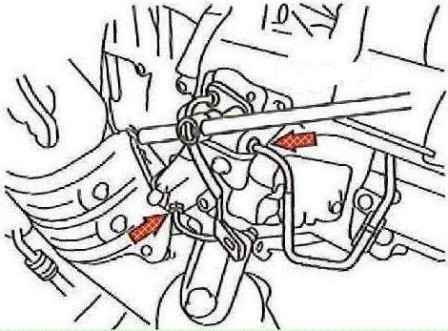
Holding the accumulator with a special device, unscrew the nuts securing the pipelines and move the pipelines to the side
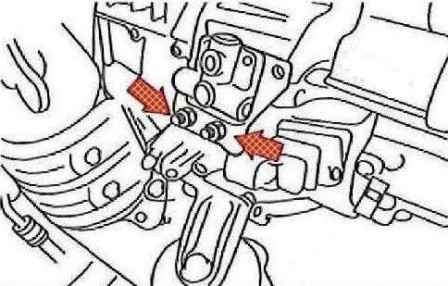
We unscrew the two bolts and remove the clutch release accumulator
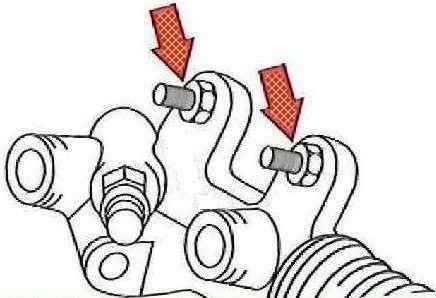
We unscrew the two bolts and remove the clutch release hydraulic slave cylinder
Remove the cover from the cylinder body
Unscrew the pusher from the cylinder body
Remove the piston from the cylinder body and the spring
Remove the cap from the drain plug
Remove the drain plug of the working cylinder
Check and clean the clutch slave cylinder
Build and install
Install the drain plug of the working cylinder by tightening it with a tightening torque of 8.3 Nm
Installing the drain plug cover
Installing a new spring in the cylinder body
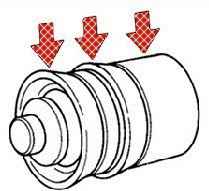
Lubricate the piston with lithium grease in the places shown by the arrows in the figure
Installing the piston into the cylinder
Install the cylinder pusher and cover on the cylinder body
We install the working cylinder and fix it with two bolts with a torque of 12 Nm
We install the clutch accumulator and fix it with two nuts and a bolt with a tightening torque of 12 Nm
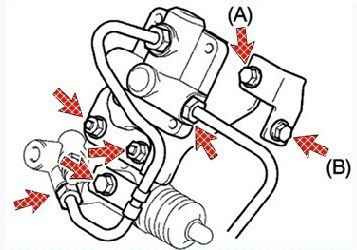
Install the hose bracket and secure it with two bolts. Tightening torque: bolt (A) - 12 Nm; bolt (B) - 39 Nm
Using a special tool, we connect two hoses by tightening the fastening nuts to a torque of 15 Nm
Install the clamp bracket and fasten with a bolt, tightening torque 12 Nm
Fill the master cylinder reservoir with clutch fluid and bleed the air from the clutch hydraulic circuit
Checking clutch fluid leakage
Checking the fluid level in the clutch reservoir
Bleeding the hydraulic clutch release
Remove the fender liner
We check the level of the working fluid in the reservoir of the main brake cylinder (the reservoir is common for both master cylinders) and, if necessary, bring it to normal
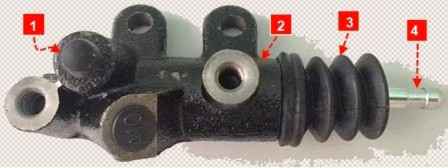
Remove the protective cap from the valve to bleed 1 clutch slave cylinder
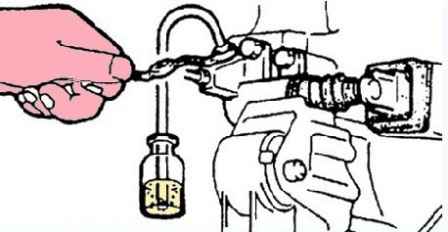
We put a hose on the valve and lower its end into a container with a small amount of brake fluid.
We ask the assistant to press the clutch pedal 4-5 times at intervals of 2-3 seconds, and then keep it pressed
Unscrew the valve ¾ turn. Liquid with air bubbles will come out of the hose into the container
We twist the valve and ask you to lower the clutch pedal
We repeat these operations several times until the fluid exits the hose without air bubbles
During pumping, we monitor the level of liquid in the tank.
Timely add liquid to the tank
We twist the valve, put on a protective cap and, if necessary, add fluid to the reservoir of the main brake cylinder
Install all parts in reverse order


