If the clutch does not fully disengage (“drives”) when the pedal is pressed all the way, which is accompanied by a characteristic grinding of gears when reverse gear is engaged, there may be air in the clutch hydraulic actuator. Remove it by pumping the drive
In addition, pumping is performed when the hydraulic drive is filled with liquid after its replacement or after repair of system components associated with its depressurization.
You will need: 8 wrench, bleed hose, brake fluid container, brake fluid.
Work with an assistant on the inspection ditch.
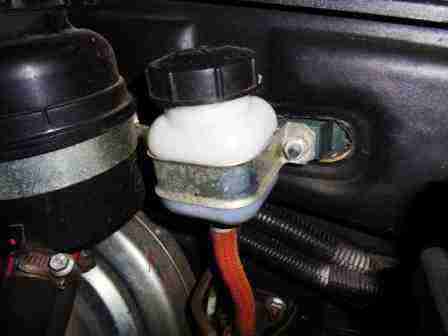
The supply of hydraulic clutch brake fluid is located in the reservoir located on the left side of the front panel.
The level of brake fluid in the reservoir with the cap installed should reach the lower edge of the filler neck.
With the reservoir cap removed, the liquid level should reach the upper edge of the reservoir clamp.
An increase in the fluid level in the clutch hydraulic reservoir indirectly indicates (with a sealed hydraulic actuator) a significant wear of the lining of the clutch disc.
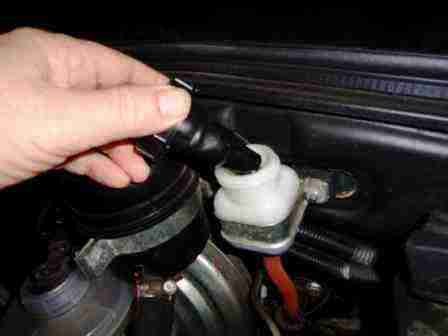
To add brake fluid to the reservoir, turn it counterclockwise and remove the reservoir cap.
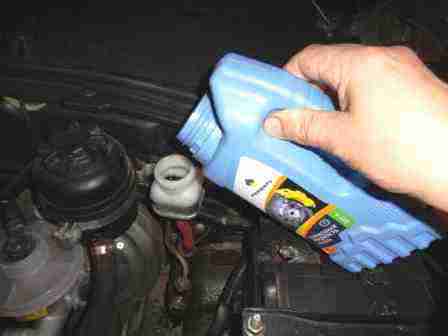
Add liquid type DOT-4 into the tank to the required level.
Reinstall the lid, wrapping it tightly.
Brake fluid that comes into contact with paintwork, plastic parts and vehicle wiring can damage them.
Remove it immediately with a clean cloth.
Bleeding the clutch hydraulic drive, changing the car fluid
We pump the clutch hydraulic drive to remove air from it after it is depressurized when replacing the master cylinder, working cylinder, hoses, tubes, as well as in case of replacing the working fluid.
We remove the air from the hydraulic drive when the engine is not running.
Before pumping, we check the fluid level in the clutch hydraulic reservoir and add fluid if necessary.
Pumping the hydraulic drive is carried out with an assistant.
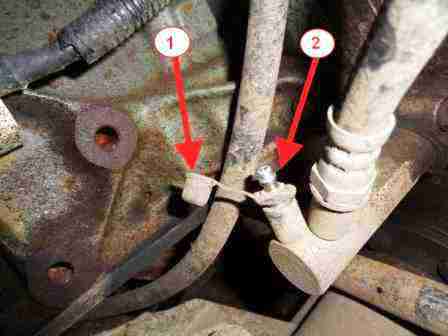
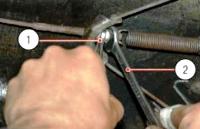
Remove the protective cap 1 from the bleed valve 2 of the working cylinder (Fig. 4).
Loosen the bleeder valve with an 8 spanner.
We put a hose on the fitting, and immerse its free end in a container partially filled with working fluid.
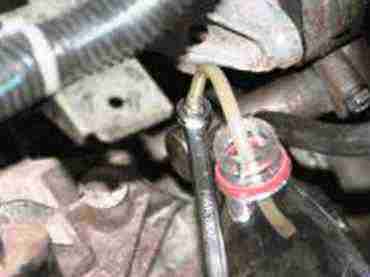
Use the “8” key to unscrew the bleeder valve by 1/2–3/4 turn.
The assistant presses and gently releases the clutch pedal several times sharply until the air bubbles coming out of the hose disappear.
In this case, it is necessary to monitor the level of liquid in the tank and add it. With the clutch pedal pressed, we wrap the bleeder valve.
Remove the hose, wipe the bleeder dry and put a protective cap on it.
If the air cannot be removed, we check the tightness of the connections, pipelines, hoses, main and working cylinders.
We tighten the leaking connections, we replace the faulty main and working cylinders.
We replace the working fluid in the clutch hydraulic drive in accordance with the maintenance schedule - after three years.
When replacing, we pump out the old liquid from the tank with a syringe or a rubber bulb.
Pour new fluid into the tank.
Bleed the clutch hydraulic until new fluid (lighter than the old one) starts to come out of the slave cylinder bleeder.
After pumping, we bring the fluid level in the clutch hydraulic reservoir to normal.


