We disassemble the generator to replace and repair parts of the generator
Remove the nut and remove the lead insulator
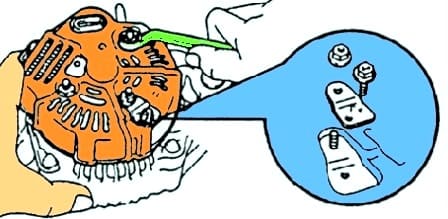
Remove the straightener plate (fig. 1).
Remove the three cover nuts and remove the generator cover from the rectifier side.
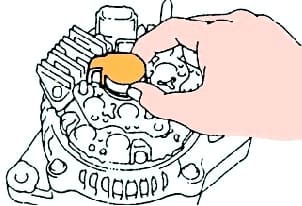
Remove the brush holder cover (fig. 2).
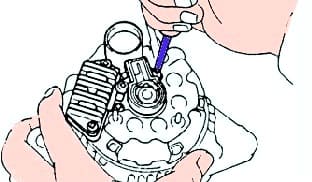
Remove five screws and remove the brush holder with cover and electronic voltage regulator (fig. 3).
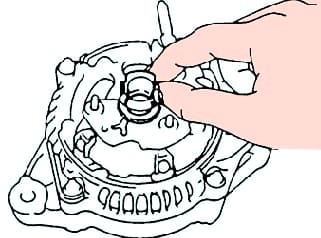
Remove the sealing plate (fig. 4).
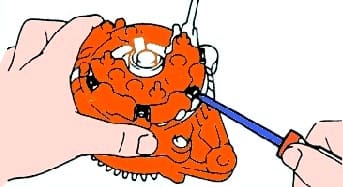
Unscrew the four screws, remove the rectifier unit, four rubber insulators and the front cover of the generator (Fig. 5).
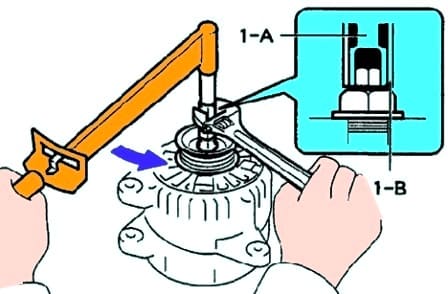
Install special tools "1-A" and "1-B" on the alternator pulley.
Holding the special tool "1-A" with a torque wrench, tighten the special tool "1-B" (clockwise) (fig. 6). Tightening torque: 39 Nm.
Make sure that the special tool "1-A" is securely fixed on the rotor shaft.
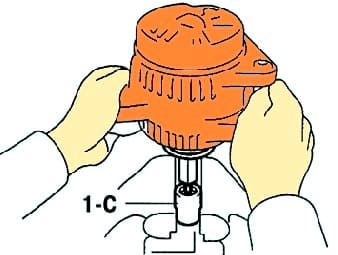
Clamp the special tool "1-C", as shown in Figure 7, and install the generator on it
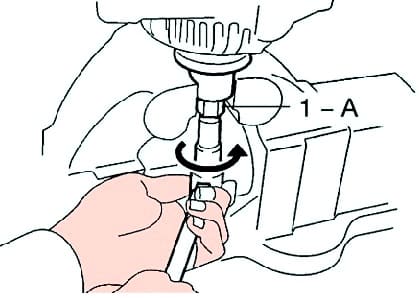
To loosen the pulley nut, turn the special tool "1-A" in the direction shown in figure 8
In order not to damage the rotor shaft, unscrew the pulley fastening nut no more than half a turn.
Remove the generator from the special tool "1-C".
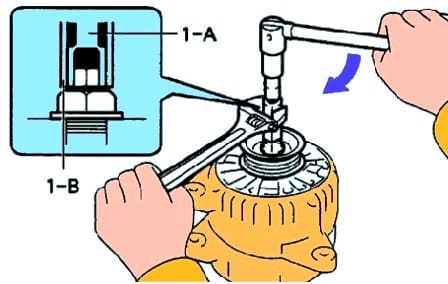
Unscrew the special tool "1-B" and remove the special tools "1-A" and "1-B" (Fig. 9)
Remove the pulley nut and the alternator pulley.
Remove the bolt, three fastening nuts and remove the plate clamp and the back cover of the generator.
Remove the brush holder cover.
Unscrew the two fixing screws and remove the brush holder.
Unscrew the three screws and remove the voltage regulator.
Remove the four screws and remove the lead insulator.
Remove the rubber insulator.
Remove the straightener plate.
Unscrew the four nuts and remove the wiring clamp.
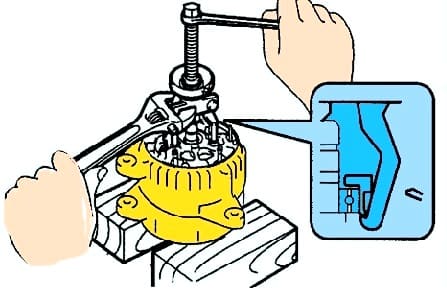
Using a bearing puller, remove the rectifier unit (fig. 10).
Remove the washer and remove the rotor from the generator cover on the drive side.
See another article on repairing a Toyota Camry generator - Generator repair


