In the article, we will consider the removal, repair and installation of the clutch master cylinder of a car
Clutch master cylinder installed in cars with manual transmission
We prepare the car and drain the clutch fluid
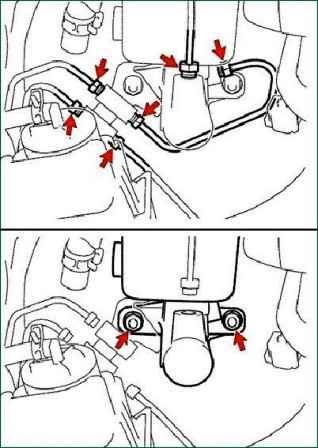
Remove the main brake cylinder by unscrewing the mounting bolts shown by the arrows in the figure
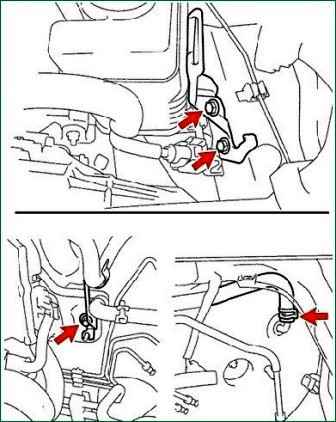
Remove the brake booster by unscrewing the mounting bolts shown by the arrows in the figure
Loosen the clamp and disconnect the clutch master cylinder reservoir tube from the clutch master cylinder.
Drain the liquid into a plastic container
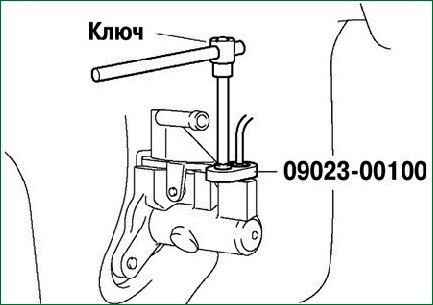
Using a special tool 09023-00100 and a special wrench, disconnect the hose from the clutch master cylinder
Having removed the clip and pin, remove the clutch master cylinder pusher fork with pin
Unscrew the two nuts, remove the clutch master cylinder
Removing and installing clutch master cylinder piston kit
Using a beard with a thin sting (5 mm) and a hammer, knock out the splined spring pin
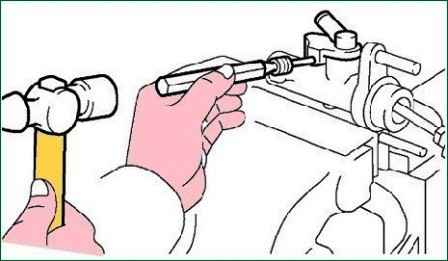
Remove the inlet fitting and sealing ring
Loosen the locknut and remove the pusher fork
Unscrew the pusher locknut
Remove the cover of the cylinder body
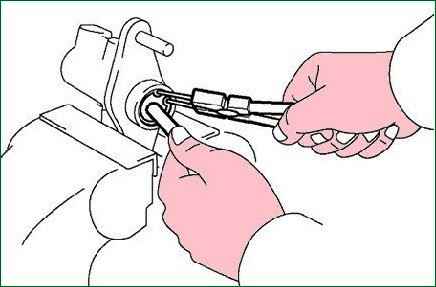
Sinking the piston rod, using pliers to remove and install the retaining rings, remove the retaining ring
Remove the pusher from the cylinder body
The piston may pop out of the cylinder body. Therefore, carefully remove the pusher from the cylinder body
Remove the thrust plate from the pusher
Remove the piston with the spring from the cylinder
Be careful not to damage the inside of the cylinder body
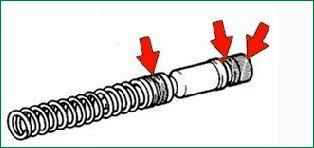
Lubricate the piston parts with lithium grease
Installing the piston with the spring into the cylinder
Install the thrust plate on the pusher
Install the pusher in the cylinder body
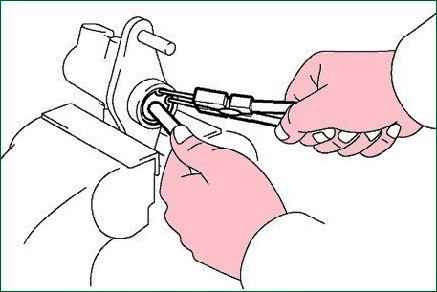
Sinking the piston rod, using pliers to remove and install the retaining rings, install the retaining ring
Install the cover on the cylinder body
Installing the pusher locknut
Temporarily install the pusher fork with the locknut on the pusher
Installing the inlet fitting and a new sealing ring
Install the thrust plate on the pusher
Install the pusher in the cylinder body
Sinking the piston rod, using pliers to remove and install the retaining rings, install the retaining ring
Install the cover on the cylinder body
Install the pusher locknut with the locknut on the pusher
Installing the inlet fitting and a new sealing ring
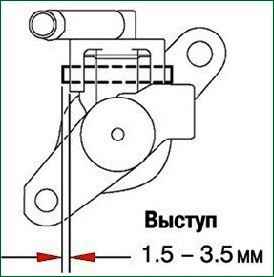
Using a beard with a thin sting (5 mm) and a hammer, install the splined spring pin
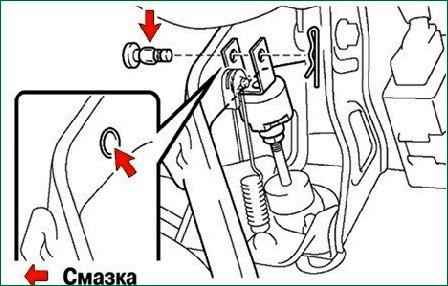
Apply MP grease to the contact surfaces of the pin and bushing
Connecting the fork to the clutch pedal with a pin
The pin must be installed on the left side of the car
Installing the pin clamp
Using a special tool, connect the hose and tighten the fastening nut. Tightening torque 15.2 Nm
Connect the clutch master cylinder reservoir tube with clamp to the clutch master cylinder
Installing the brake booster
Installing the brake master cylinder
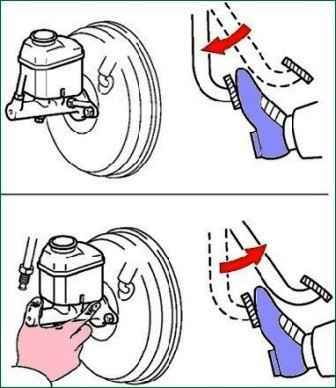
Removing air from the master cylinder
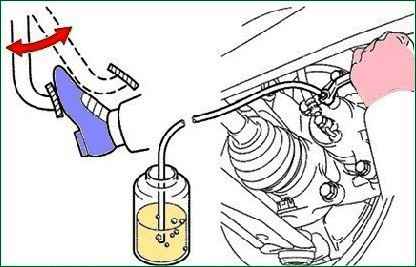
Removing air from the brake system
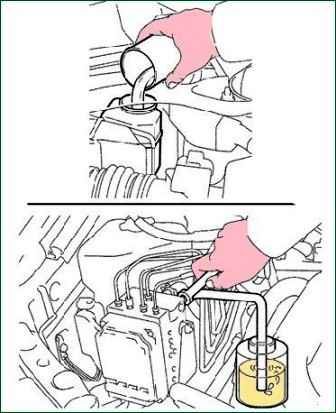
After filling the master cylinder reservoir with clutch fluid, we remove air from the clutch system
Checking and adjusting the brake pedal height
Checking for brake fluid leakage
Checking for clutch fluid leakage
Checking the fluid level in the clutch reservoir


