Replacing the cylinder head cover gasket
To complete the task, you will need tools: wrenches for 14, 13, socket heads for 10, 14, 19 and screwdrivers
We prepare the car for the task and remove the negative terminal from the battery
Remove the decorative engine cover
Disconnect the hoses of the crankcase ventilation system from the branch pipes of the head cover
Remove ignition coils
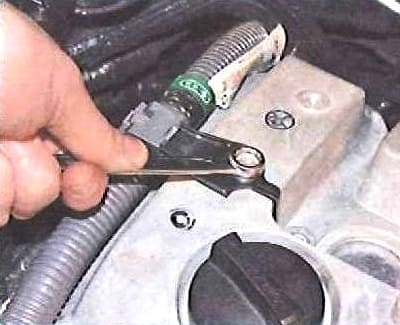
We unscrew the bolt securing the wire holder of the engine management system, and take the wiring harness to the side
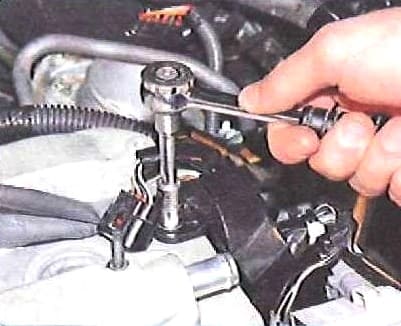
We also unscrew the bolt securing the engine compartment wiring harness holder, and move the harness to the side
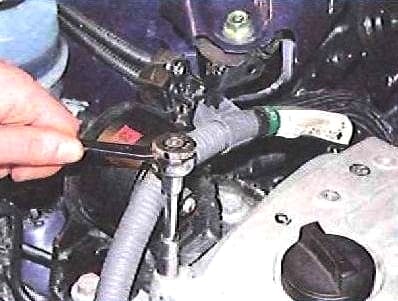
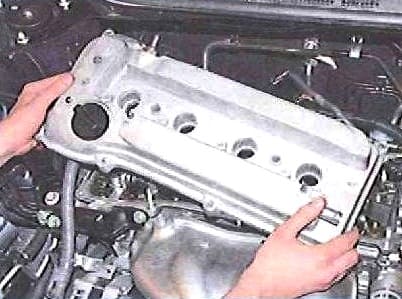
We unscrew the eight bolts securing the cylinder head cover and remove the cover
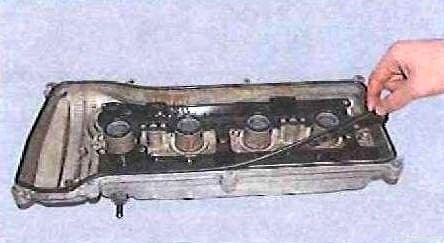
We take out the gasket and the sealing rubber gasket of the candle holes from the grooves in the cover
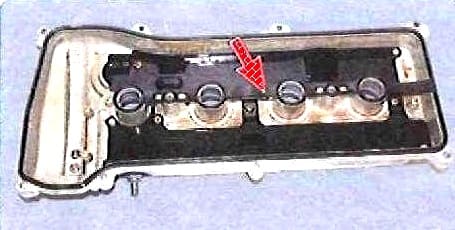
We clean the groove of the cover and the mating surface of the cylinder head from oil residues
Install new cylinder head cover gaskets and parts in reverse order
Replacing the cylinder head gasket
Reducing the pressure in the power system
Remove the negative wire from the battery
Remove the decorative engine cover
Disconnect the hoses of the crankcase ventilation system from the branch pipes of the head cover
Remove the front right wheel liner
Remove the engine mudguard
Drain the engine oil from the crankcase
Draining the coolant
Remove the hood
Remove the two clips and remove the windshield wiper trim
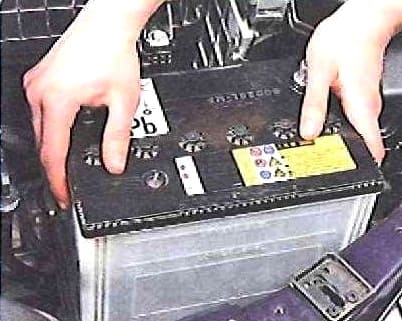
Remove the battery
Unscrew the bolts and remove the battery shelf
Remove the air filter
Remove the throttle body
Remove the fuel rail
Disconnect the vacuum brake booster hose from the intake manifold pipe
Disconnect the wire block from the hydraulic valve for changing the phases of the gas distribution mechanism
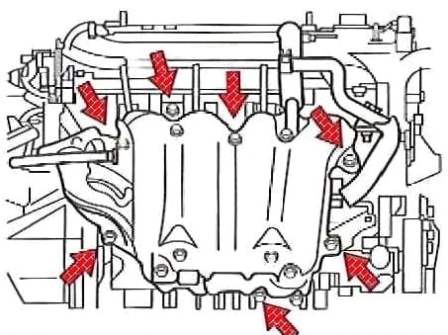
We unscrew the five bolts and two nuts securing the intake manifold, and remove it
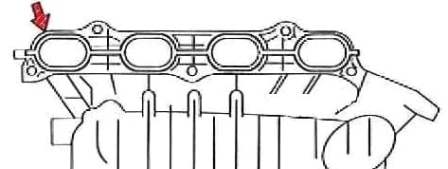
Remove the intake manifold gasket
We unscrew the two mounting bolts bracket to cylinder head and support bracket
Remove the thrust of the longitudinal movement of the power unit
We install the jack through a wooden spacer under the gearbox housing and raise the power unit, thereby unloading its support
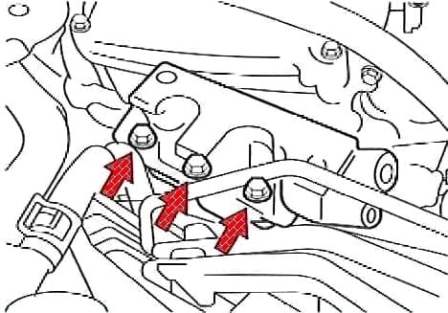
We unscrew the three screws and remove the bracket for fastening the right support of the power unit
Remove the accessory drive belt
Remove the generator
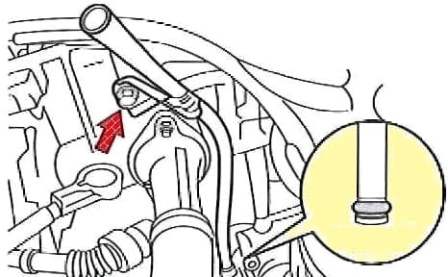
Remove the O-ring from the dipstick tube
Remove the collector
Remove the timing chain
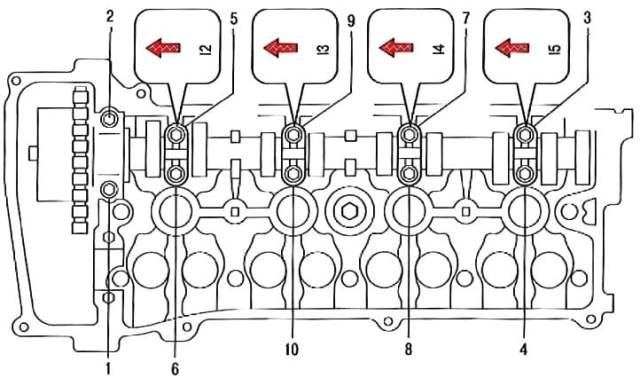
We unscrew the bolts of the intake camshaft bearing caps from the cylinder head, in the sequence shown in the figure
Remove the bearing caps and take out the camshaft
Disconnect the block of wires from the hydraulic phase change valve
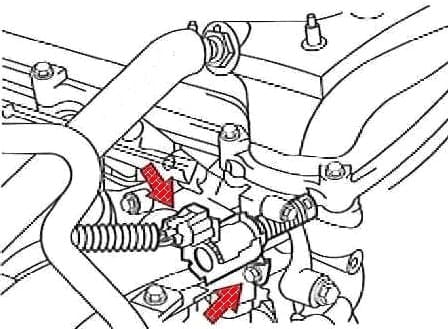
We unscrew the bolt and remove the hydraulic valve of the phase regulator
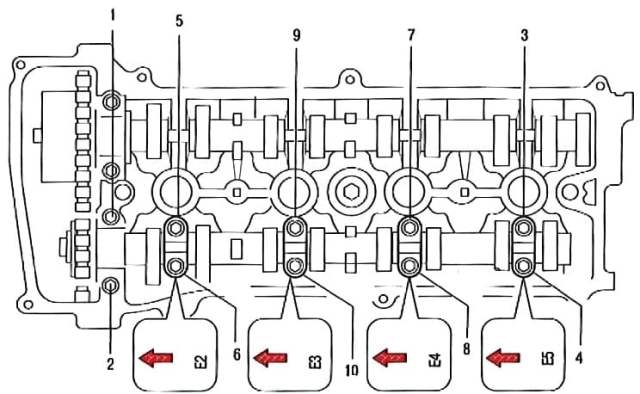
We unscrew from the cylinder head, in the sequence indicated in the figure, the bolts securing the bearing caps of the exhaust camshaft
Remove the bearing caps and take out the camshaft
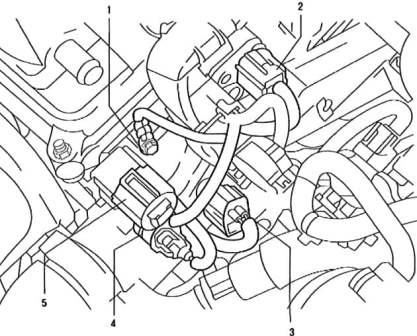
Unscrew the bolt and disconnect the tip of the wire "-" 1
Disconnect the wire blocks from the camshaft position sensor 2, coolant temperature sensor 5, oil pressure sensor 4 and from the radio tuning capacitor 3
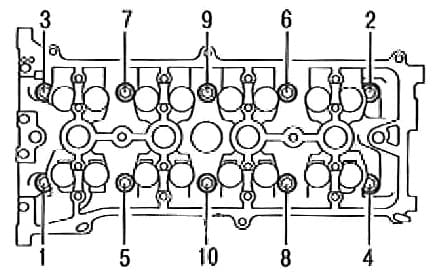
We unscrew the cylinder head bolts in the sequence shown in the figure, remove them together with the spring washers and remove the cylinder head
Remove the cylinder head gasket
It is advisable to remove the head with two people, the head is quite heavy
We clean the mating surfaces of the cylinder head, remove oil from the threaded holes in the block for the head bolts
Checking the block head for warping
To do this, we put the ruler with an edge on the surface of the head, first in the middle along, across, and then along the diagonals and with a probe we measure the gap between the plane of the head and the ruler
Replace the cylinder head if the gap exceeds 0.1 mm
Install the cylinder head in reverse order, taking into account the following:
- - remove from the threaded holes of the fastening bolts oil or coolant that got there when the head was removed;
- - install a new block head gasket, gasket reuse is not allowed
- - lubricate the bolts with engine oil
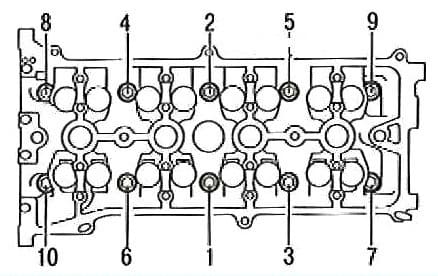
- - we tighten the bolts on a cold engine in the order shown in the figure, in two stages:
- - stage 1 - tighten the bolts with a torque of 70 Nm;
- - stage 2 - tighten the bolts at an angle of 90º
- - install camshafts
Install parts in reverse order
After installing the camshafts and the timing chain, we check and, if necessary, adjust the clearances in the valve drive


