Inspect the one-way clutch
Install special tool 09350-32014 into the inner race of the one-way clutch
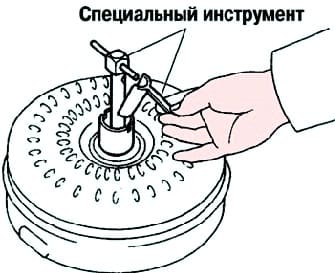
Install the special tool so that it fits into the groove of the torque converter bushing and the outer ring of the one-way clutch (Fig. 1).
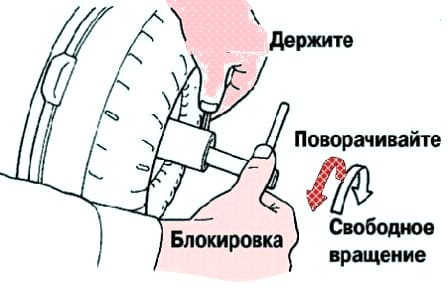
With the torque converter clutch on its side, make sure the one-way clutch locks when rotated counterclockwise and rotates smoothly clockwise (fig. 2).
If necessary, clean the torque converter and recheck the one-way clutch.
Replace the torque converter if the one-way clutch test fails.
Identify the condition of the torque converter clutch assembly.
If the following step fails after checking the torque converter clutch, replace the torque converter clutch.
Signs of a problem are listed below.
The torque converter clutch makes a metallic sound during a parking test, or when the shift lever is in neutral.
Single-sided clutch rotates freely or locks in both directions.
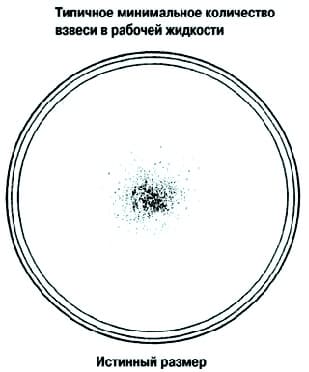
The amount of suspended solids in the working fluid exceeds the typical limit (see Fig. 3).
The figure shows the amount of suspension in approximately 0.25 liters of working fluid, which is drained from the removed torque converter clutch.
Change the hydraulic fluid in the torque converter clutch.
If the fluid is discolored and/or smells bad, stir the fluid well in the torque converter clutch and drain it while holding the transformer face up
Cleaning and checking the oil line and oil cooler
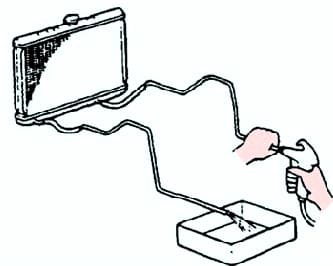
When inspecting the torque converter clutch or changing the fluid, clean the oil line and oil cooler (fig. 4).
Supply 196 kPa compressed air through the inlet hose.
If there is a large amount of suspension in the working fluid, add new working fluid using a piston pump and clean the system again.
If the working fluid is cloudy, inspect the oil cooler (radiator).
Be careful not to deform the torque converter clutch or damage the oil pump gears.
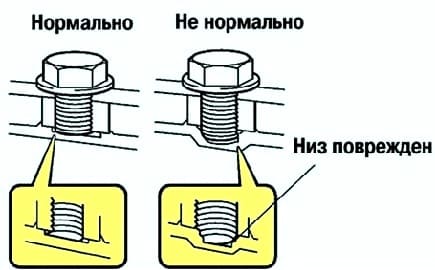
If any contact is found at the end of the torque converter clutch bolt and at the base of the bolt hole due to increased clearances, replace the bolt and torque converter clutch (fig. 5).
All bolts must be the same length.
Bolts with washers must be used.
Inspection of the ring gear and drive disc
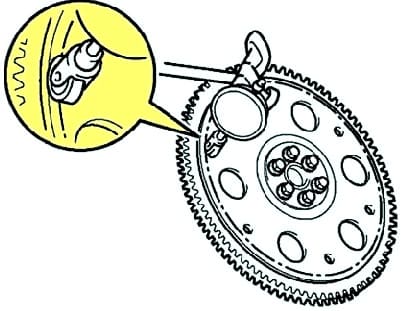
Install a dial indicator and measure the drive disc runout (fig. 6).
Inspect the ring gear for damage.
Maximum runout: 0.20 mm.
If the runout is out of tolerance or the ring gear is damaged, replace the drive disc


