")
")
")
")
")
")
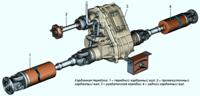
Longitudinal rods are removed for replacement if they are damaged or to replace worn rod hinges
The upper rod is attached through rubber-metal hinges with its front end to the side member of the body, the rear end - to the bracket on the rear axle beam.
The lower rod is attached through rubber-metal hinges with its front end to the bracket on the floor of the body, the rear end - to the bracket on the rear axle beam.
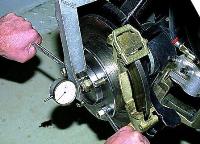
You will need two "19" keys.
Removing the lower longitudinal bar
We carry out work on a viewing ditch or a lift.
Disconnect the lower shock absorber mount from the rear axle beam.

Using a 19 spanner wrench, unscrew the nut of the bolt securing the rod to the rear axle beam, holding the bolt from turning with a wrench of the same dimension.

We knock out the bolt through a soft metal drift and remove it.


Remove the rear tip of the rod from the lug of the rear axle bracket.

Using a 19 spanner wrench, unscrew the nut of the bolt securing the rod to the body bracket, holding the bolt from turning with a wrench of the same dimension.

Remove the bolt and remove the bar

To replace the rubber bushings of the rod, we clamp it with a little force in a vise.

With a puller, we press the bushing into a cup resting on the edges of the eye, and take out the rubber and steel (spacer) bushings.

We lubricate the new rubber bushing with soapy water and press it into the eye in a vice.

To press the spacer sleeve, we use a conical mandrel or a tool head with different outer diameters.

Insert the mandrel into the hole of the rubber bushing lubricated with soapy water and press the spacer bushing in a vice

To remove the bracket for fastening the front end of the rod with a “17” head, unscrew four nuts

Remove the bracket
Install the removed parts in reverse order.
Removing the upper longitudinal bar

Using a 19 spanner wrench, unscrew the nut of the bolt securing the rod to the rear axle beam, holding the bolt from turning with a wrench of the same dimension.

We knock out the bolt through a soft metal drift

Using a 19 spanner wrench, unscrew the nut of the bolt securing the rod to the body side member, holding the bolt from turning with a wrench of the same dimension

Remove the bolt

Removing the barbell
Replace rubber bushings as shown above
Install the bar in reverse order.
Removing the cross bar

Using a 19 spanner wrench, unscrew the nut of the bolt securing the rod to the body bracket, holding the bolt from turning with a wrench of the same dimension.


We knock out the bolt through a soft metal drift and remove it.

Using a “19” spanner wrench, unscrew the nut of the bolt securing the rod to the rear axle beam bracket, holding the bolt from turning with a head of the same dimension.

Through a soft metal drift, we knock out the bolt and remove the transverse rod

See the replacement of the rubber bushings of the transverse rod at the beginning of the article.
Install the bar in reverse order.
We finally tighten the nuts of the rod fastening bolts in the “car on wheels” position.
The tightening torque of the nuts for the bolts of the transverse and longitudinal rods is 66.6-82.3 Nm (6.8-8.4 kgf m)