Replacing the rear suspension arms Kia Magentis
We remove the parts of the rear suspension for replacement, as well as for repair
We install the car on a lift or on a viewing ditch
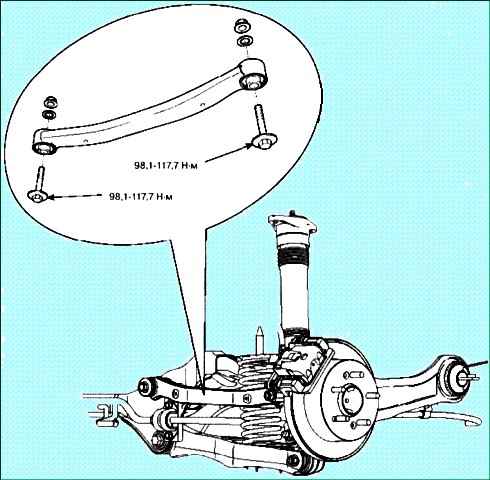
Removing the upper arm of the rear suspension
Loosen the rear wheel nuts
Raise the rear of the car and install it on reliable stands
Remove the rear wheel
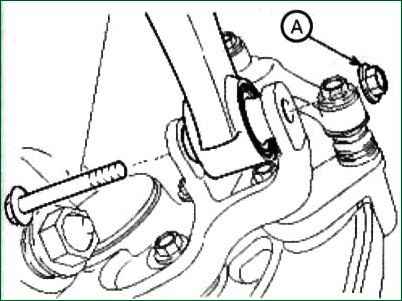
We unscrew the bolt and nut securing the upper arm (A) from the steering knuckle. Tightening torque 98.1-117.7 Nm
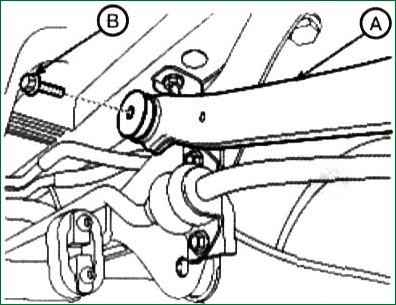
We unscrew the bolt (B) of the upper arm from the cross member. Tightening torque 98.1-117.7 Nm
Checking the state of the upper arm
Check for defects and damage to the lever bushing. If necessary, replace the lever assembly
Check the lever for deformation. If necessary, replace the lever
Checking the condition of bolts and nuts
Removing and installing the lower control arm
Loosen the rear wheel nuts
Raise the rear of the car and install it on reliable stands
Remove the rear wheel
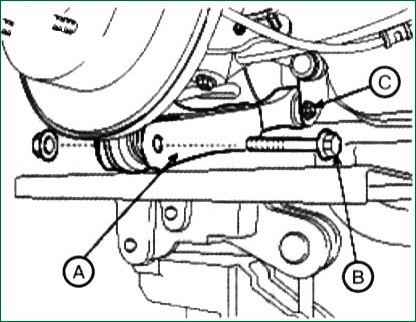
We unscrew the bolt (B) securing the lower arm from the steering knuckle, supporting the lower arm (A) with a jack, as shown in the figure.
Unscrew the bolt (C) of the lower arm from the cross member. Bolt tightening torque 137.3 Nm
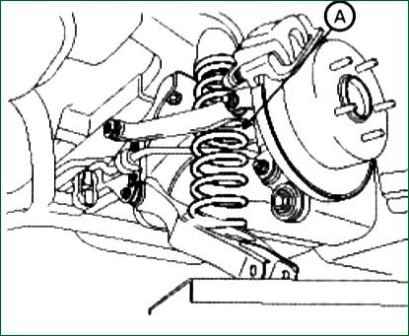
Remove the spring (A), the lower support and the upper spring cushion.
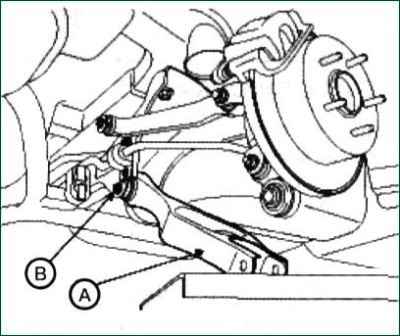
Unscrew the bolts (B) of the lower arm (A) from the cross member
Install the lower arm in reverse order
Checking the technical condition
Checking the condition of silent blocks. If defects are found, replace the lever assembly
Checking the lower arm for changes in geometric parameters
Removing and installing additional rear suspension arm
Loosen the rear wheel nuts
Raise the rear of the car and install it on reliable stands
Remove the rear wheel
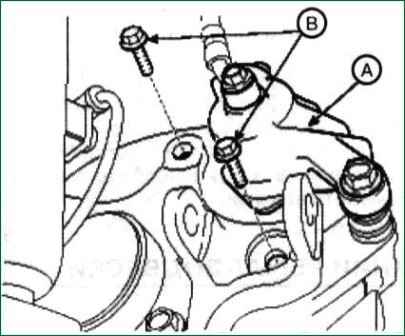
Unscrew the mounting bolts (B) of the brake caliper
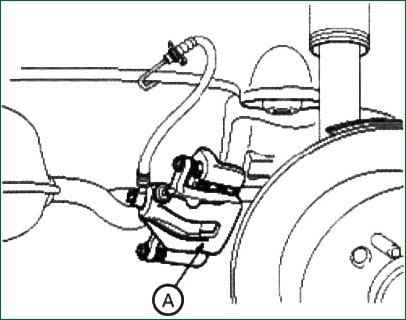
We tie the caliper to the rear suspension spring
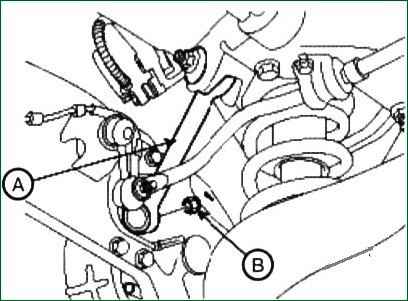
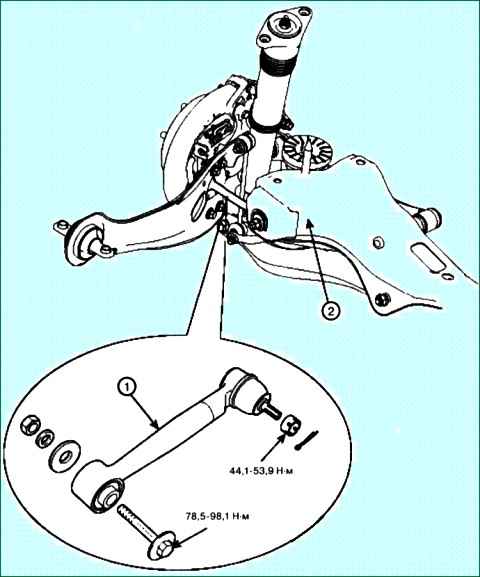
Unscrew the self-locking nut (B) of the ball joint of the additional lever (A) and remove the cotter pin
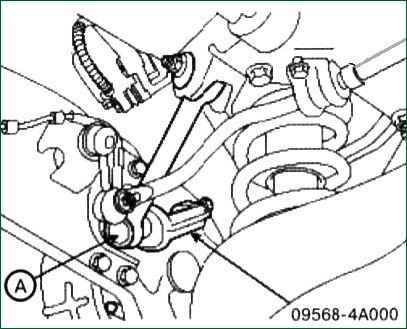
Using puller 09568-4A000, remove the ball joint (A) of the auxiliary arm. Tightening torque 44.1-53.9 Nm
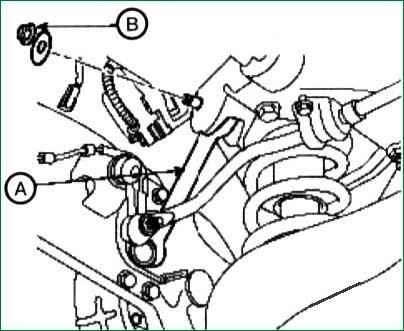
Unscrew the fastening nut (B) of the additional lever from the cross member. Tightening torque 78.5-98.1 Nm
Install the additional lever in reverse order
Removing and installing trailing arm rear suspension
Loosen the rear wheel nuts
Raise the rear of the car and install it on reliable stands
Remove the rear wheel
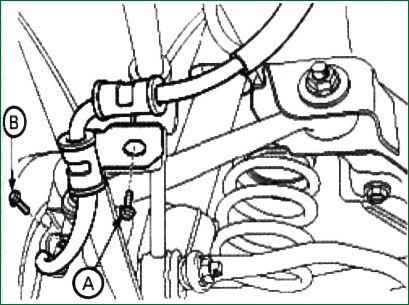
Unscrew the mounting bolts (A, B) of the wheel speed sensor wiring bracket from the housing and disconnect the connector. Tightening torque 6.9-10.8 Nm
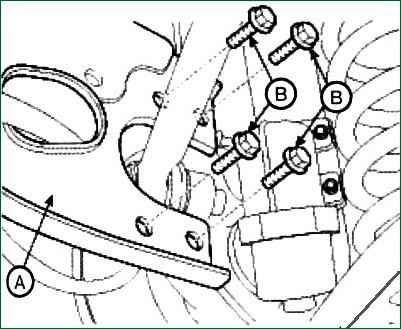
Unscrew the mounting bolts (B) of the trailing arm (A) from the steering knuckle. Tightening torque 44.1-53.9 Nm
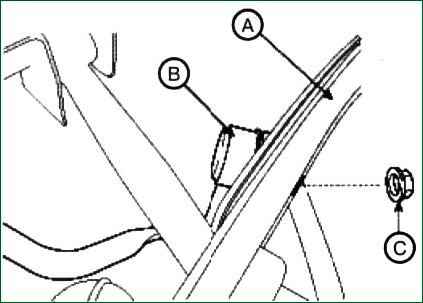
Unscrew the mounting nut (C) of the stabilizer strut (B). Tightening torque 44.1-53.9 Nm
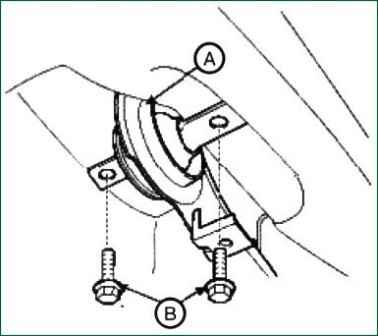
We unscrew the bolts of the bracket (A) of the additional lever from the body. Tightening torque 137.3-156.9 Nm
Install the trailing arm in reverse order
Removing and installing the rear suspension anti-roll bar
Loosen the rear wheel nuts
Raise the rear of the car and install it on reliable stands
Remove the rear wheel
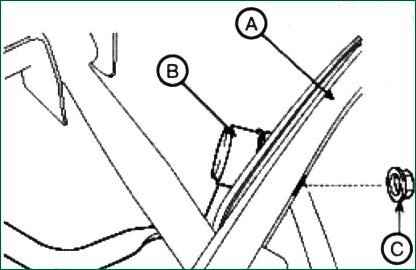
We unscrew the left and right nuts (C) of the stabilizer strut (B) from the trailing arm (A)
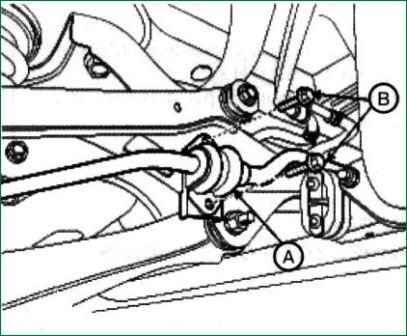
We unscrew the left and right bolts (B) of the stabilizer bracket (A)
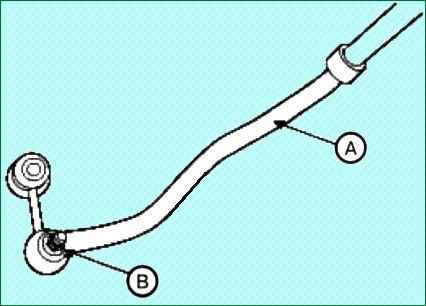
Unscrew the mounting nut (B) of the stabilizer strut (A) from the stabilizer assembly
Installing the rear suspension stabilizer
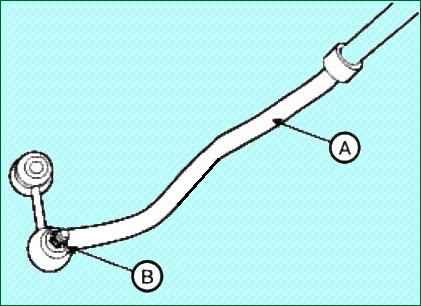
We screw in the nut (B) of the stabilizer strut (A). Tightening torque 44.1-53.9 Nm
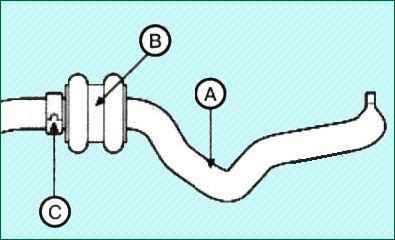
Installing the bushing (B) of the stabilizer (A)
The clamp (C) of the stabilizer (A) must be butt against the bushing (B)
We tighten the bracket mounting bolts on one side, then install the sleeve on the other side
We screw in the bolts securing the stabilizer to the crossbars e. Tightening torque 44.1-53.9 Nm
We screw the stabilizer strut nuts to the trailing arm. Tightening torque 44.1-53.9 Nm
In the same way, we screw the bolts and nuts on the other side
Install the wheel on the hub


