In the article, we will consider the stages of disassembly and assembly of the gearbox
Gearbox disassembly
After removing the drive shaft, remove the auxiliary cylinder assembly
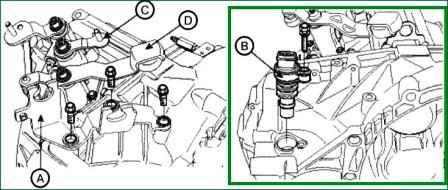
Remove the shift cable bracket (A) and the vehicle speedometer (B)
Remove the selector lever (C) and switch connection (D) assembly
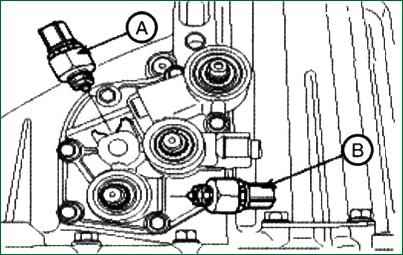
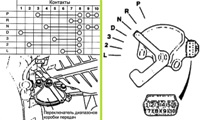
Remove the tail light switch (A) and neutral switch (B)
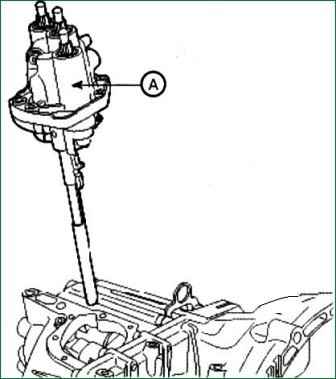
Remove the drive shaft (A)
Remove the gearbox holder
Unscrew the filler cap and the driven shaft bolt
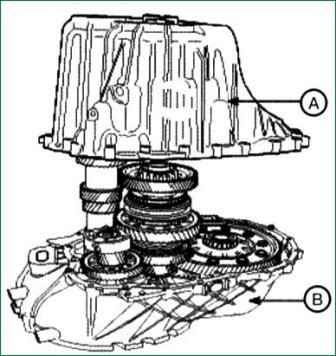
Disconnect the clutch housing (B) from the gearbox housing (A)
Remove the spring fingers from the switch beam (third, fourth and reverse gear)
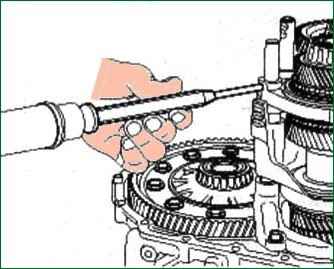
Remove forks (4EA), axles (2EA) and axle support bracket
After that, we remove the parts in order:
- - second output shaft;
- - input shaft;
- - first output shaft;
- - differential assembly.
Remove the reverse driven shaft assembly
Remove the magnetic plug and auxiliary cylinder
Remove the guides, bearing outer races, locating pin and gaskets from the clutch housing
Remove the O-rings and guides from the clutch housing
Gearbox assembly
Installing the reverse gear driven shaft assembly
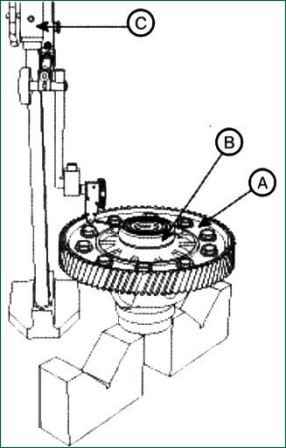
After installing the outer race of the tapered roller bearing (B) on the differential assembly (A), measure the height with a tool (C)
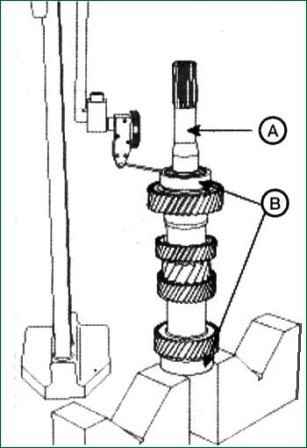
After installing the tapered roller bearing outer race (B) on both sides of the input shaft (A), measure the height
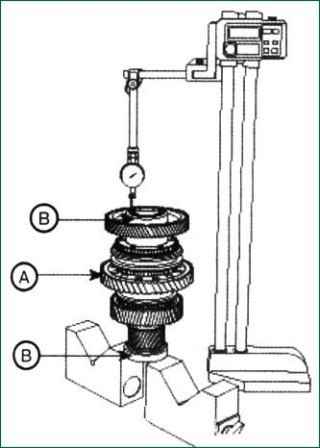
After installing the outer race of the tapered roller bearing (B) on both sides of the first output shaft (A), measure the height
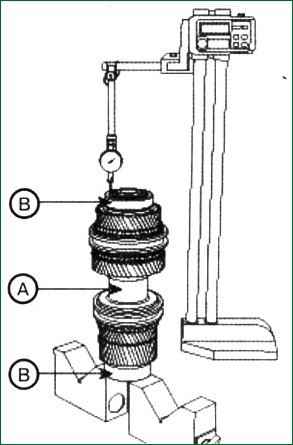
After installing the tapered roller bearing outer race (B) on both sides of the second output shaft (A), measure the height
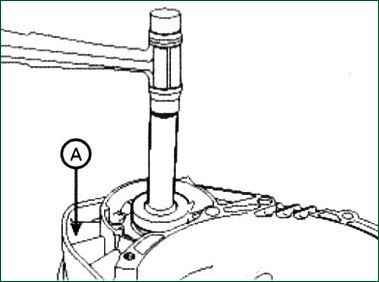
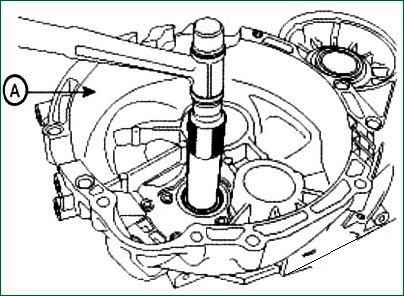
Install the cuffs and guides on the clutch housing (A)
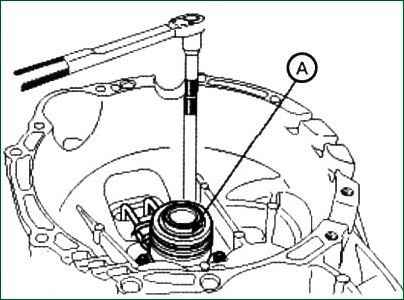
Install the auxiliary cylinder assembly and boot. Tightening torque 11.8-14.7 Nm
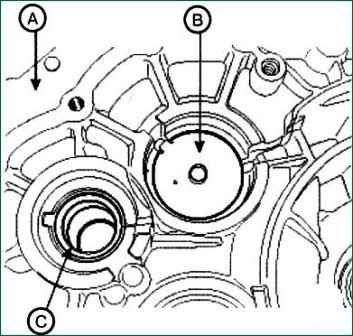
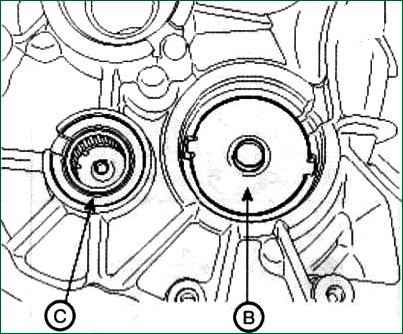
We fix the guides (B), the outer rings of the bearings, the locating pins and gaskets (C) on the clutch housing (A).
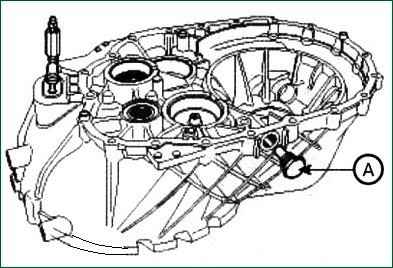
Insert the rubber bushing into the hole of the auxiliary cylinder
Tighten the magnetic plug (A). Tightening torque 29.4-34.3 Nm
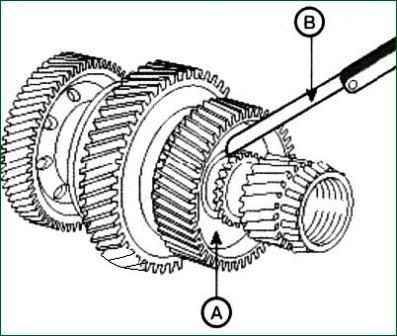
We measure the axial clearance of the reverse gear (A) of the primary output shaft with a gauge (B). Standard value 0.135-0.345 mm
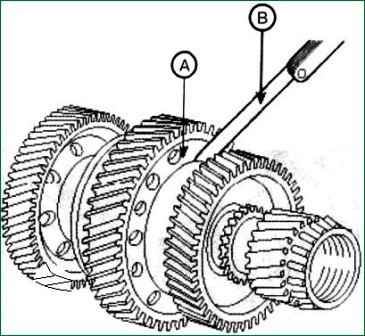
We measure the axial clearance of the first gear gear (A) of the primary output shaft with a gauge (B). Standard value 0.135-0.345 mm
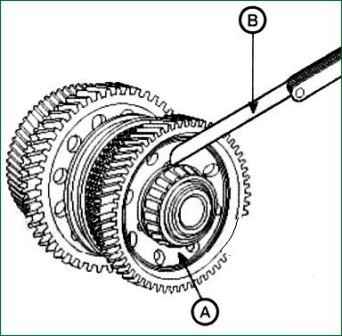
We measure the axial clearance of the second gear gear (A) of the input shaft with a gauge (B). Standard value 0.230-0.430 mm
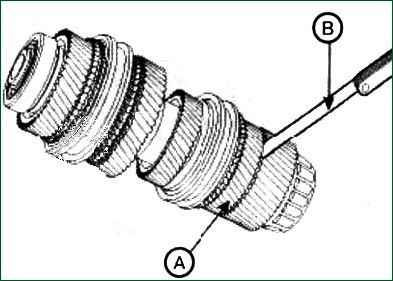
We measure the axial clearance of the fifth gear gear (A) of the second output shaft with a gauge (B). Standard value 0.125-0.305 mm
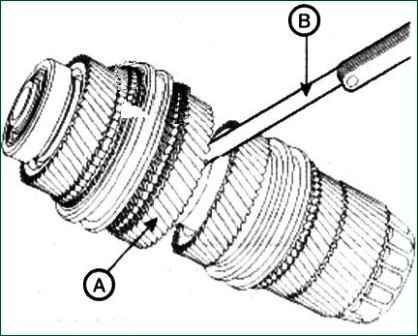
We measure the axial clearance of the third gear gear (A) of the second output shaft with a gauge (B). Standard value 0.142-0.427 mm
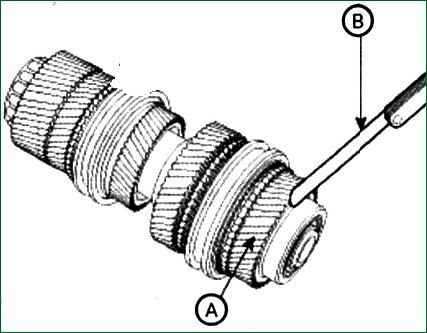
We measure the axial clearance of the fourth gear (A) of the second output shaft with a gauge (B). Standard value 0.230-0.430 mm
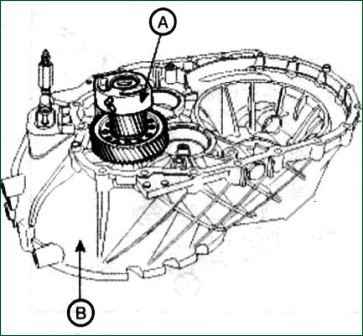
Install the reverse driven shaft (A) together with the gasket on the clutch housing (B)
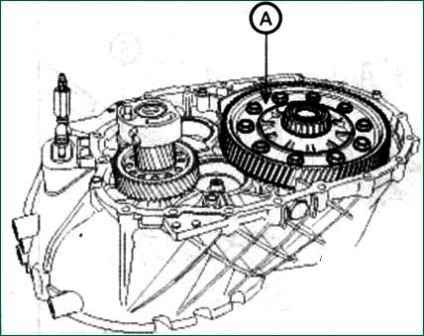
Installing the differential assembly (A) with the new pr lining in the clutch housing
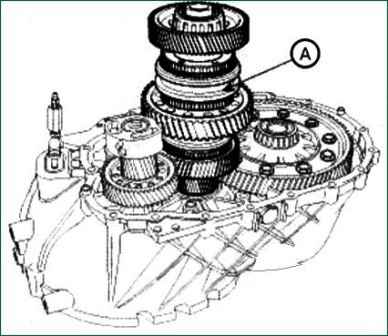
Install the first output shaft (A) with the gasket in the clutch housing
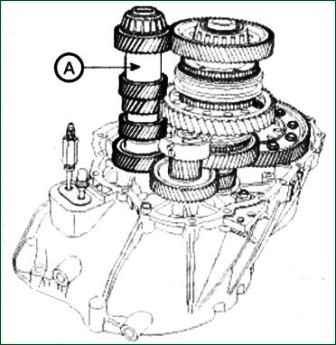
Install the input shaft (A) with the gasket in the clutch housing
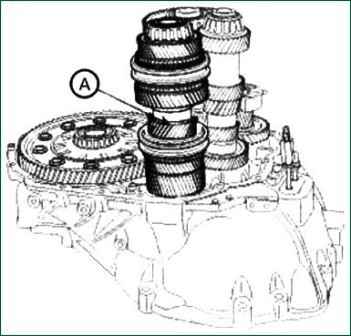
Install the second output shaft (A) with the gasket in the clutch housing
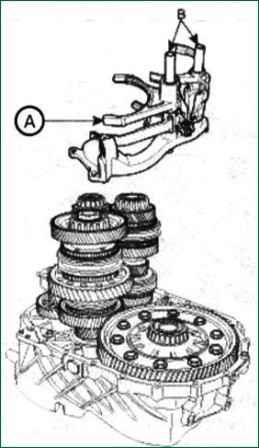
Install the fork (A), the derailleur shaft (B), and the axle support mounting bracket. Tightening torque 19.6-26.5 Nm
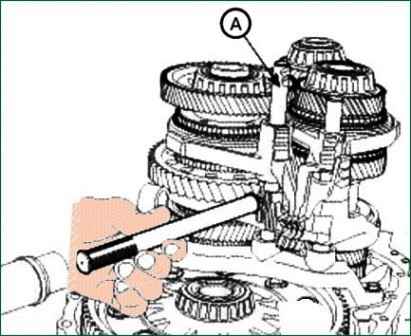
We fix the parts by inserting a finger into the axis (A, B). Lightly hit the spring finger.
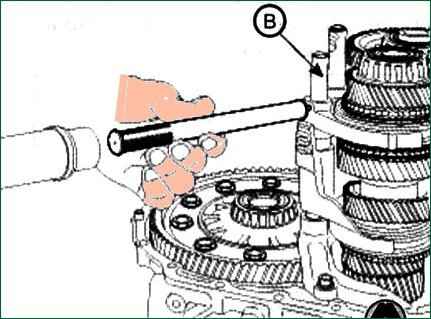
Insert gaskets, bushings and outer races of bearings into the gearbox housing
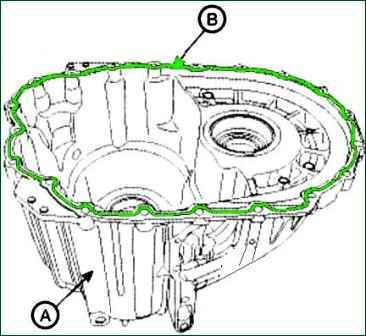
We apply sealant to the gearbox housing. Recommended Sealant Loktite 587 or 5060
Align the position of the pin with the hole on the reverse driven shaft damper
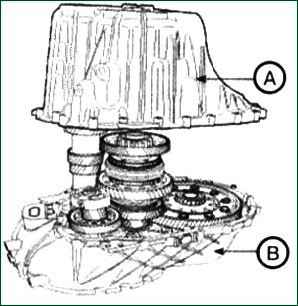
Aligning the transmission housing (A) with the clutch housing (B)
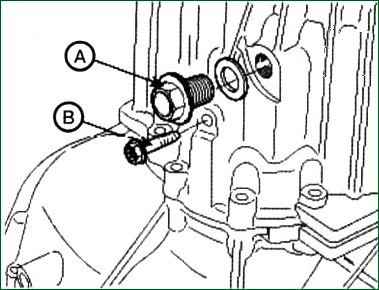
Tighten the filler cap and the driven shaft bolt (B). Tightening torque 29.4-34.3 Nm for plug; 24.5-29.4 Nm for the bolt.
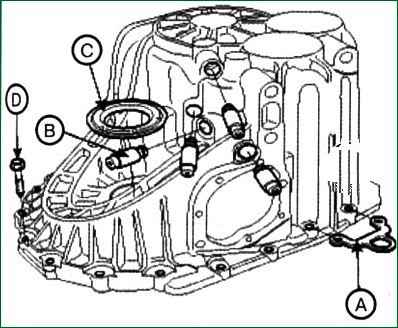
We fix the gearbox holder (A), the thrust pin (B) and the cuff (C). Tightening torque 24.5-29.4 Nm
We press on the thrust pin so that it is flush with the surface of the transmission housing
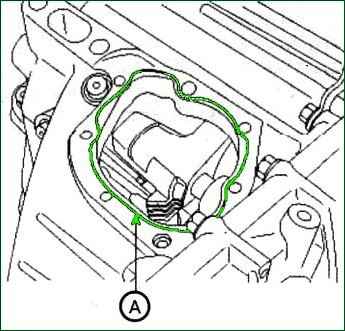
Install the gear selector lever (B), pre-apply sealant on its surface. Tightening torque 9.8 -11.8 Nm
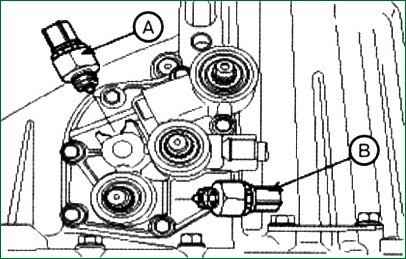
Install the rear light switch (A) and neutral gear switch (B). Tightening torque 29.4-34.3 Nm
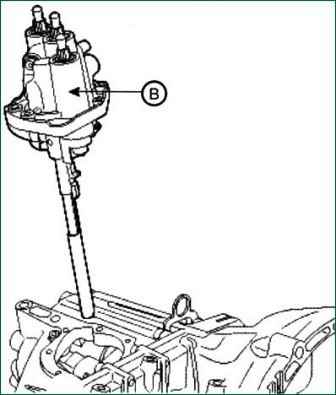
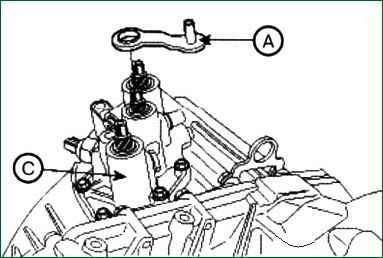
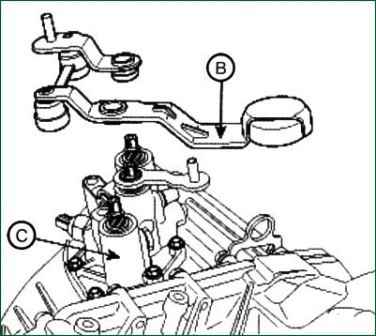
Install the gear selector lever (A) and the gear lever assembly (B), positioning the parts flush with the yellow mark on the drive shaft (C).
Tightening torque 42.2-53.9 Nm
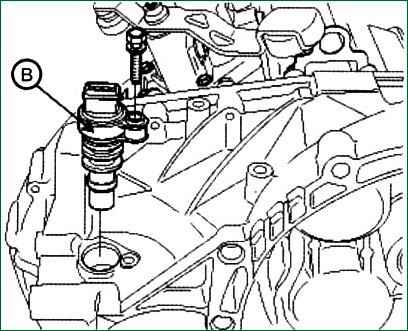
Install the vehicle speed sensor (B). Tightening torque 7.8-9.8 Nm
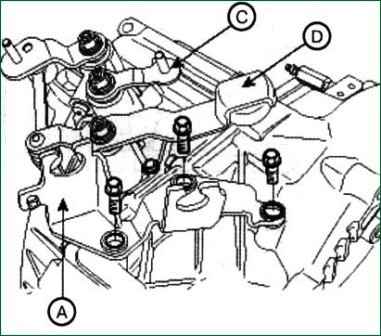
Install the shift cable bracket assembly (A). Tightening torque 14.7-19.6 Nm.


