Checking the fluid level
Check the power steering fluid level. If necessary, bring the fluid level to normal
Power steering fluid ATF M III or equivalent (e.g. Dexron®II).
Checking for fluid leakage
Start the engine and let it idle.
Turn the steering wheel left and right as far as it will go to increase the fluid pressure.
If you keep the steering wheel turned all the way for more than 5 seconds, the temperature of the working fluid will increase significantly, which will adversely affect the operation of the power steering pump.
Check for fluid leaks.
If a leak is found, replace the associated piping or hose.
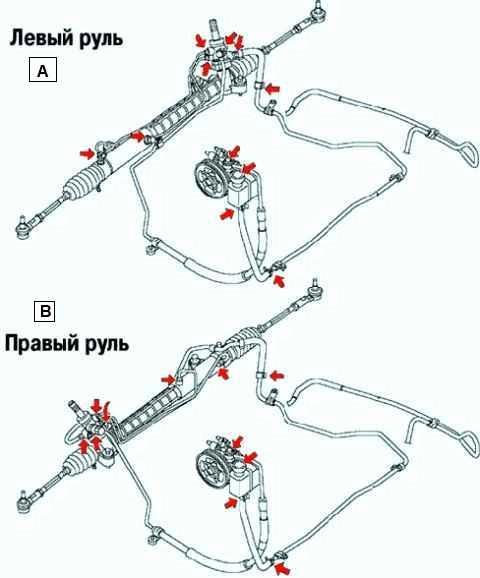
Possible fluid leaks are shown by arrows in Figure 1.
Checking the pressure of the working fluid in the hydraulic system
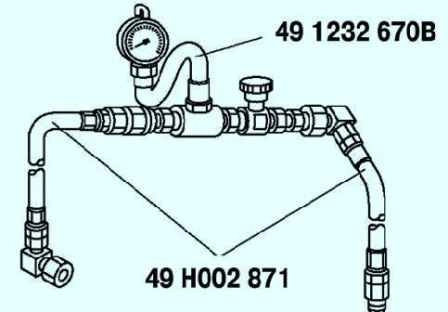
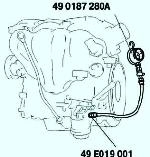
Assemble the special tools as shown in Figure 2.
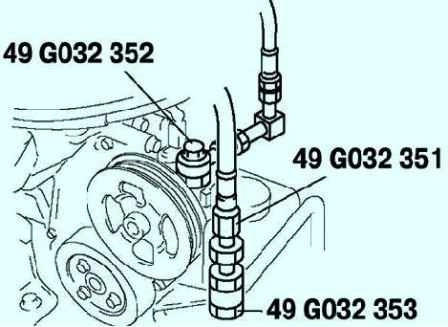
Disconnect the pressure pipe from the hydraulic booster pump and connect the special tools (fig. 3). Tightening torque: 29.4 - 44.1 Nm.
Purge air from the system. Fully open the valve.
Start the engine and turn the steering wheel all the way to the left and right to increase the fluid temperature to 50-60 °C.
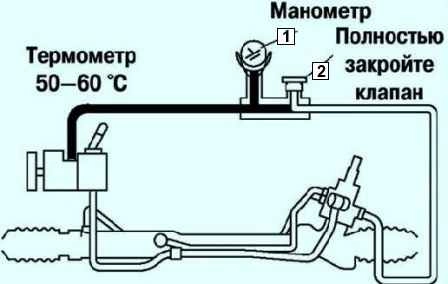
Close the valve completely. Increase the engine speed to 1000–1500 min–1 and measure the pressure generated by the pump (Fig. 4).
If the pressure is not correct, repair or replace the power steering pump parts.
Working fluid pressure: 10.80–11.29 MPa.
If the valve is left closed for more than 5 seconds, the temperature of the working fluid will increase significantly, which will adversely affect the operation of the power steering pump.
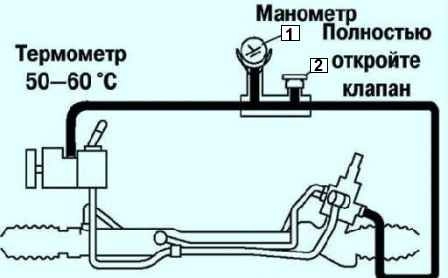
Fully open the pressure gauge valve and increase the engine speed to 1000–1500 min–1 (fig. 5)
Turn the steering wheel all the way to the left and right, then measure the fluid pressure in the steering gear housing.
If pressure is not correct, repair or replace steering gear parts. Working fluid pressure: 10.80–11.29 MPa.
Remove special attachments.
Install the pressure pipe and tighten it to the specified torque. Tightening torque: 29.4 - 44.1 Nm.
Purge air from the system.
Checking the free play of the steering wheel
Set the wheels to straight ahead and turn the steering wheel slightly to the left and right to check if the free play is correct.
If the steering wheel free play is not correct, the cause may be worn tie rod joints, wear or excessive clearance in the steering gear.
Repair if necessary. Steering wheel free play: 0–30 mm.
Checking the steering column
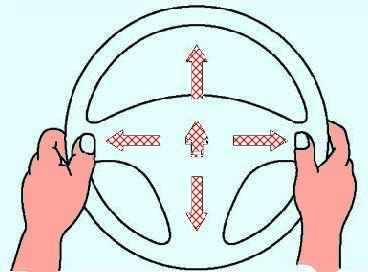
Moving the steering wheel as shown in Figure 6, check the wear of the steering column bearing, the free play in the steering shaft joint, the reliability of the fastening of the steering wheel and steering column.
Repair or replace parts as needed.
Checking the force on the steering wheel
Check the following: – tire size and tire pressure; - level fluid in the power steering reservoir; - tensioning the power steering pump drive belt.
Put the vehicle on a firm, level surface with the wheels in a straight-ahead position.
Remove the airbag module.
Be careful when removing the module.
Start the engine and warm up the power steering fluid to 50-60°C.
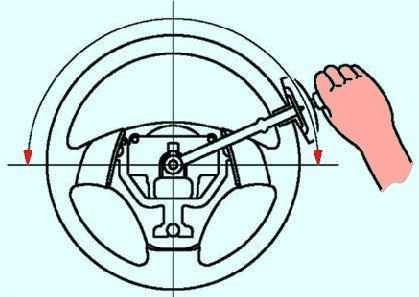
Measure the force on the steering wheel with a torque wrench (fig. 7).
If the force is not correct, check the following:
- – the presence of air in the power steering hydraulic system;
- - leaks through hoses and their connections;
- - operation of the power steering pump and steering gear.
Steering wheel force 7.8 Nm.
To check the steering force, compare it with the steering force of another car of the same model under the same conditions.
The force on the steering wheel depends on the following conditions:
- – pavement condition (dry or wet, asphalt or concrete);
- – tire condition (manufacturer, degree of wear, tire pressure).
Checking the steering rack
Check the rack for cracking, damage and tooth wear.
Replace the rail if necessary.
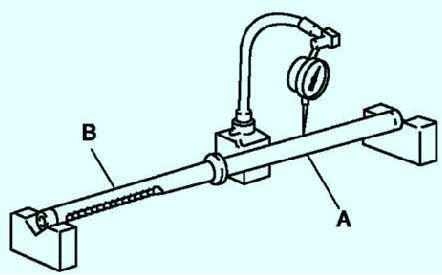
Measure the rack runout (Fig. 8).
Beating:
- - maximum near point A: 0.15 mm;
- - maximum near point B: 0.20 mm.
If the runout is not correct, replace the rail.
Checking the tie rod end
Check the tie rod end for cracks and damage to the protective boot. Replace it if necessary.
Check ball joint clearance.
Replace the tie rod end if necessary.
Rotate the hinge pin five times.
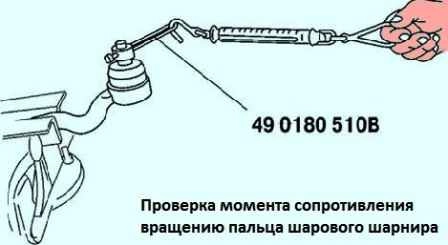
Measure the moment of resistance to rotation of the ball joint pin using a special tool and a dynamometer (Fig. 9).
Torque of resistance to rotation: 0.4 - 2.7 Nm. Dynamometer reading: 3.4–25.5 N.
If the measurement result is different from the specified, replace the tip
Tie Rod Test
Check the tie rod for deformation and damage.
Replace it if necessary. Check ball joint clearance.
Replace the tie rod if necessary.
Swing the tie rod five times.
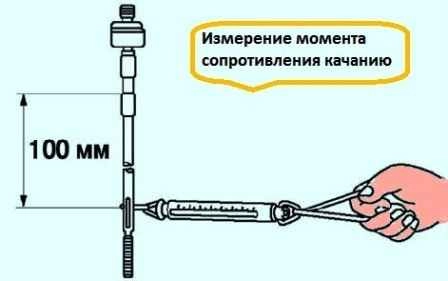
Measure the rolling moment using a dynamometer (fig. 10). Swing torque: 0.1 - 4.0 Nm. Dynamometer reading: 0.6–24.5 N.
If the measurement is different from the specified, replace the rod.


