We replace the receiver gasket in case of leakage, while the engine runs unevenly “troit”
We prepare the car for the task, remove the decorative engine cover and disconnect the negative battery terminal
Draining coolant from the engine cooling system
We remove the windshield wiper trapezoid, as described in the article - Toyota Camry windshield wiper and washer repair
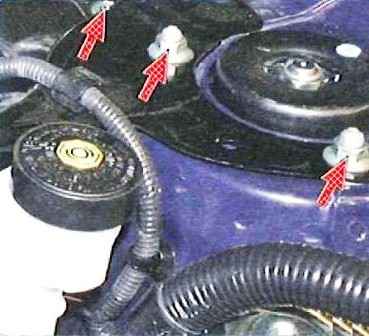
Remove the front panel of the air intake box by unscrewing the nuts and unscrewing the bolts of its fastening
Remove the air filter cover assembly with the air supply sleeve
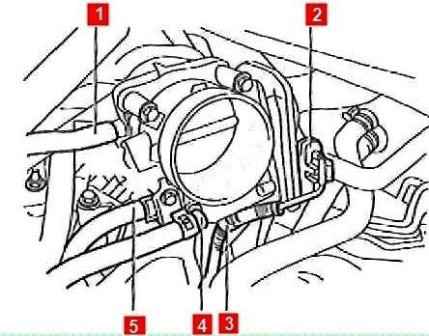
Disconnect hose 1 of the adsorber purge valve from the throttle body
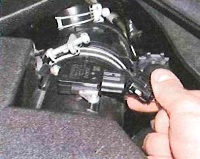
Squeezing the latches, disconnect block 2 of the wiring harness from the throttle assembly, then remove holder 3 of the harness from the throttle assembly and move the wiring harness to the side
We squeeze the bent ears of the clamp and move the clamp along the hose 4 of the engine cooling system, disconnect the hose from the throttle assembly. Also disconnect the hose 5
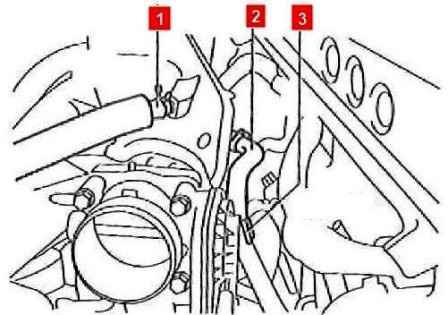
Squeeze the bent ears of the clamp and slide the clamp along the hose 1 of the crankcase ventilation system, disconnect the hose from the receiver
We also disconnect the vacuum hose 2 and remove it from the holder 3
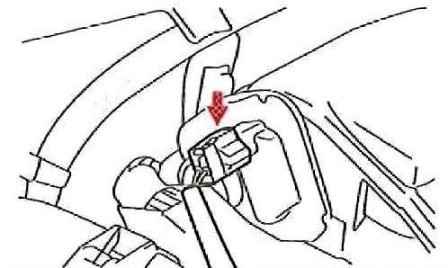
Squeezing the latch, disconnect the wire block from the intake manifold damper actuator
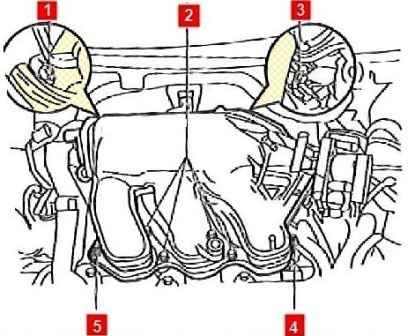
Unscrew four bolts 2, unscrew nuts 4 and 5 securing the receiver to the intake manifold
We unscrew the bolts 1 and 3 securing the receiver to the racks, after which we remove the receiver assembly with the throttle assembly and three gaskets installed under it
Installing the receiver with new gaskets
When installing, first tighten bolts 2 to 18 Nm, then nuts 4 and 5 to 16 Nm.
After that, tighten the bolts 1 and 3 securing the receiver to the racks with a torque of 21 Nm
Install all parts in reverse order
Oil pan seal replacement
Oil pan flange installed with sealant, no gasket of any kind.
Therefore, in case of oil leakage in the oil sump and sump connector, tightening the sump mounting bolts will not lead to the desired result
Remove the engine mudguard by placing the car on a lift or inspection ditch
Drain the oil from the engine lubrication system
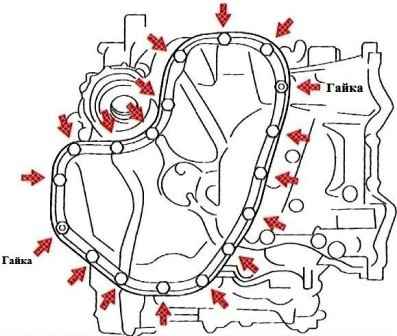
We unscrew sixteen bolts and unscrew the two nuts securing the sump to the oil sump, and then remove the sump
We clean the mating surfaces of the sump and oil sump from the old sealant
We apply a special sealant (Three Bond 1207B or its equivalent) to the mating surface of the oil pan with a roller with a diameter of 3-4 mm, while the sealant application line should pass from the inside of the mounting holes
No later than three minutes after applying the sealant, install the pan on the oil sump, tighten the bolts and fastening nuts to a torque of 10 Nm
Fill engine oil
Fill and start the engine no earlier than two hours after installing the oil pan. This time is necessary for polymerization sealant.


