Removing the camshafts of the 2AZ-FE engine
We replace camshafts in the following cases:
- the pressure in the engine lubrication system has dropped
The cause of this malfunction is increased wear of the camshaft journals in the cylinder head
When the beds and their covers are worn out, we replace the block head as an assembly, since the beds are made directly in the cylinder head housing;
- valve knock at normal clearances in the valve drive mechanism. Caused by increased wear of the camshaft lobes
Preparing the car for the task
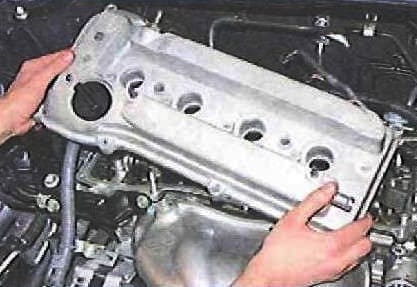
Remove the cylinder head cover as described in the article "How to replace the cover and cylinder head gasket 2AZ-FE Toyota Camry"
Remove the hydraulic phase change valve
Setting the first cylinder piston to the TDC position of the compression stroke "How to set the TDC of the first cylinder of the 2AZ-FE engine"
Remove the timing chain tensioner
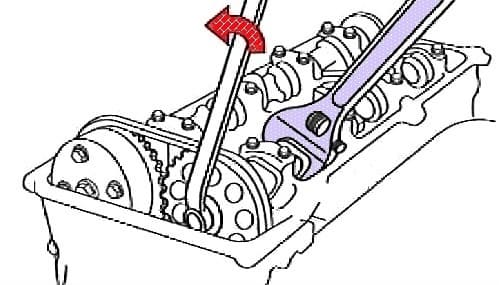
Loosen the sprocket mounting bolt while holding the exhaust camshaft
We unscrew the bolts securing the exhaust camshaft covers, and remove the covers
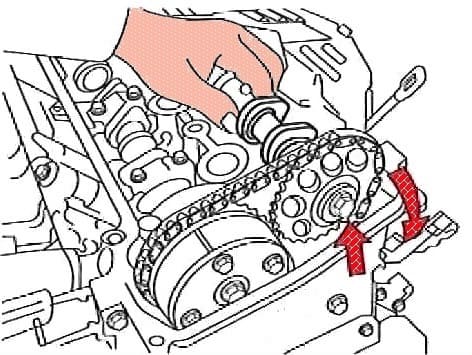
Holding the exhaust camshaft, unscrew the sprocket mounting bolt and remove the sprocket
Remove the intake camshaft
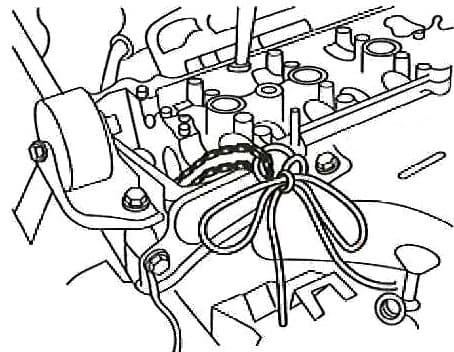
We fix the camshaft drive chain, for example, by tying it with a wire to the stud of the collector
We clamp the camshaft in a vise
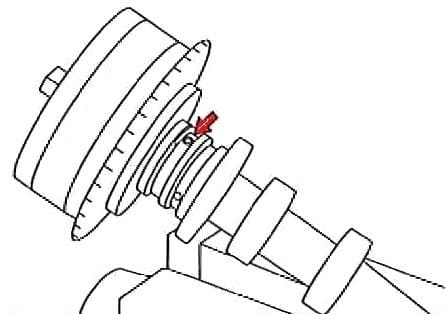
We cover all lubrication holes with electrical tape, except for the hole on the side of the coupling of the phase change system, as shown in the figure
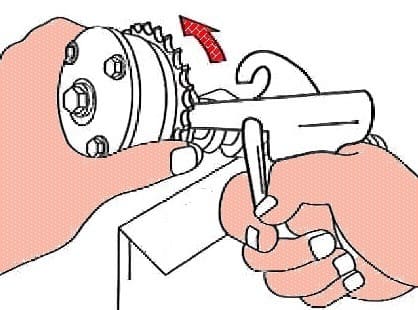
Create a pressure of 100 kPa (1.0 kgf/cm2) in the oil passage, and then turn the phase change clutch by hand in the forward (counterclockwise) direction, as shown in the figure
Depending on the air pressure, the clutch of the phase change system can be rotated in the direction of advance without the application of manual force
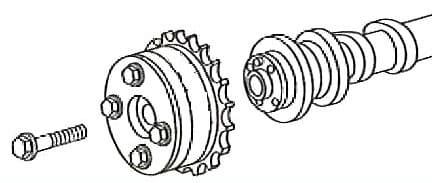
Unscrew the bolt securing the phase regulator clutch to the camshaft and remove the clutch
Install the camshafts in the reverse order, taking into account the following:
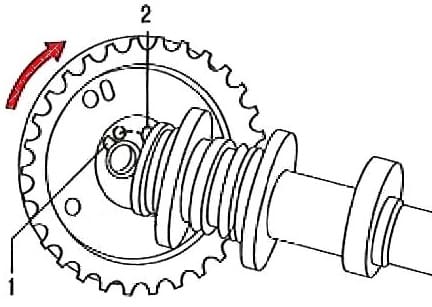
- install the camshaft clutch so that the pin on the shaft enters the gear hole, and tighten the clutch mounting bolt;
Check the rotation of the clutch in the direction of delay (to the right) and fixation in the position of maximum delay
- - before installing the camshafts, lubricate the shaft journals with a thin layer of engine oil;
- - install camshaft covers
Camshaft bearing caps are processed together with the beds in the cylinder head, so they cannot be depersonalized.
The covers are labeled with their belonging to each camshaft ("E" and "I"), and, in addition, bearing serial numbers are stamped on them.
The numbers made in the casting are technological for the process of casting the lid and do not serve as a guideline for the installation of lids
Install the camshaft covers in strict accordance with the markings on them.
Install parts in reverse order


