Replacing the carburetor K-151, K-151D
Remove the air filter.
Unscrew the screw 6 fastening the rod 2 to the choke lever, unscrew the screw 1 fastening the rod to the bracket and disconnect the rod from the carburetor
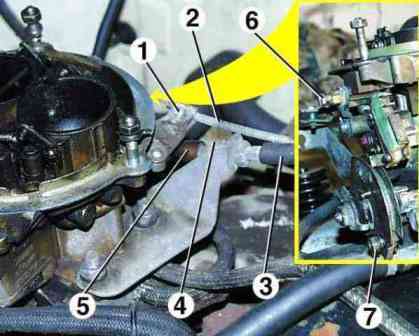
Unscrew the nut 7 fastening the accelerator cable to the throttle actuator sector, move the oil seal 5, unscrew the nut 4 and remove the rod 3 from the bracket and the throttle actuator sector.
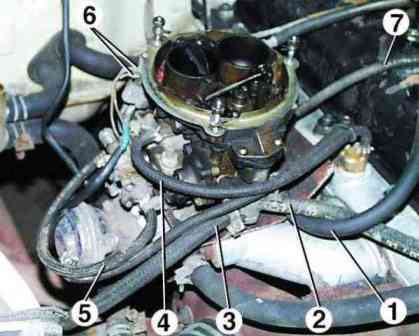
After loosening the clamps, remove the fuel supply hoses 2 and drain 3 from the carburetor fittings, the hose 1 of the crankcase ventilation system, the vacuum hose for controlling the forced idle economizer (EPKhH) from the back of the carburetor and the hose 5 to the solenoid valve of the EPHKh system, to the vacuum - to the ignition distributor corrector 7 and to the exhaust gas recirculation thermal switch 4.
Disconnect wires 6 from the EPHX system microswitch.
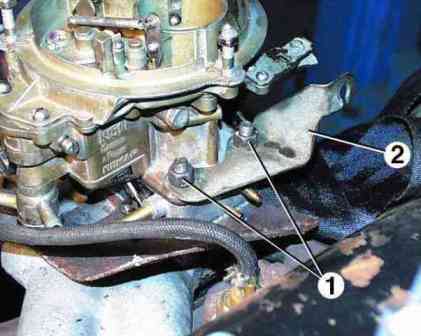
Unscrew the four nuts 1 securing the carburetor to the intake pipe, remove the cable holder 2 and dismantle the carburetor
Build and install
The assembly of the carburetor assemblies and the carburetor itself as a whole, as well as its installation on the engine, is carried out in the reverse order of disassembly, taking into account the following:
It is necessary to check the mating surfaces of the throttle body for nicks and cracks.
Check the ease of turning the shutters in the housing and the clarity of their return to their original position after removing the force.
Check the mating surfaces of the carburetor body for nicks and warping in the area of the holes for the mounting screws.
All cardboard, paronite and rubber gaskets must be replaced with new ones.
The screws connecting the carburetor body parts should be tightened tightly, but without excessive force, which could lead to deformation of parts made of soft alloys.
The nuts securing the carburetor to the engine intake pipe should be tightened without excessive force and only on a cold engine.
After assembly and installation, the carburetor must be adjusted.


