")
")
")
")
")
")
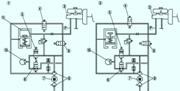
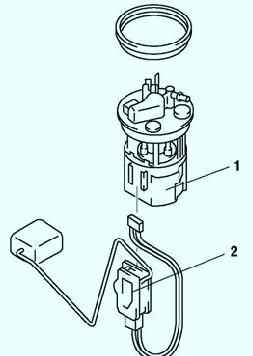
Due to the fact that the vehicle uses a system without fuel return to the tank, the fuel pump unit, with the exception of the fuel gauge sensor, is integrated
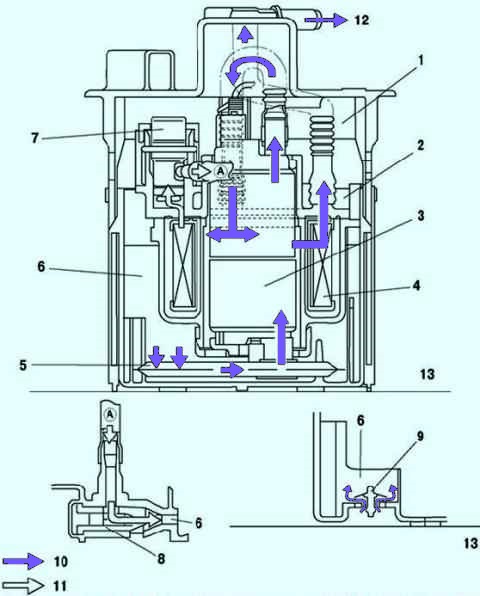
To prevent the reduction of engine power due to insufficient fuel supply, for example, when the vehicle is turning, the fuel pump has been designed so that the fuel supply is constant.
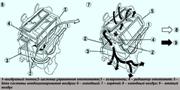
The fuel remaining in the fuel pump reservoir is supplied from two sources: a check valve and an ejector (Fig. 1, 2).
Removing and installing the fuel pump module
If the engine power drops, there is increased noise, or howls are heard periodically during the operation of the fuel pump, then most likely the fuel pump is out of order.
Pre-check the pressure in the fuel supply system.

Withdrawal
Disconnect the negative cable from the battery.
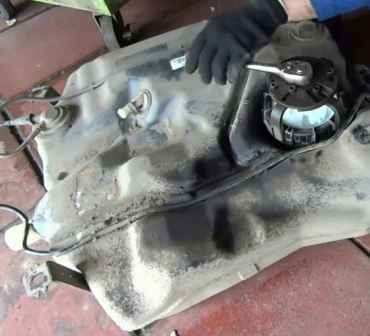
Remove the fuel tank.
Removing the fuel tank to replace the fuel pump is necessary because the car does not have a hatch in the base of the body above the fuel module, so access to it is impossible when the tank is installed on the car.
Remove the quick connector.
The cap of the fuel pump may be damaged if the special tool is not installed tightly on the cap.
Fix the special tool securely so that there is no gap between the tabs of the special tool and the side of the cover.
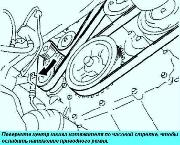
Remove the fuel pump cover using the special tool (fig. 4).

If there is no special tool, you can use a wooden drift made of dense wood and a hammer.
Remove the fuel pump assembly.
Installation
If there is gasoline on the gasket, the fuel pump assembly will rotate and cannot be secured in the indicated position.
Thoroughly wipe off any gasoline from the gasket.
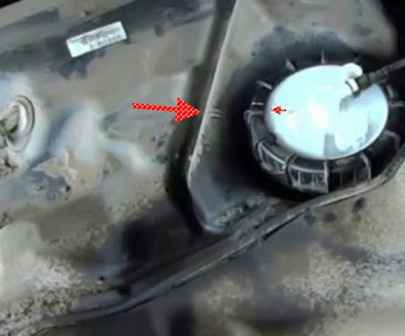
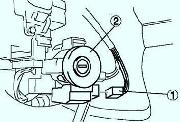
Align the alignment marks on the fuel pump and fuel tank as shown in Figure 5.
Install the special tool.
Using the special tool, tighten the fuel pump cap to the specified tightening torque without shifting the alignment marks.
If the specified tightening torque cannot be achieved, replace the fuel pump cap and gasket.
If the specified tightening torque cannot be obtained after replacing the fuel pump cap and gasket, replace the fuel tank. Fuel pump cover tightening torque: 80–90 Nm.
Checking for fuel leakage after installing the pump module
Before installing the fuel tank, check for fuel leakage when pressurizing the fuel tank to +5.9 kPa. Install the fuel tank.
Pull the vehicle into motion and brake hard at low speed five to six times.
Stop the vehicle and check for signs of fuel leakage around the fuel pump unit on the outside of the vehicle.