")
")
")
")
")
")
Checking the variable valve timing actuator (L3) Mazda 3
The actuator for changing the valve timing is a precision assembly and cannot be disassembled.
Disconnect the negative battery cable
Remove the plug hole plate.
Remove the high voltage wire.
Remove the oil control valve connector.
Remove the ventilation hose.
Remove the cylinder head cover.
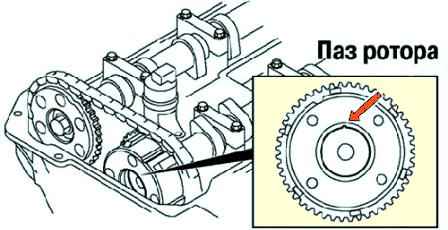
Make sure that the groove of the rotor and the bulge of the cover of the variable valve timing actuator are aligned (Fig. 1).
If the groove and bulge are not aligned, turn the crankshaft clockwise two turns.
Check the alignment of the groove and the bulge.
If the groove and bulge do not match again, replace the variable valve timing actuator.
If you hear the camshaft actuator rattling every time the cam passes the full valve open position as the crankshaft rotates, the actuator is loose.
Replace the actuator. Install the cylinder head cover.
Install the ventilation hose.
Connect the oil control valve connector.
Removing and installing the actuator for changing the valve timing
The camshaft sprocket of the variable valve timing actuator is integrated with the mechanism itself, therefore it is removed together with the assembly.
Remove the timing chain.
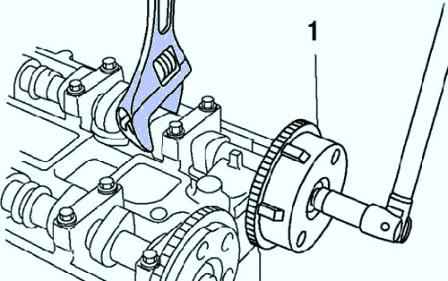
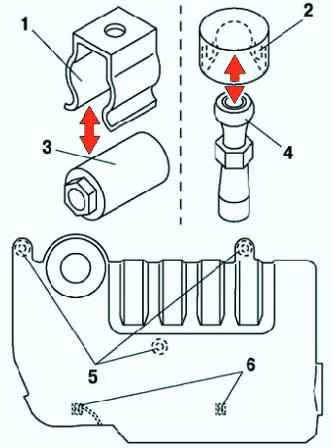
Install a wrench or similar tool in the hex portion of the camshaft to prevent rotation (fig. 3).
Remove the mechanism. To install, follow the same operations in reverse order of removal.
The tightening torque of the actuator bolts is 69–75 Nm.