We remove the timing chain when repairing the engine and when it wears out
To complete the task, you will need keys for 14, 17, 19, heads for 14, 17, 19, extension cord, wrench, screwdrivers
We prepare the car for the task and install it on a lift or a viewing ditch
- Disconnecting the negative battery terminal
- Remove the engine cover, as indicated in previous articles
- Remove the right front wheel
- Remove the front right wheel liner
- Remove the engine mudguard
- Drain engine oil from crankcase
- Remove the exhaust pipe of the exhaust system
- Remove the right support of the power unit
- Remove the thrust of the longitudinal movement of the power unit
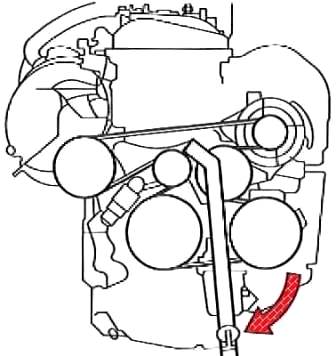
Turn the tensioner lever clockwise and remove the belt from the crankshaft pulleys and auxiliary pulleys
You can use a socket wrench 19
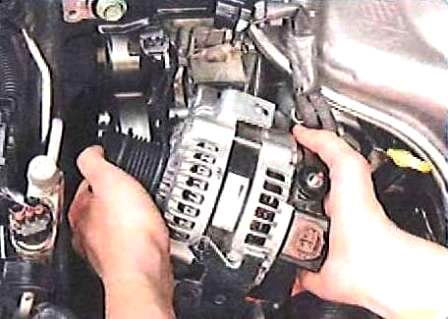
Remove the generator
Remove the water pump
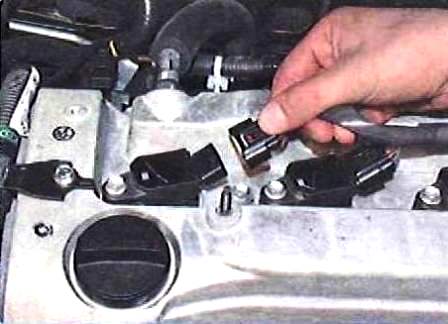
Press the latch and disconnect the wire block from the coil of the first cylinder
We also disconnect the wire blocks from the rest of the coils
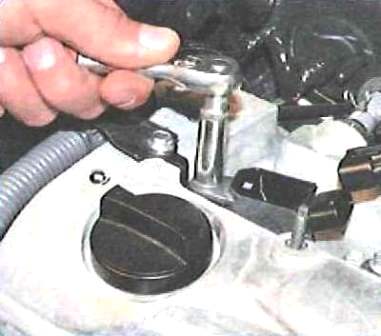
We unscrew the bolts securing the ignition coils to the cylinder head cover
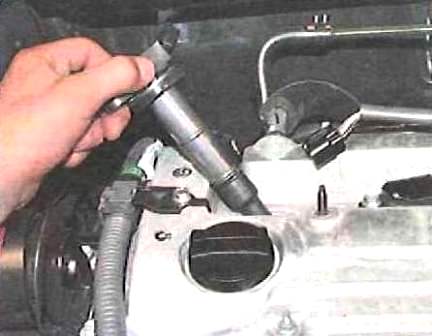
Remove coils
Disconnect the crankcase ventilation system hoses from the pipes of the cylinder head cover
Remove the cylinder head cover
Set the piston of the first cylinder to the TDC position, as described in the article "How to set the TDC of the first cylinder of the 2AZ-FE engine"
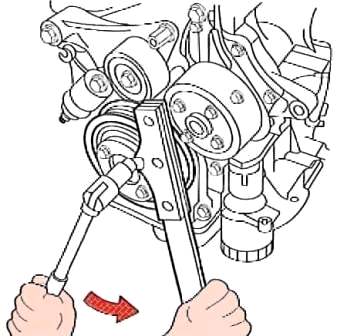
Unscrew the crankshaft position sensor mounting bolt and remove the sensor
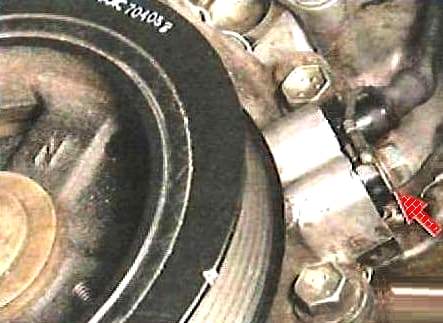
We unscrew the bolts of the oil sump and remove it
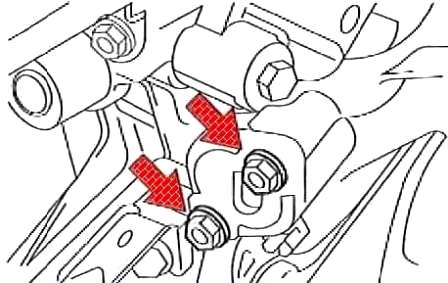
We unscrew the two nuts securing the timing chain tensioner and remove it
Remove the gasket from the tensioner mounting studs
Install the engine removal tool and lift the engine
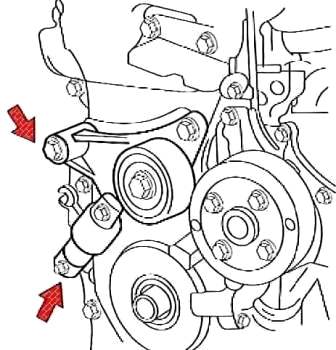
We unscrew the bolt and nut of the accessory drive belt tensioner and remove the tensioner

We unscrew the two bolts securing the holders of the hydraulic fluid return pipeline to the front suspension subframe
Let's move the pipeline to the side
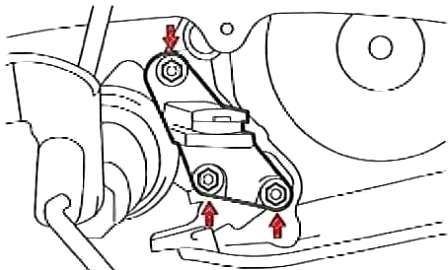
We unscrew the three bolts securing the bracket of the right suspension support of the power unit and remove the bracket
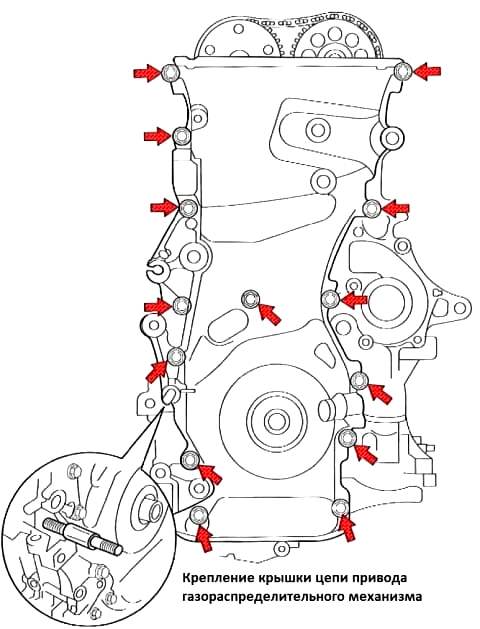
We unscrew the stud for fastening the auxiliary drive belt tensioner from the cylinder block
We unscrew the twelve bolts and two nuts securing the cover to the cylinder block and remove the cover
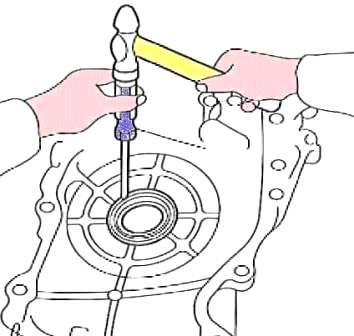
When removing the timing chain cover, replace the crankshaft oil seal, regardless of its condition
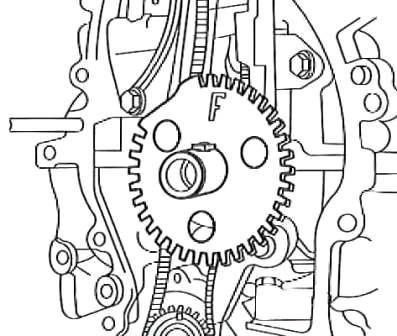
Remove the gear disk of the crankshaft position sensor from the crankshaft pulley
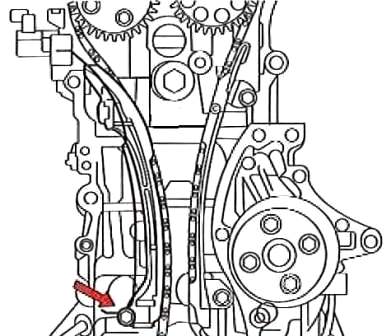
We unscrew the bolt and remove the timing chain tensioner shoe
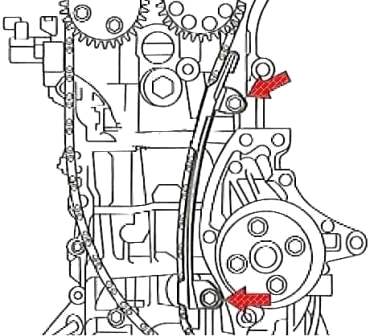
We unscrew the two bolts and remove the timing chain damper
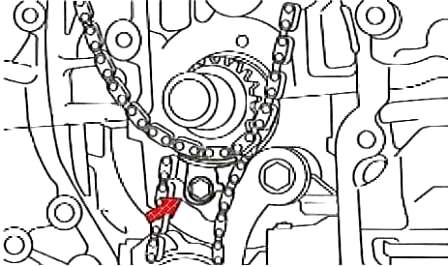
Unscrew the bolt and remove the timing chain guide bracket and remove the chain
After removing the timing chain, do not rotate the crankshaft, as the pistons can damage the valves
Install the timing chain in reverse order, taking into account the following:
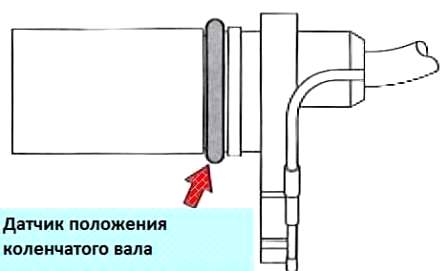
- before installing the crankshaft position sensor, lubricate the O-ring with engine oil;
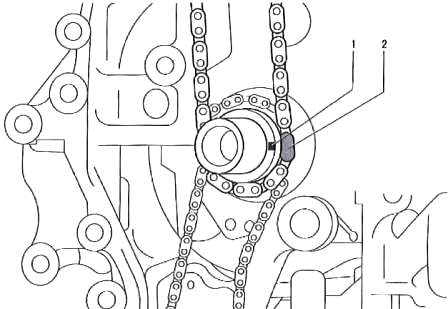
- we put the chain on the timing chain drive sprocket, aligning the marked link 2 (figure) with the alignment mark on the crankshaft 1;
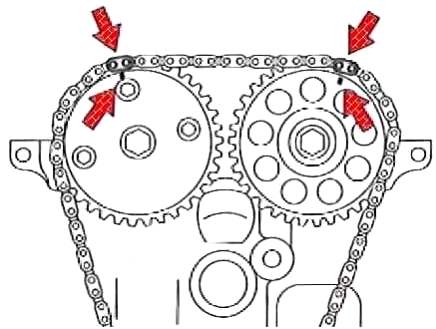
- we put the chain on the camshaft sprockets, aligning the marked links with the marks on the sprockets;
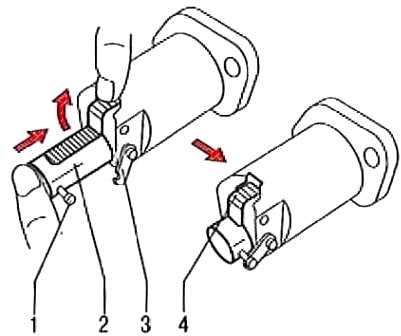
- before installing the hydraulic chain tensioner, raise the tensioner ratchet 4 (fig)
And then we push plunger 2 all the way and hook 3 onto pin 1 so that the plunger is in the position shown in the picture
Install a new gasket and install the hydraulic chain tensioner
Turn the crankshaft counterclockwise and disconnect the plunger pin from the hook;
Turn the crankshaft clockwise and check the movement of the plunger relative to the chain tensioner housing
- before installing the oil sump, remove the remnants of the old sealant from the mating surfaces of the cylinder block and sump
Turn the crankshaft two turns clockwise and check that the alignment marks of the crankshaft and camshafts match.
If the marks do not match, repeat the chain installation.


