These vehicles are equipped with:
- - a system for automatically adjusting each headlight depending on changes in body height, acceleration, braking and vehicle speed;
- - headlight washer.
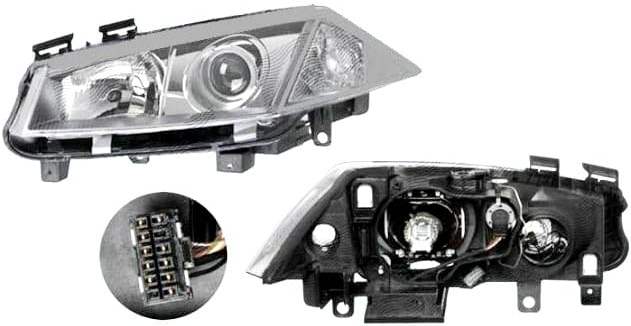
Do not turn on the lamp when it is not inserted into the headlight (this is dangerous for the eyes).
Xenon lamps light up at 20,000 V and operate at 85 V AC.
Before removing the ECU "assembly" and the high voltage unit, wait until they cool down.
Disconnect the battery before doing any work.
The angle of inclination of the light beams in the vertical plane is adjusted depending on the speed of the vehicle.
At speeds above 30 km/h, the range of illumination increases.
There is no filament in xenon lamps.
Light radiation in such lamps is generated by two electrodes enclosed in a quartz bulb containing compressed gas (xenon) and mercury vapor.
Each headlight is equipped with an ECU built into the high voltage unit.
This system is checked using diagnostic tools.
Computer assembly - high voltage unit" and xenon lamps can be replaced separately from the headlights.
The actuator (stepper motor) cannot be removed from the headlight.
If the actuator fails, the headlight must be replaced.
Removal and installation of headlights with xenon lamps is carried out in the same way as headlights with halogen lamps.
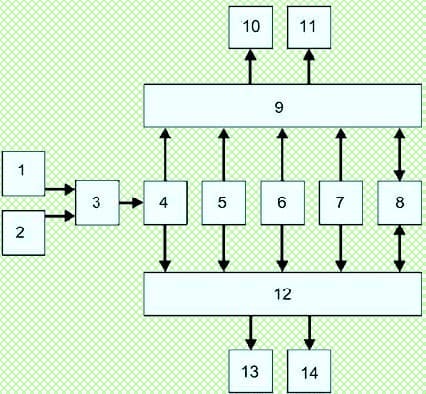
Block diagram of the lighting system with xenon lamps: 1 - rain and light sensor; 2 - switch for outdoor lighting, direction indicators and fog light; 3 - CECBS; 4 - information about the inclusion of the low - high beam headlights (from the protection and switching unit); 5 - information about the speed of the vehicle (from the ABS computer); 6 - height of the front part of the body (front sensor); 7 - height of the rear part of the body (rear sensor): 8 - diagnostic line K; 9 - node "ECU - high voltage unit" (left headlight); 10 - lamp; 11 - the actuator of the corrector of the left headlight; 12 - node "ECU - high voltage unit" (right headlight); 13 - the actuator of the right headlight corrector; 14 - lamp
Replacing xenon headlight bulbs
Withdrawal
Disconnect the wires from the battery terminals, starting with the negative terminal.
The headlight must be removed to replace the xenon bulb.
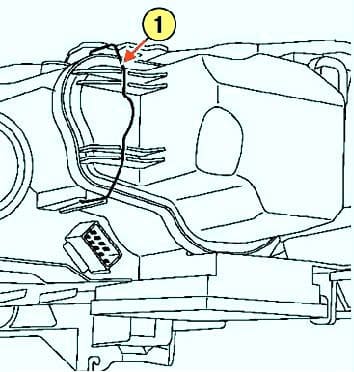
To do this, press the latch and cover (fig. 3).
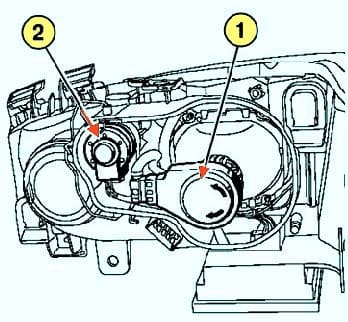
Remove the high voltage block by turning it 1/8 turn counterclockwise (fig. 4).
Remove the lamp retainer.
The corrector actuator (stepping motor) is not removable.
If the actuator fails, the headlight must be replaced.
Installation
Hold the lamp base.
Do not touch the lamp with your fingers, and if this happens, wipe the lamp with a soft, lint-free cloth dampened with alcohol.
Install the bulb (the protrusion should be against the headlight groove) (fig. 4).
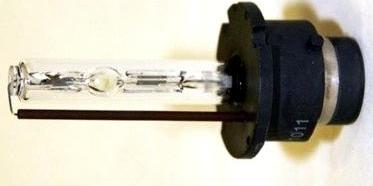
Install:
- – lamp retainer;
- – high voltage block;
- - a block of power wires.
Use only certified D2S lamps.
Install the headlight.
Adjust the headlights.
Removing and installing xenon headlight control unit
Withdrawal
Disconnect the battery.
Remove the headlight.
In order not to scratch the headlight, place it on a clean cloth b.
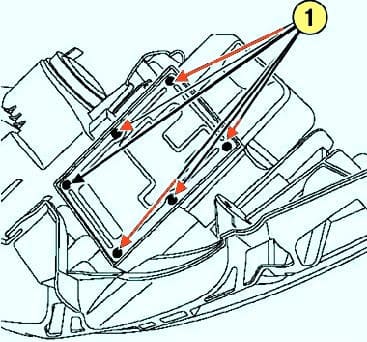
Remove the screws securing the "ECU - high voltage unit" assembly (Fig. 6).
Disconnect the connectors.
Installation
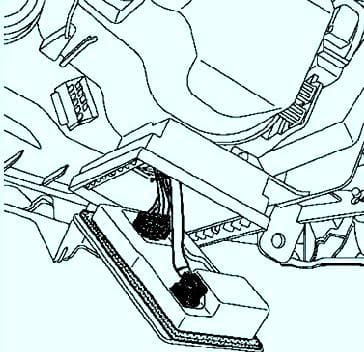
Connect the connectors (fig. 7).
Right and left headlight high voltage wiring harnesses are different (left headlight connector is brown, right headlight connector is blue).
Be sure to replace the gasket when replacing the ECU.
Tighten the screws securing the "ECU - high voltage unit" assembly to the required torque of 12 Nm.
Install the headlight.
Connect the battery. Be sure to replace the ECU together with the gasket.
Perform ECU calibration.
Adjust the headlights.


