If you need to repair the cylinder head of the engine installed on the car, remove it
In most cases, repair of the cylinder head consists of lapping or replacing valves, replacing valve guides, replacing or grinding valve seats.
In case of such malfunctions as a violation of the tightness of the channels of the jacket of the cooling system and warping of the mating surface to the cylinder block, the block head is replaced.
You will need: wrenches "for 13", "for 17", "for 21", a spark plug wrench, a screwdriver, round-nose pliers (tweezers), a device for compressing valve springs
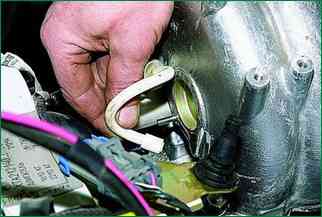
Disconnect the fuel pressure regulator hose from the nozzle on the receiver.
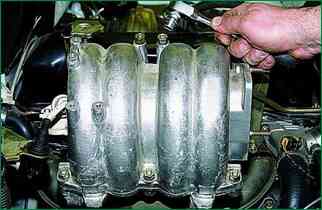
Remove the nuts securing the receiver to the intake pipe
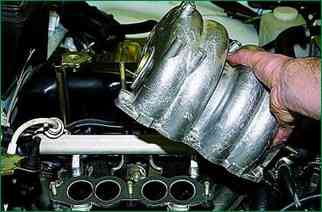
Remove the receiver and the gasket installed under it
If there is a valve spring compression tool that differs in design from the one shown (for example, a screw screwed into the hole in the head of the block for the hydraulic support), it may not be necessary to remove the receiver.
For convenience, you can remove the intake pipe and exhaust manifold, as well as the rest of the hinged units removed together with the head, if repair or replacement of these units is not required, with sufficient skill, you can repair the block head without removing them.
We turn the spark plugs out of the cylinder head with a candle wrench.
Remove the cylinder head cover (look - "How to replace the Niva Chevrolet cylinder head cover gasket").
Turn the crankshaft until the mark on its pulley matches the mark on the camshaft drive cover.
Remove the camshaft housing and valve levers (look - "How to replace the Niva Chevrolet camshaft").
In this position of the crankshaft (the pistons of the 1st and 4th cylinders are at TDC), we change the valve stem seals of the 1st and 4th cylinders.
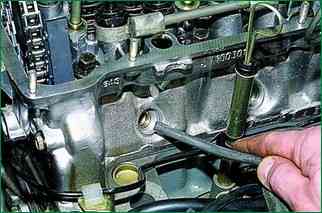
Through the candle hole, we insert a soft metal bar with a diameter of about 8 mm between the piston bottom and the valve plate (on which we change the cap).
Installing the valve cracker.
We rest the thrust pad of the dryer against the valve plate, and we wind the hook lever by the nut screwed onto the stud for fastening the camshaft bearing housing.
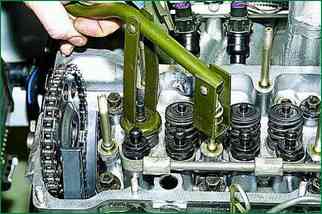
Compress the valve springs with a cracker and remove the crackers with tongs (or tweezers).
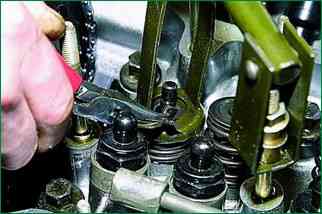
Weaken the springs.
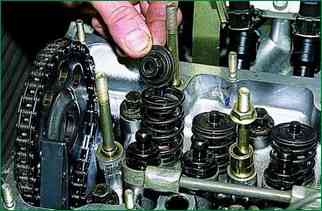
Remove the valve plate
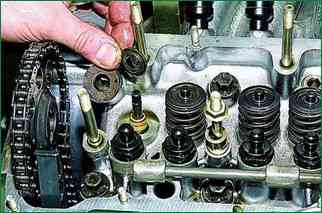
Remove the outer and inner springs, as well as the upper and lower spring support washers
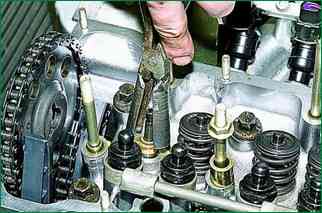
Using pliers, remove the valve stem seal from the valve guide.
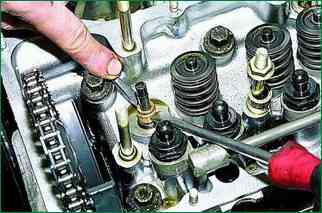
If there are no pliers, we pry off the oil cap with two screwdrivers and remove it.
Carry out the operation carefully so as not to damage the fragile guide bush.
Having lubricated the working edge of the new oil cap with engine oil, carefully put it on the valve stem.
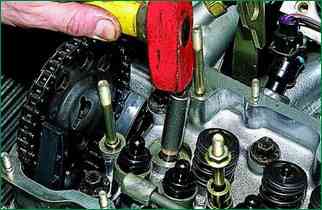
Through a high “12” head or a mandrel, we press the cap onto the valve guide sleeve
We assemble the valve mechanism in reverse order.
Remove the rod from the candle hole.
After replacing the valve stem seals of the 1st and 4th cylinders, turn the crankshaft 180 ° (supporting the camshaft drive chain so as not to pinch it) and change the valve caps of the 2nd and 3rd cylinders.
We assemble the gas distribution mechanism in the reverse order.
PS.
Of course, it is not completely possible to say that the cylinder head has been repaired, because all parts of the cylinder head have not been inspected and repaired.
But with good compression and proper operation, this may well be enough until the engine is overhauled.


