We install the car on a lift or on a viewing ditch.
Disconnect the negative battery terminal.
Removing the front bumper
To remove the front bumper, you need to remove the mudguard for this:
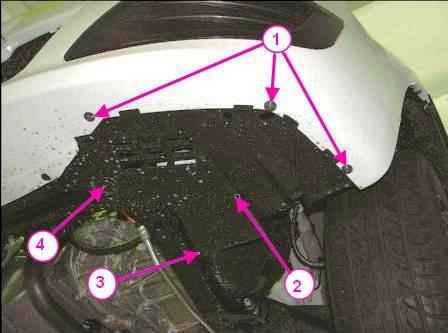
Use a slotted screwdriver to remove the piston 3 fastening the shield to the fender liner, Figure 1.
We remove the piston 4 fastening the shield to the subframe.
Use the TorxT20 head to unscrew three self-tapping screws 1 of the lower bumper mount.
Remove the lower mudguard 2.

Using the TorxT20 head, we unscrew the self-tapping screws 1 (Figure 2) of the bumper side mount on the right and left sides of the car.
We set aside the protective wheel arch cover and use the TorxT30 head to unscrew bolts 2 of the bumper side mount on the right and left sides of the car
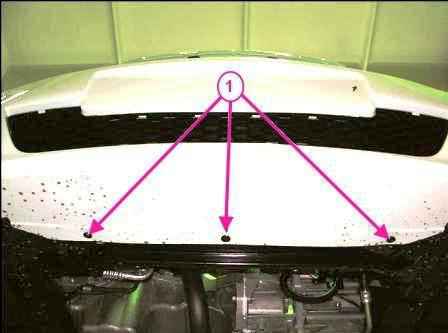
Use the TorxT30 head to unscrew the bolts 1 (Fig. 3) of the lower mounting of the bumper to the subframe
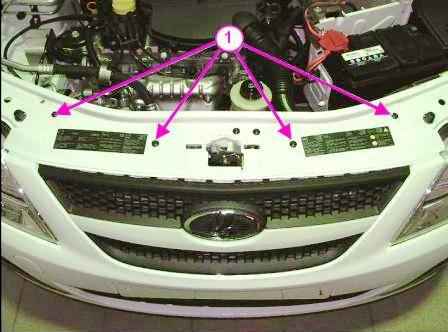
Using the TorxT30 head, unscrew the screws 1 securing the bumper to the upper cross member of the radiator frame
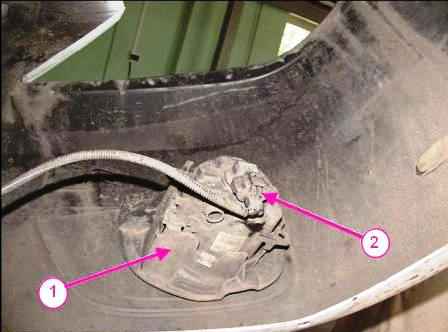
If fog lights are installed and need to be removed then:
Disconnect the front bumper wiring harness block from the wiring harness block (Fig. 5) of the instrument panel.
Remove the fog lights.
Remove the front bumper
Install the front bumper in reverse order.
Removing the rear bumper
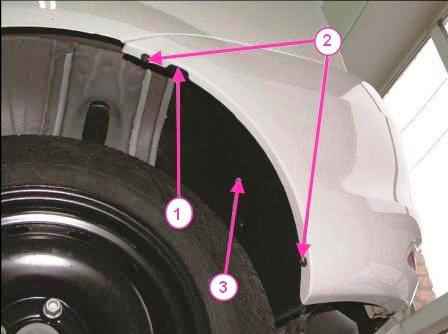
We carry out preparatory operations, disconnect the negative battery terminal.
Using a TorxT20 screwdriver, we unscrew two self-tapping screws 2 each securing the casing to the bumper on the right and left sides of the car.
We set aside the protective wheel arch cover and unscrew the bolts 1 of the bumper side mounting on the right and left sides of the car.
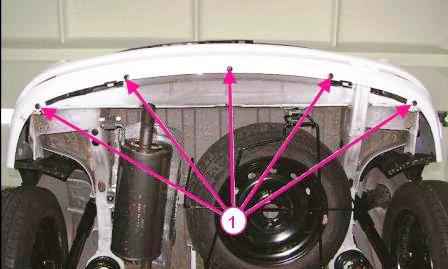
Use the TorxT30 head to unscrew five screws 1 of the lower bumper mount
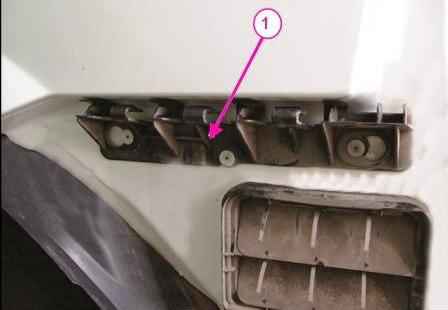
We disengage the bumper sidewalls with side brackets 1 (Fig. 8).
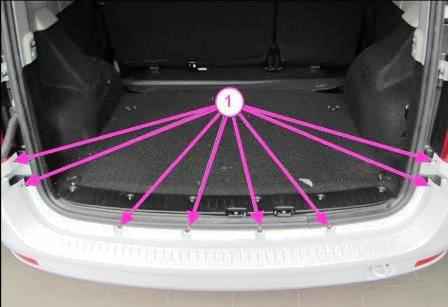
Use the TorxT30 head to unscrew the eight bolts 1 (Fig. 9) securing the bumper.
Remove the rear bumper
We install in the reverse order.


