Remove
Disconnect the wires from the battery terminals, starting with the negative terminal
Remove the intake manifold
Beware of gasoline emissions when disconnecting the fuel supply line from the fuel rail.

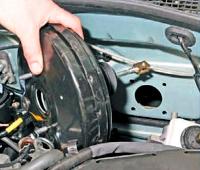
Remove the two nuts securing the rail guard (fig. 1).
Open the wiring harness.
Detach:
- – fitting of the fuel supply line;
- - pads of wires from injectors;

- pads of wires from the knock sensor (Fig. 2).
Remove the rail mounting bolts.
Carefully pull the fuel rail towards you and remove it.

Unscrew the wiring harness nut and remove the dipstick guide tube (fig. 3).

Remove the bolts securing the lining of the injector bodies (Fig. 4).
Installation
The lining of the injector housings must be replaced.
Install all mounting bolts.
Attach:
- - lining the injector housings to the top cover of the timing drive and tighten the bolt "A" by hand;
- - lining the injector bodies to the support of the engine pendulum suspension, tightening the bolt "B" by hand.

Push the lining of the injector bodies into the gaskets from the cylinder head cover (fig. 5).
Tighten in the order shown in Figure 5 to the correct torque:
- - fastening bolts 11 and 12 of the lining of the injector bodies (25 Nm);
- - fastening bolts 13 and 20 of the lining of the injector bodies (21 Nm).
Torque tighten:
- - bolt for fastening the upper timing cover (44 Nm);
- - pendulum support mounting bolt (44 Nm).
Install the intake manifold.
Installation is performed in the reverse order of removal.
Connect the wires to the battery terminals, starting with the positive terminal.
")
")
")
")
")
")