Removing and installing engine oil pan (K4J, K4M engines) Renault Megane 2
Put the car on a two-post lift.
Disconnect the battery.
Remove the engine undertray. For this:

We unscrew the five bolts of the engine crankcase protection

We lower the back of the protection, and take it back

Remove crankcase protection

We bite the antennae of disposable clamps and remove the mudguard
Drain the engine oil
Remove:
- - top engine covers;
- - oil dipstick;
- - front wheels;
- - fenders.

Remove the side reinforcements of the subframe (Fig. 5).
Attach the engine cooling radiator with a tether strap to the top cross member.
Remove the nuts and bolts of the subframe.

Remove the subframe (fig. 6).

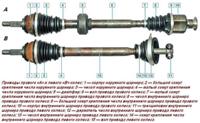
Remove the right front wheel drive

We unscrew the two bottom bolts of the pallet

Unscrew the four bolts securing the pan to the clutch housing

We unscrew the four bolts securing the pallet to the front cover of the crankshaft

Remove the left mounting bolt

We unscrew the seven bolts of the rear mount of the pallet

We unscrew the seven bolts of the front fastening of the pallet

Pry off with a screwdriver and remove the oil pan

Remove the gasket from the crankcase grooves.
Clean and degrease the crankcase grooves.
Laying a new gasket

We clean the corners of the junctions of the oil pan with the cylinder block from the sealant residues

Clean the joints of the front crankshaft cover.
Clean the mating surfaces with DECAPJOINT to dissolve any adhering gasket residue.

We apply a special sealant to the corners of the junction of the pallet with the cylinder block in the front of the engine

We also apply sealant to the rear of the engine

We apply sealant to the joints of the front crankshaft cover with the cylinder block from the side of the oil pump at the front of the engine
Same back of the engine

If you apply too much sealant, then when you tighten the mounting bolts, its excess will be squeezed out.
The ingress of sealant into working fluids can damage some components and assemblies (engine, radiator, etc.).

Apply two drops of silicone sealant with a diameter of 7 mm to the mating of the front cover with the cylinder block (Fig. 4.) Install the oil separator on the cylinder block.

When installing the engine crankcase pan, make sure that the tongues of the oil separator fit into the grooves of the pan (Fig. 5)
The planes of the cylinder block and the sump on the flywheel side are aligned to prevent deformation of the clutch housing.
Install the engine oil pan with a new gasket.

Install the oil sump, screw in the twenty bolts of its fastening to the cylinder block, without completely tightening it.
Full tighten the four bolts securing the oil sump to the clutch housing, without completely tightening them.
Tighten the bolts securing the oil sump to the cylinder block in the order shown in the figure, first to a torque of 8 Nm, and then finally to a torque of 14 Nm.
Then tighten the four bolts securing the oil sump to the clutch housing to 27 Nm.
Install all removed parts and assemblies in the reverse order of removal.
Fill engine oil.
")
")
")
")
")
")