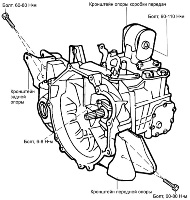
Basically, during the operation of the air conditioning compressor, the malfunction is the failure of the air conditioning clutch. The bearing 4 (Fig. 1) of the pulley begins to collapse
The bearing may be destroyed due to excessive tension of the drive belt, water ingress, slippage of the pressure disk 1 (Fig. 1)
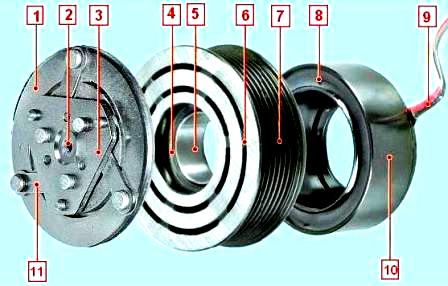
Compressor drive electromagnetic clutch: 1 - clutch pressure plate; 2 - slotted hole of the disc hub; 3 - clutch driven disk; 4 - bearing; 5 - inner race of the bearing; 6 - working surface of the pulley; 7 - pulley streams; 8 - electromagnet winding; 9 - electromagnet wiring harness; 10 - electromagnet housing; 11 - elastic steel leash
Due to the play of the bearing during rotation, the inner surface of the pulley begins to rub against the surface of the housing 10 of the electromagnet coil.
Under the action of friction, the parts heat up, and the insulation of the winding 8 (Fig. 1) of the coil begins to burn out, the turns of the coil of the electromagnet close and the electromagnet fails.
There are cases of complete jamming of the bearing and rotation of the inner race 5 of the bearing on the landing neck of the compressor cover.
When the compressor is running, you need to pay attention to extraneous noise during the operation of the air conditioning compressor.
If there is a suspicion, then you need to remove the drive belt from the pulley and turn the pulley by hand.
It should rotate without noise and without jamming. There should be no radial and axial play.
Removing and installing the air conditioning compressor
To work, you will need tools: an 18 wrench and a flat-blade screwdriver.
Preparing the car for work.
Remove the refrigerant from the air conditioning system (article - Features of recharging Renault Megan refrigerant 2).
Remove the fender liner of the right front wheel (article - Removing the fender liner of a Renault Megan car 2).
Remove the engine mudguard
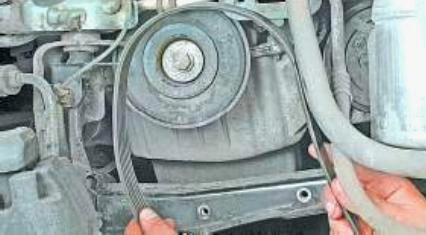
Remove the accessory drive belt (article - Replacing the belt auxiliary units Renault Megane 2)
Check the condition of the drive belt.
Replace the belt if the following defects are found:
- - wear of the serrated surface, cracks, undercuts, folds or peeling of rubber from the fabric;
- - recesses, cracks or bulges on the outer surface of the belt;
- - loosening or delamination on the end surfaces of the belt;
- - traces of oil on the surface of the belt due to leaks in the engine shaft seals.
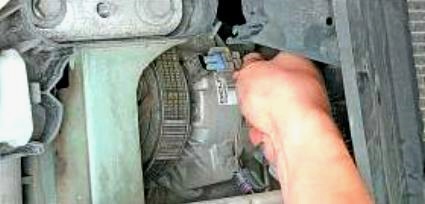
We press the latches and disconnect the block of wires from the block of the electromagnetic clutch for turning on the compressor.
We unscrew the bolts securing the flanges of the low and high pressure pipelines to the compressor.
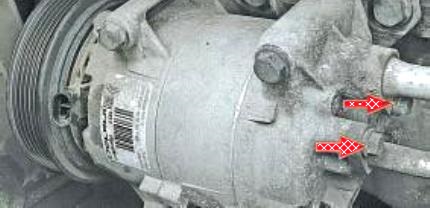
We remove the bolts from the holes and disconnect the pipelines from the compressor.
After disconnecting the pipelines, plug the openings of the compressor and pipelines.
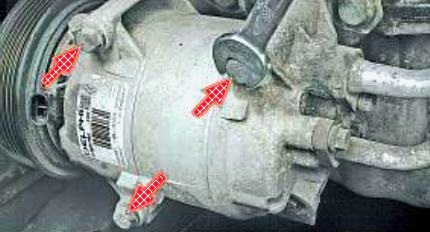
We unscrew the three bolts securing the compressor to the bracket on the cylinder block.
Remove the bolts from the holes and remove the compressor.
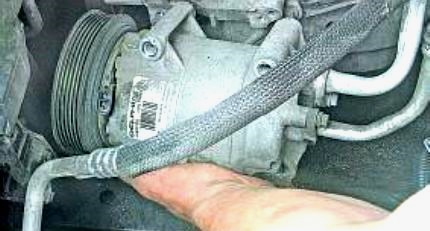
Install the compressor and all parts in reverse order
We remove the plugs of the compressor and pipeline openings just before the connection.
We lubricate the new sealing rings with oil for the air conditioning compressor.
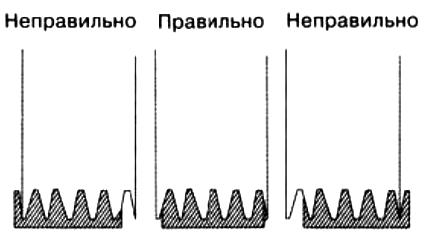
When installing the belt, you need to make sure that the wedge tracks match the grooves of the pulleys.
Filling the air conditioning system.
If a new compressor is installed, you need to know how much oil is filled in the compressor and the type of oil.
Compressor pulley bearing replacement
The compressor pulley bearing is double-row, during operation it is not lubricated and not adjustable
To replace the bearing, you will need tools: a flat-blade screwdriver, an 18 wrench, pullers to remove the compressor pulley.
Removing the refrigerant (article - Features of recharging Renault Megan 2 refrigerant)
Remove the air conditioning compressor
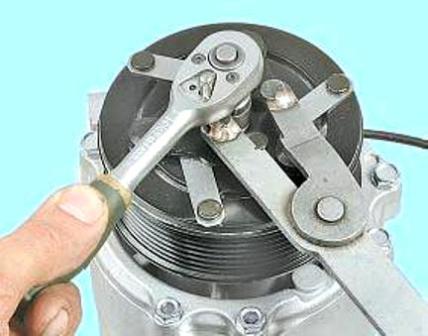
Unscrew the pressure plate mounting bolt, keeping the shaft from turning
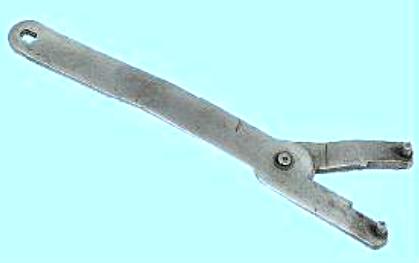
We use a special key to hold the rotor shaft
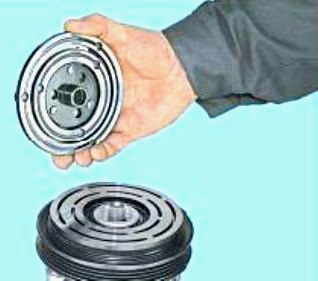
Remove the pressure plate from the compressor shaft
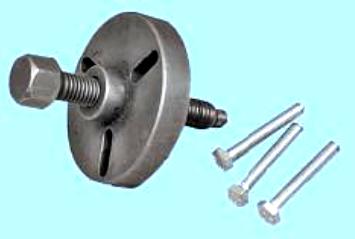
If the pressure plate is tight on the shaft, you need to use a puller
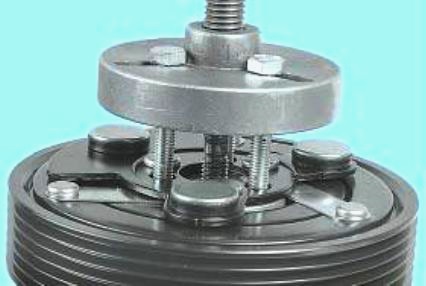
We screw the mounting bolts of the puller into the threaded holes of the pressure plate and press it.
If there are no threads in the holes, you need to cut the threads with an M5 tap yourself
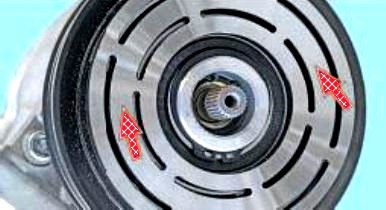
Inspecting the friction surfaces of the pulley
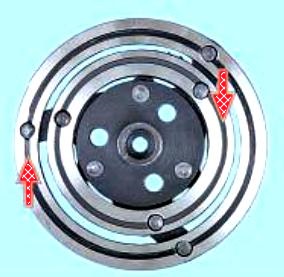
We inspect the surface of the pressure plate, there should be no wear and signs of overheating
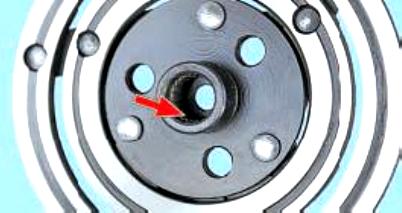
Inspecting the slots of the pressure plate.
When the splines are worn, replace the plate
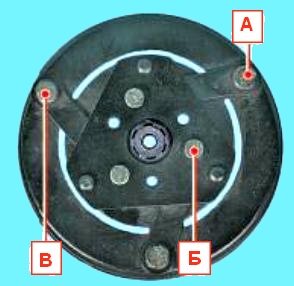
Inspecting the rivet connections (A and B) and elastic steel leashes "C" of the plate
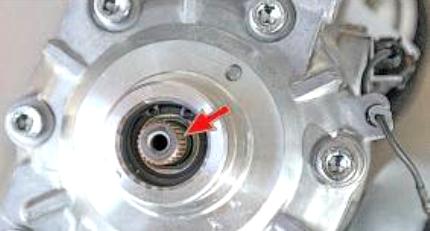
Inspecting the surface of the shaft.
If the shaft seal is leaking, you need to replace the compressor.
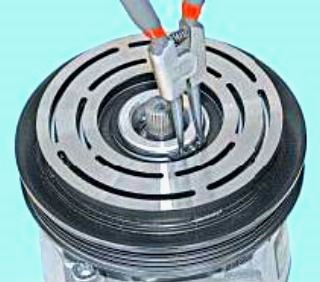
Remove the retaining ring of the bearing with a puller
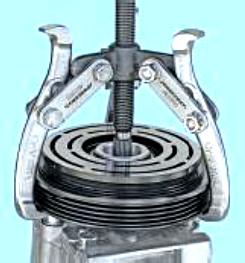
Installing the puller
It is convenient to use a universal puller to remove the pulley
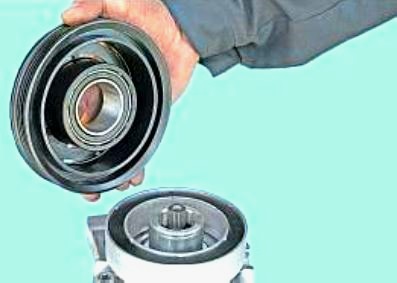
Compress the pulley from the landing neck of the front cover of the compressor
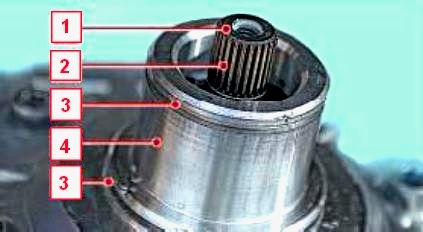
We inspect the splines 2 and the threaded tip of the shaft 1, the grooves for the circlips 3 and the seating surface 4 of the bearing neck.
If there is wear, then the compressor needs to be replaced
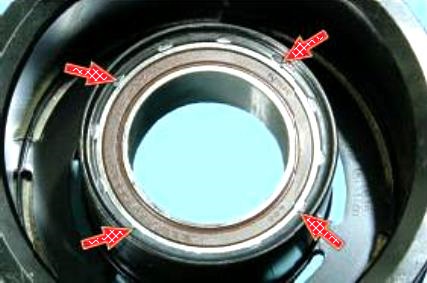
On a lathe, we cut off the rolling of the bearing fixation in the pulley
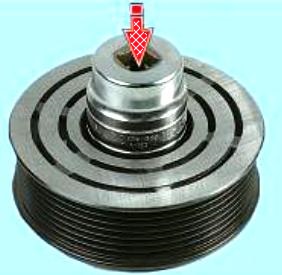
Using a mandrel, we press out the old bearing
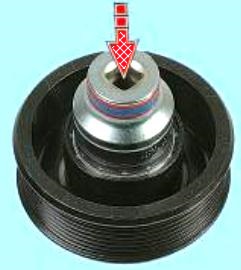
We press in a new bearing.
When pressing in, force must be applied to the outer race of the bearing
You need to press the bearing carefully without distortion.
The outer race of the bearing is very thin
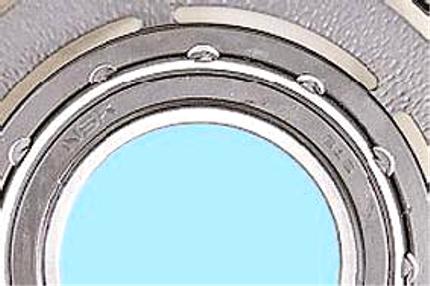
Fix the bearing by punching the edge of the pulley mounting hole
We press the pulley onto the front cover of the compressor.
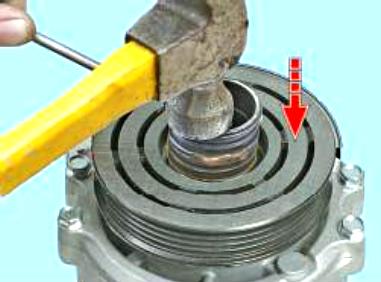
Force must be applied to the inner race of the bearing
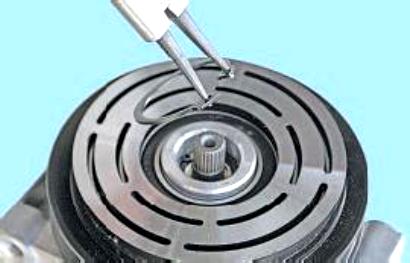
Installing the retaining ring
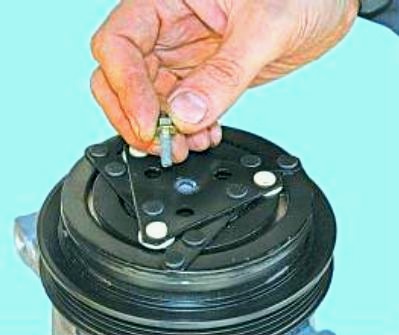
We put a pressure plate on the shaft and screw in the old mounting bolt
Using a feeler gauge, we measure the gap between the friction surfaces of the pressure plate and the pulley
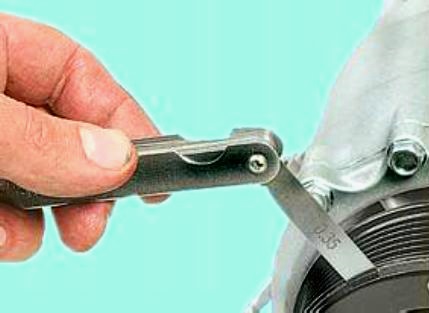
The gap must be the same at different points on the circle.
The nominal gap for gasoline engines is 0.25-0.45 mm, for diesel engines 0.30-0.50 mm.
The exact gap can be checked using a dial indicator, for this we install the compressor in a vise.
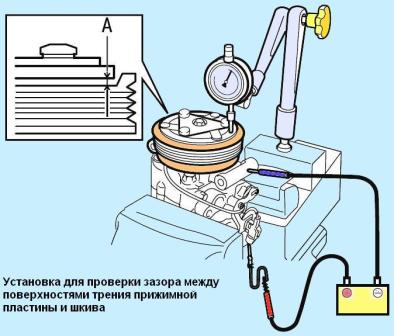
Installing the arrow indicator.
Connect the positive terminal of the battery to the coil winding connector, the negative terminal to the compressor housing.
Measure the gap "A" between the friction surfaces at different points.
If the gap is not the same, replace the pressure plate.
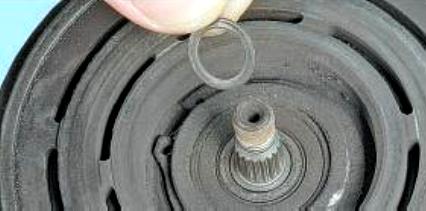
If the gap differs from the nominal size, remove the pressure plate.
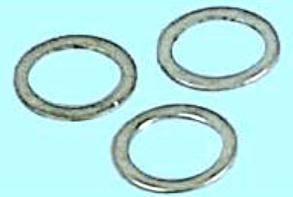
To adjust the gap, we use special calibration washers.
After adjustment, unscrew the old bolt from the shaft end and screw in the new bolt.
We install the compressor and all the removed parts. Filling the air conditioning system.
Compressor clutch solenoid replacement
To work, you will need tools: a set of screwdrivers, an 18 wrench, pullers to remove the pulley, a puller to remove the electromagnet and a tester
We remove the refrigerant from the system. We remove the compressor.
Remove the pressure plate
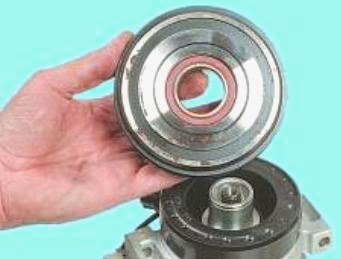
Remove the drive pulley as above
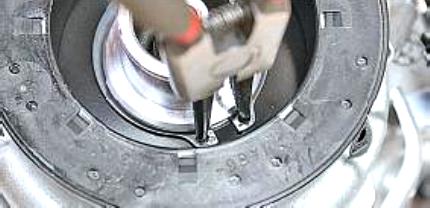
Remove the retaining ring of the compressor clutch electromagnet
To remove the retaining ring, use a special expanding puller
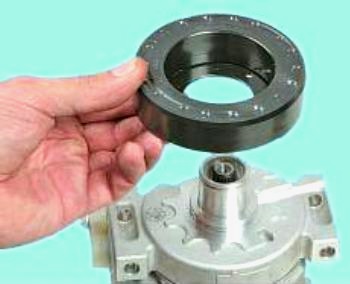
We move the electromagnet from the landing belt of the front cover of the compressor and remove it
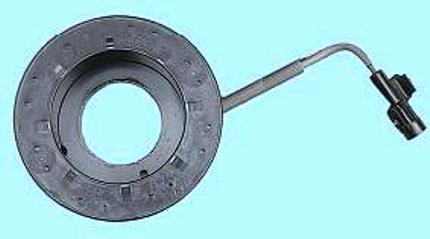
We check with an ohmmeter the resistance of the winding of the electromagnet coil and the absence of a short circuit to the case.
Resistance should be 3.6-3.8 ohms.
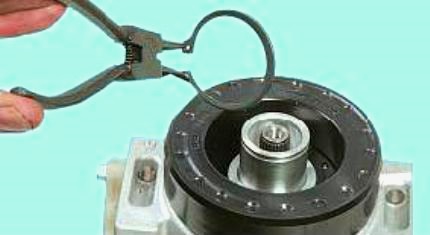
Install the electromagnet on the front cover of the compressor.
You need to make sure that the retaining ring is fully inserted into the groove
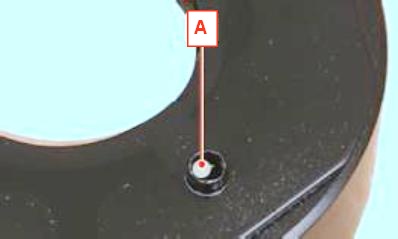
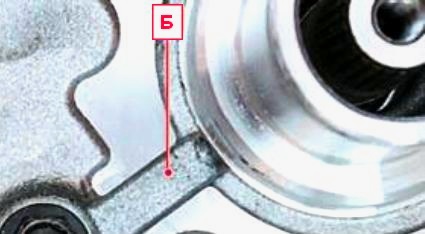
When installing the coil on the compressor, the fixing protrusion "A" on the rear surface of the coil housing must fit into the recess "B" on the compressor cover.
We press the pulley onto the landing neck of the compressor front cover.
You need to apply force to the inner race of the bearing.
After pressing, check the rotation of the pulley.
Install the compressor and other parts in reverse order. We charge the system with refrigerant.
Removing the A/C compressor pressure regulator
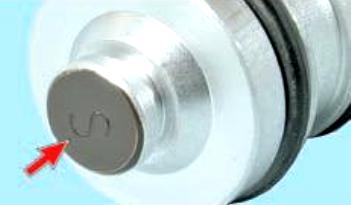
Color identification is applied to the protrusion of the end surface of the regulator body.
The color of the label indicates the setting of the regulator to certain working pressures.
To replace a regulator, you need to purchase a regulator with a label of the same type.
Remove the refrigerant from the system.
We install the car on the inspection ditch.
Disconnect the negative battery terminal.
Remove the right front wheel liner.
Remove the engine mudguard
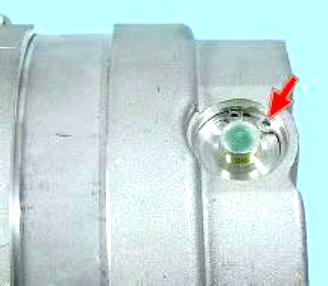
We clean the end surface of the regulator and the surface of the compressor cover around the regulator from dirt.
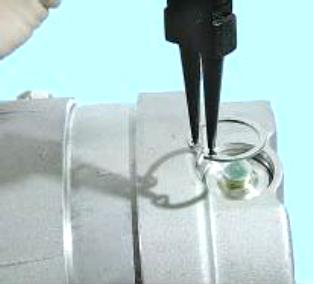
Remove the retaining ring of the regulator.
Remove the regulator from the compressor housing.
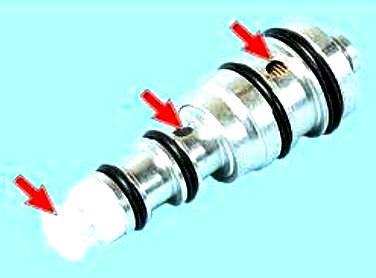
If aluminum or plastic particles are found on the filter mesh or in the holes of the regulator, it means that the pump part of the compressor has collapsed.
You will need to replace the compressor and flush the entire air conditioning system.
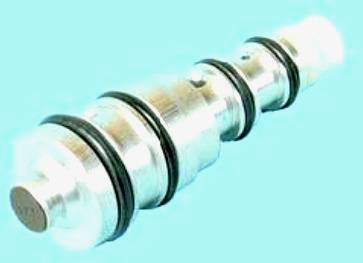
When installing a new regulator, lubricate the O-rings with oil for the air conditioning compressor.
Filling the air conditioning system.


