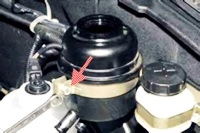
You will need: a pipe (gas) wrench, a screwdriver, a chisel, a beard, a hammer, a cross-piece remover, a snap ring remover, a metal brush, penetrating lubricant (for example, WD-40)
The drive shaft assemblies are balanced at the factory.
Therefore, it is necessary to maintain the relative position of the parts during disassembly and subsequent assembly, otherwise vibrations may occur when the car is moving.
On parts of manufactured cars, front and rear cardan shafts with constant velocity joints are installed
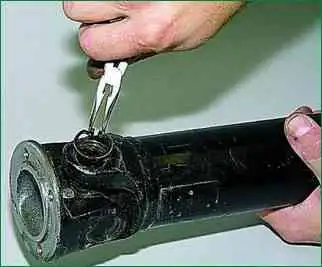
Using the pliers, remove the four retaining rings.
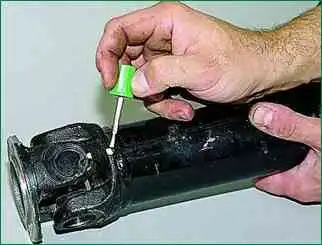
Let's mark the parts of the hinge so that they can be placed in the same position during assembly.
We apply marks with quick-drying paint so that during assembly we do not confuse the position of the hinge forks.
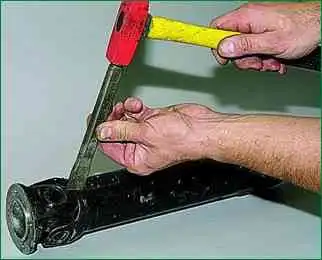
You can mark with a chisel
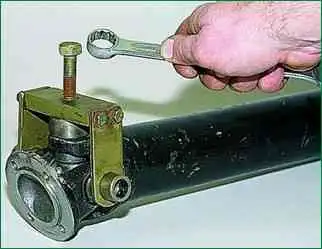
We install a special puller on the yoke of the hinge flange and press the bearing housing out of the yoke socket until the crosspiece stops against the yoke.
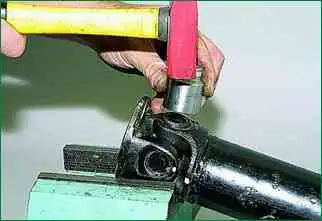
If there is no puller, then we rest the cardan flange yoke on the support (vice jaws), and through a suitable piece of pipe we strike the cardan shaft yoke with a hammer, shifting it down until it stops into the cross.
In the same way, we press out the bearing housing located on the opposite side of the cardan yoke.
Leaning the driveshaft yoke on the vise jaws, we press the bearing housings out of the sockets one by one.
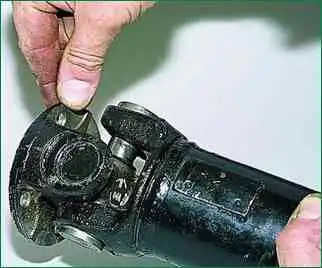
When the bearing housing is pressed out of the holes of the forks, they do not completely come out, therefore, even if the cross is moved all the way into the fork, the cross spike cannot be removed from the bearing housing
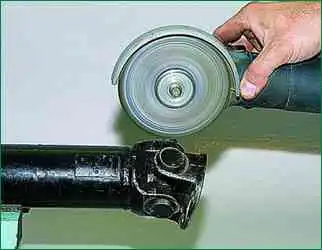
To finally press out the bearing housing, you need to clamp the bearing housing in a vise so that it does not rotate in the vise jaws and grind flats on the bearing housing with a grinder.
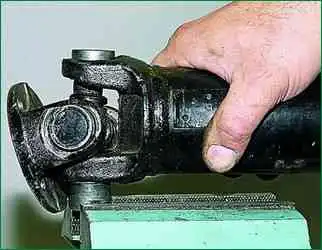
We clamp the bearing housing by the flats made and, turning the cardan shaft around the bearing axis, remove the fork from the bearing housing.
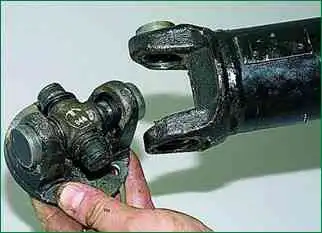
Remove the flange with the cross. The housing of one bearing of the cross, we also press out with the help of a grinder
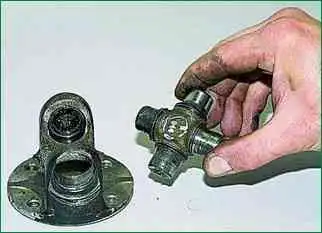
Removing the crosspiece
Having clamped the driveshaft yoke in a vise, with a punch we knock out the housing of the other bearing remaining in the yoke.
Similarly, we knock out the bearing housing remaining in the flange.
Before installing a new cross, we make sure that there is grease in the bearings - 0.8-1.2 g of Fiol-2U grease is put into each bearing.
We put the seals on the spikes of the crosspiece and insert the crosspiece into the sockets of the cardan shaft fork.
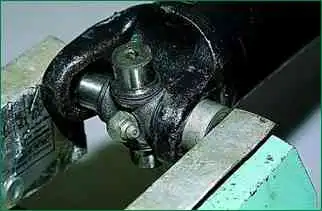
In a vise with soft metal jaws, we press the bearing into the fork socket until its end stops against the vise jaw.
At the same time, we insert the spike of the cross into the bearing socket so that the bearing needles do not fall out.
In the process of pressing by swinging, we control the ease of rotation of the cross in the bearing.
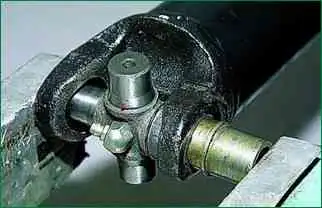
Using a suitable head or a piece of pipe, we press the bearing into the fork socket deeper than the groove for the retaining ring.
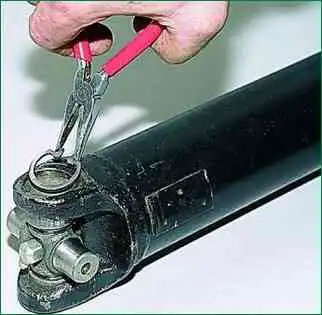
Using the pliers, install the retaining ring into the groove.
We also press the bearing into another seat of the shaft fork until the opposite bearing stops against the end of the retaining ring and install the second retaining ring.
Orienting the flange according to the marks relative to the cardan shaft yoke, insert the spikes of the cross into the sockets of the flange
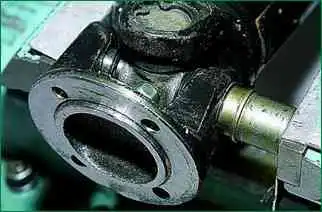
Alternately, we press two bearings into the flange sockets and install the retaining rings in its grooves
After assembling the universal joint, you need to tap with a hammer with a plastic striker on the fork and flange in order to select the gaps between the ends of the bearing housings and circlips
Checking the ease of turning the universal joint.
It should be borne in mind that universal joint crosses are sold already assembled with bearings and retaining rings, but the rings may not always fit under the old universal joint shaft, since they have several thicknesses.
Also, remember that crosses are sold with a preservative lubricant and should be replaced with a grease recommended by the manufacturer for this assembly before assembly.
The cross bearing cups should also be lubricated on the outside with grease before installation in the fork to facilitate assembly and subsequent work.
The bearing pins in the cup are held in by grease, but when installing the cross, they may fall to the bottom of the pressed cup.
If you feel that the cross "rested" during installation, do not be too lazy to disassemble the knot and check the location of the needles.
After installing and pressing the bearing cups into the propeller shaft yoke, install one circlip, use the tool to feed the second cup inward until it stops and install the second circlip.
After the final assembly of the assembly, it is recommended to bend the universal joint several times in different directions in order to select possible gaps and establish the correct assembly of the assembly.
If the pivot is difficult to turn, one of the bearing cups may be tight and should be corrected.
Replacing the seal of the cardan shaft sliding yoke
Remove the cardan shaft
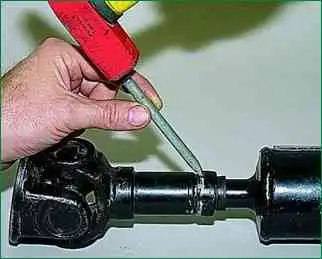
Use a suitable beard or screwdriver to shift the gland cage along the shaft
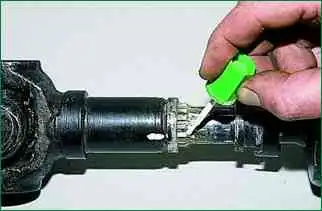
We make notes on the location of the shaft and fork in order to install it as well, otherwise an imbalance may occur
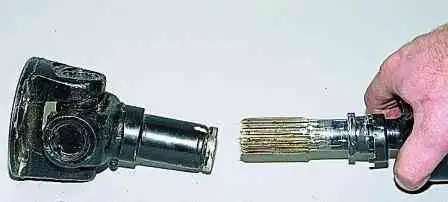
Disconnect the shaft and fork.
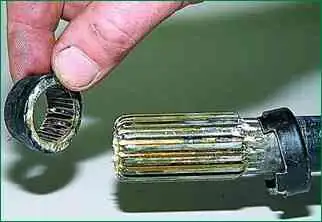
Remove the oil seal from the shaft
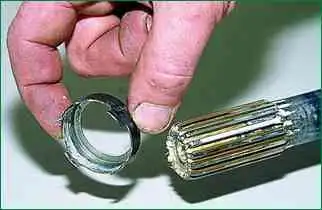
Remove clip
Assemble the knot in reverse order
We put on the clip and a new oil seal (with a large outer diameter to the fork) on the shaft. We lubricate the spline connection of the shaft with Fiol-2U grease.
When connecting the shaft and fork, we combine the marks.
We press the gland with the clip until it stops against the end of the fork and crimp the clip on the groove of the fork.


