")
")
")
")
")
")
Disconnect the negative battery cable.
Remove the plug hole plate.
Remove the high voltage wire.
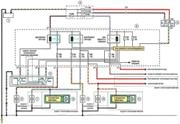
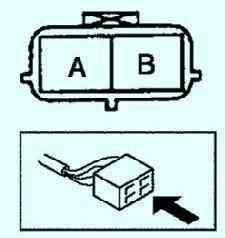
Disconnect the oil control valve (OCV) connector. Measure the resistance between terminals A and B with an ohmmeter.
Remove the ventilation hose.
Remove the cylinder head cover.
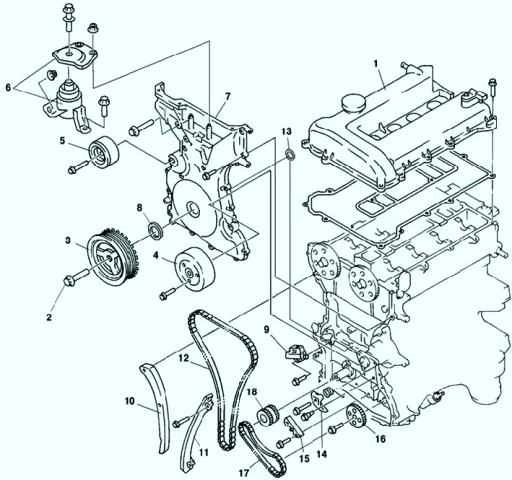
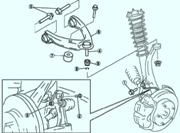
The components of the power unit that are dismantled when the timing chain is removed: 1 - cylinder head cover: 2 - crankshaft pulley mounting bolt; 3 - crankshaft pulley; 4 - coolant pump pulley; 5 - tension pulley of the drive belt; 6 - rubber support for engine No. 3 and engine mounting bracket No. 3; 7 - front cover of the engine; 8 - front oil seal; 9 - chain tensioner; 10 - tensioner lever; 11-chain guide; 12 - drive chain of the gas distribution mechanism; 13- seal; 14 - oil pump chain tensioner; 15 - oil pump chain guide; 16 - oil pump sprocket; 17- oil pump chain; 18 - camshaft sprocket
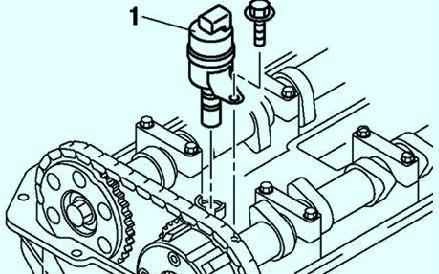
Remove the oil control valve (OCV) (fig. 2).
Checking the oil control valve (OCV)(L3)
Disconnect the negative battery cable.
Disconnect the oil control valve connector.
Measure the resistance between terminals A and B with an ohmmeter (fig. 3).
If the measurement is not as specified, replace the oil control valve.
The standard characteristic of ohmmeter readings is 6.9–7.9 ohms.
Checking the operation of the spool valve (OCV)(L3)
Disconnect the negative battery cable.
Remove the oil control valve.
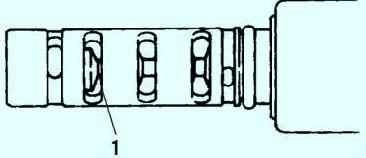
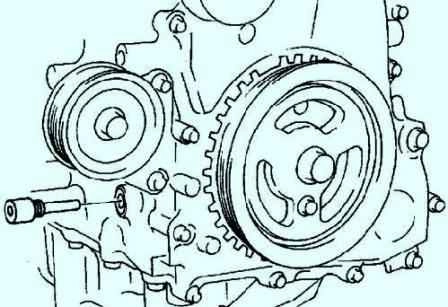
Check the position of the spool valve of the oil control valve.
It should be in the position of the maximum delay in opening or closing the engine valves, as shown in Figure 5.
If the measurement is out of standard with an ohmmeter, replace the oil control valve.
Make sure the battery is fully charged. If not, charge the battery.
Apply battery voltage to the oil control valve leads and check that the spool valve is working and moving to the maximum advance position of opening or closing of the engine valves.
If the measurement is out of standard with an ohmmeter, replace the oil control valve.
Options for supplying battery voltage to the outputs of the control oil valve:
- - Battery Plus
- to pin A, minus to pin B
- – Accumulator plus to pin B, minus to pin A
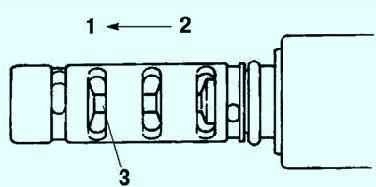
Disconnect the battery and check that the spool valve has returned to the position of the maximum delay in opening or closing the engine valves.
If not, replace the oil control valve (fig. 6).