")
")
")
")
")
")
Checking fuel leaks
Disconnect the negative battery cable.
Remove the fuel injectors together with the fuel distributor without disconnecting the fuel supply hose
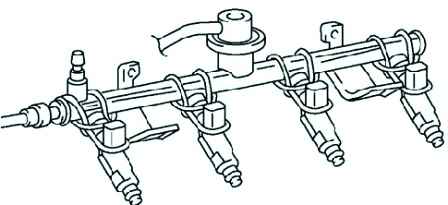
Fix the fuel injectors firmly to the fuel distributor with wire (fig. 1).
Connect the negative battery cable.
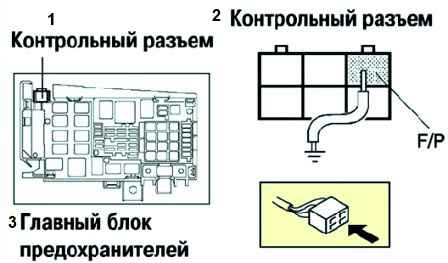
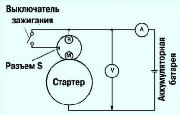
Connect the output of the control connector F/P to body ground GND using a jumper (fig. 2).
Turn the ignition key to the ON position to turn on the fuel pump.
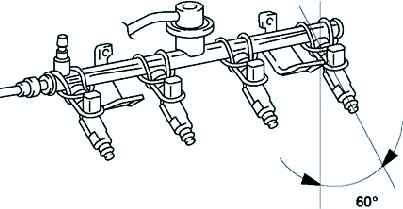
Tilt the fuel injectors approximately 60 degrees (fig. 3).
Check for fuel leakage from the fuel injector nozzles.
If the leakage is too high, replace the fuel injector.
Normal fuel leakage is less than 1 drop in 2 minutes.
Turn the ignition key to the LOCK position and remove the jumper.
Reinstall the fuel distributor.
Injector Performance Test
If you don't have a dedicated fuel injector tester, perform a "Fuel Leak Test" to check if the fuel injector is working.
Disconnect the negative battery cable.
Remove the fuel injectors.
Connect the fuel injector to the fuel injector tester.
Measure the amount of fuel injected from each fuel injector using a graduated container.
Initially, you can use a plastic bottle.
If the leakage is too high, replace the fuel injector.
Fuel injected:
- L3: 61-71ml /15s;
- LF: 53–69 ml /15 sec;
- L8: 48-63ml /15s
Turn the ignition key to the LOCK position and remove the jumper.
Reinstall the nozzles.
Spray jet check
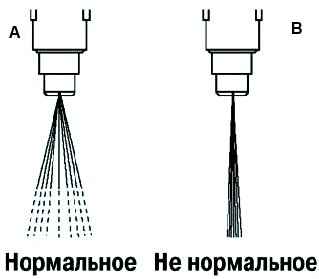
Check the spray pattern of each fuel injector.
If the atomization is not correct, replace the fuel injector (fig. 4).
You can also see the article - Replacing a fuel injector on a Mazda 3