1MZ-FE engine exhaust camshaft assembly
Clamp the camshaft at the hexagonal section in a vise
Install the following details:
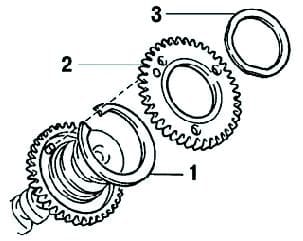
- 1 - camshaft gear spring ring;
- 2 - auxiliary camshaft drive gear;
- 3 - spring washer.
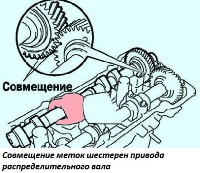
Align the drive pins on the gears with the ends of the spring
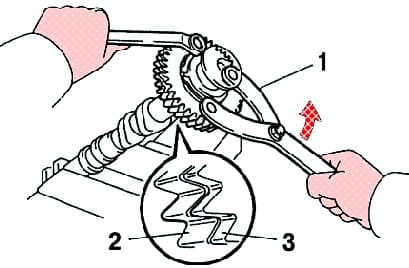
Combining gear marks
Installing exhaust camshafts
Install the camshafts.
When installing camshafts, keep in mind that the axial clearance is very small, so the shafts must be laid in the bearing bed strictly horizontally, without distortion, in order to avoid jamming and / or damage to the shafts.
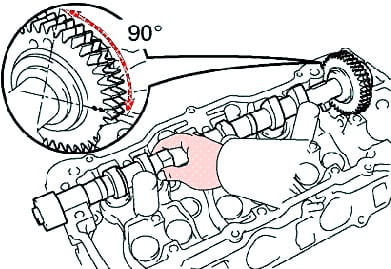
Install the rear head exhaust camshaft.
Apply a coat of engine oil to the end thrust surfaces of the camshaft.
Set the intake camshaft 90° from the position where the alignment marks on the cylinder head align (fig. 3).
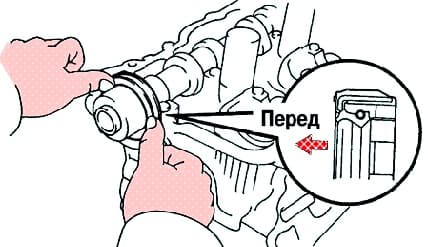
Apply grease to the new oil seal.
Install the oil seal on the camshaft (fig. 4).
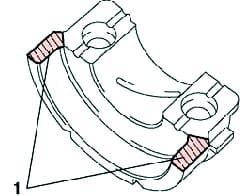
Remove the old sealing material from the bearing cap
Apply sealant to bearing cap #1 as shown (fig. 5).
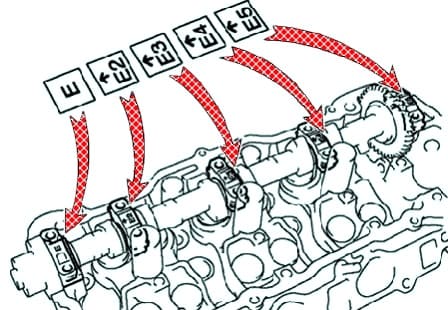
Install the bearing caps according to the markings on their housings (fig. 6).
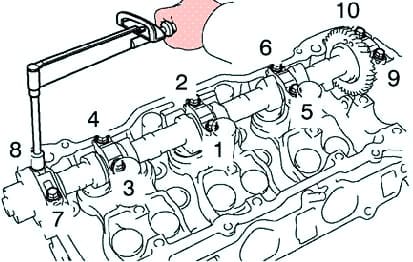
Apply a light coat of engine oil to the threads and under the heads of the bearing cap bolts.
Install and evenly tighten the ten bearing cap bolts in several passes to a torque of 16 Nm, in the sequence shown in figure 8.


