")
")
")
")
")
")
Carburetor parts are well washed from deposits with solvents for nitro paints No. 646, 647, 647, 650, acetone or toluene, but strong solvents should not get on plastic or rubber parts.
Before assembling the body parts, we blow compressed air and blow through the channels.
Carburetor float adjustment

The float mechanism is adjustable by bending the tongue.

We adjust to a size of 10.75-11.25 mm between the upper part of the float and the upper plane of the body of the float chamber.
This is best done on a car, pumping fuel with a manual pump drive.
This adjustment can be made without installing a carburetor on the car.
To do this, you need to install the carburetor on a horizontal plane.
We put on a rubber petrol-resistant hose on the fuel fitting of the carburetor, in which we create a slight overpressure of fuel with any improvised means, for example, a syringe.
You can simply raise the end of the hose to a height of 30-40 cm and pour fuel into it through a funnel.
This pressure will be enough to fill the float chamber and take measurements.
Idle adjustment
Before you start adjusting the idle speed, you need to make sure that the ignition system is working (candles, high-voltage wires, ignition timing), and also adjust the gaps between the valves and timing rockers.
After starting, we warm up the engine to a coolant temperature of 80-90 ° C.
We turn the quality screw and the operational adjustment screw (quantity) of the crankshaft speed to the stop.
Then we unscrew the quality screw by 2-3, and the quantity by 5-6 turns.
We start the engine and set the crankshaft speed to 550-650 min using the operational adjustment screw (quantity).
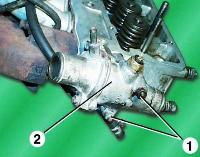
Removing and checking the solenoid valve of the EPHX system
The EPHX system turns off the fuel supply to the intake manifold in the engine braking mode (the so-called forced idling), thereby saving fuel and reducing the emission of toxic substances into the atmosphere.

We loosen the clamps and remove the hoses from the valve nozzles, marking their position.
When the ignition is off, disconnect the wires.
Using a 10 key, we unscrew the nut securing the valve and the negative wire.
To check the valve, blow into the side tube of the valve - the air should exit through the air filter, and when voltage is applied to the contacts, through the second tube.
We replace the defective valve. When installing the valve, make sure that the hoses are connected correctly:
The side tube is connected to the economizer, and the central tube is connected to the throttle space of the carburetor.
Checking the EPHX system control unit

Sliding the insulation from the solenoid valve connectors, we connect a voltmeter.
Disconnect the wires from the carburetor microswitch.
Starting the engine.
The voltmeter should show the presence of voltage.
Increase the engine speed.
After reaching 1700-1 min, the control unit must turn off the power supply to the valve, and after the speed drops to 1300 min-1, turn it back on.
The defective block is replaced.
Adjusting the microswitch of the EPHX system
Disconnect the wires from the microswitch.

Connect an ohmmeter to its plugs.
When the fuel pedal is released, the microswitch contacts should be open, with the slightest pressure on the pedal, they should be closed.

To adjust the switching moment, loosen the two screws with a screwdriver and, moving the microswitch along the oval body openings, we achieve its optimal position.