Removing the fuel pump module
Disconnect the wires from the battery terminals, starting with the negative terminal
Raise the rear seat cushion
Remove the mat holder.
Open the mat.

Remove the cover bolts
Remove the trim and the hatch cover.
Remove the hatch cover with a screwdriver, prying off the edge.

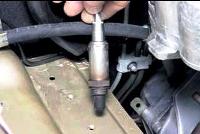
Disconnect the wiring harness

By pressing the latches, disconnect the fuel inlet and outlet pipes

Unscrew the captive plastic nut securing the fuel module using the tool (Mot. 1397)

On the road, you can unscrew it in this way using a pliers and a ring spanner

At home, you can make a fixture from a strip of metal 3-5 mm thick, and weld a bolt to it.

Using such a device, we unscrew the union nut of the fuel module in this way.

Having unscrewed the plastic union nut of the module, carefully remove it and the rubber sealing ring.
Be careful not to damage the float.

On the case, with a felt-tip pen or just a sharpened screwdriver, we make marks for the position of the fuel gauge sensor and the position of the bottom cover of the module.
This is done for the correct position of the fuel gauge sensor

Pry off the plastic retainer with a screwdriver

remove the fuel gauge sensor.

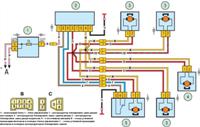
Position of contacts

Laying the module sideways with gentle blows, we disconnect the cover from the module body
You can also remove the cover using a few screwdrivers, inserting them into the connector of the cover at small intervals

Install the new filter and assemble it in reverse order
The electric pump is suitable for some domestic cars.
When replacing a pump, the performance of the pump must be taken into account.
To eliminate the risk of tank deformation, reinstall the nut securing the fuel pump assembly with fuel level sensor and fuel filter immediately after removing this assembly.
Installation
Replace the O-ring.

Install the "fuel pump - fuel level sensor - fuel filter" assembly, aligning the mark "A" on this assembly with the mark "B" on the fuel tank (see Fig. 3)
Tighten the nut.
Tighten the nut until the “C” mark on the nut aligns with the “B” mark on the fuel tank and the “avec” mark on the fuel pump assembly with the fuel level sensor and fuel filter (fig. 3).
The rest of the equipment is installed in the reverse order of removal.
Connect the wires to the battery terminals, starting with the positive terminal.
")
")
")
")
")
")