Fuses are used to break the circuit when the current exceeds a certain value, and to protect elements and wires that can be damaged by too much current
A sudden increase in current is usually caused by a malfunction in the circuit, most often a short circuit.
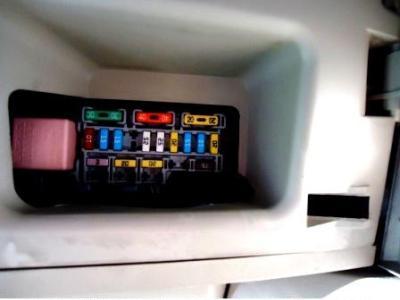
Fig. 1. Fuse box in the passenger compartment
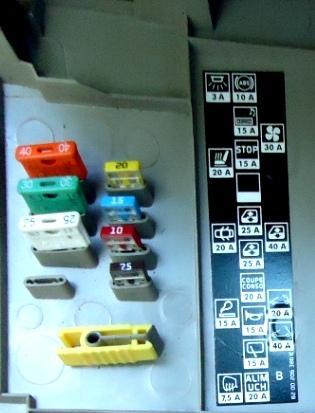
The fuse box is located under the dashboard on the driver's side.
Each of the fuses protects its own circuit, its belonging to a particular circuit is indicated on the cover of the fuse box.
The fuse box contains blade-type fuses, the color of which corresponds to the fuse protection current.
In the event of failure of any element of electrical equipment, first of all, check the condition of the fuse.
The health of the fuse is determined by the presence of a wire conductor connecting the contacts of the fuse.
To replace a failed fuse, first turn off the corresponding electrical circuit, remove the fuse from the socket with tweezers.
If a newly installed fuse breaks instantly when energized, check the circuit being protected.
If the fuse protects several circuits, then they must be connected in turn in order to determine the faulty circuit by blowing the fuse.
The heater and air conditioner draw a lot of current, so the fuse box has a switch to protect their circuits.
If the circuit is opened by the switch, turn off the heater and air conditioner before pressing the switch's reset button.
A relay is an electronically controlled switch that is typically used as follows:
- - switches high currents remotely from the circuit in which this current flows, allowing the use of thinner wires and switch contacts;
- - has more than one control input unlike a mechanical switch;
- – performs a timer function, for example, sets the wiper interval.
If an electrical circuit controlled by a relay fails and the cause of the problem is probably the relay, listen to the relay while the system is on.
If the relay is working properly, you should hear a click when it turns on.
If the relay is OK, then the cause of the malfunction lies in the elements or connecting wires.
If the relay does not work, it means that it does not receive the main power supply or control pulse, or the relay is faulty.
Most of the relays are installed in the fuse and relay box located in the engine compartment.
Some specialized relays are located separately or in separate blocks under the instrument panel and in the engine compartment
Relay
Designation - Rated current - Purpose
- A 30 A Power window relay
- V 40 A Consumer relay
Fuses
- С 40 A Interior fan
- D 40 A Power windows, rear doors or power window relays
- E 20 A Electric sunroof
- F 10 A ABS and stability control
- G 15 A Audio system, remote display, headlight washer pump relay, first row cigarette lighter, seat heaters, windshield washer pump, diesel fuel heater relay, air conditioner control panel, air conditioner control unit, rear-view mirror with electrochromic coating, burglar alarm , central communication unit
- H 15 A Brake light
- I Not used
- J 25 A Driver's power window
- K 25 A Passenger's power window
- L 20 A Fuse for disconnecting consumers of electricity: audio system - remote display - switch for outside rear-view mirrors - burglar alarm - instrument panel
- M 15A Horn, headlight washer pump relay diagnostic connector, rear window wiper motor
- N 15 A Rear window wiper motor
- O 20 A UCH - instrument cluster, air conditioner control unit, accessory relay
- T 20 A Heated seats
- S 3A Venti Cooler and interior temperature sensor, rear-view mirror with electrochromic coating, rain and light sensor (depending on version)
- U 20 A Central locking or locking system for inside door handles
In order to access the interior mounting block, you need:
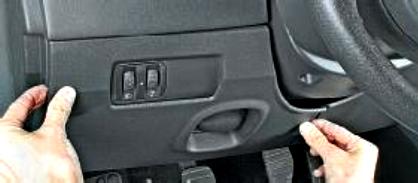
Pry off the cover of the mounting block, overcoming the resistance of the clamps
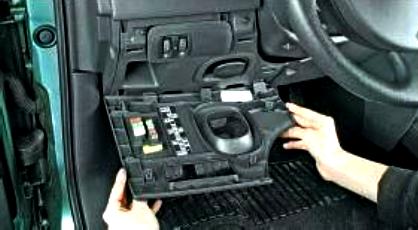
Opening the lid
If necessary, disengage the cover holders from below and detach the cover of the mounting block
On the inside of the cover, the purpose and layout of the fuses are drawn
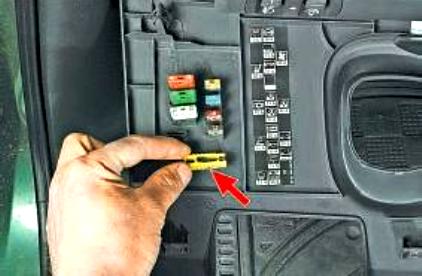
Remove the fuse with tweezers
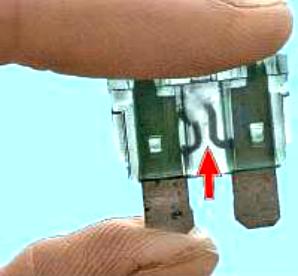
This is what a blown fuse looks like
To access the power fuse mounting block located in the engine compartment:
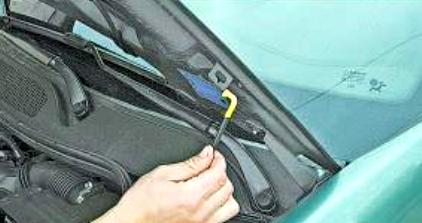
Opening the hood
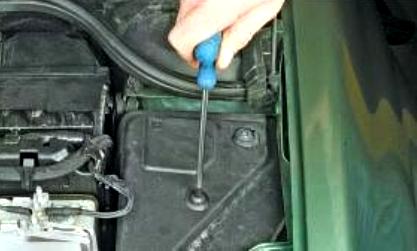
We unscrew the two screws securing the cover of the mounting block
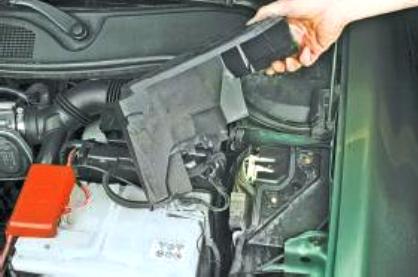
Remove the lid
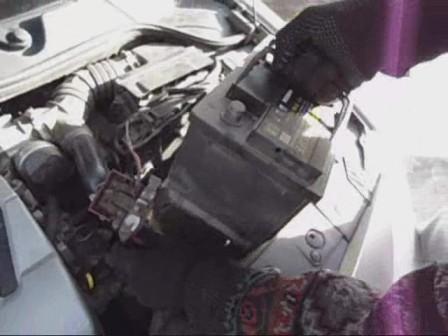
Remove the battery
We use tweezers to replace the fuses. Install the parts in reverse order.
Removing and installing mounting blocks
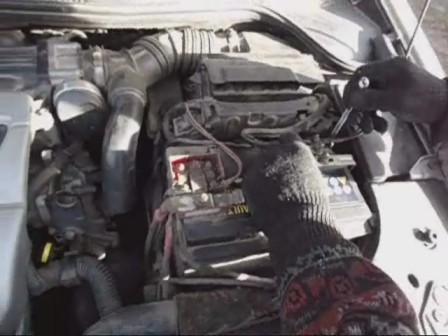
Disconnect the negative terminal from the battery

Opening the decorative cover of the interior mounting block
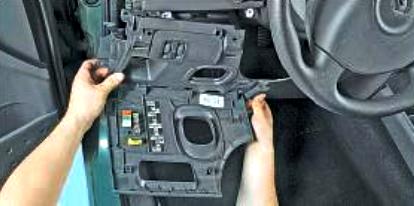
Remove the lower left and side panel covers
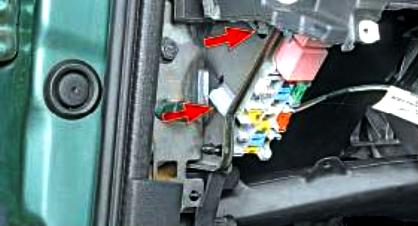
Press the two latches
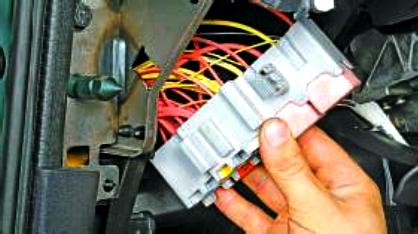
And remove the mounting block from the amplifier bracket for the length of the wires
Install the mounting block in reverse order
Removing the engine compartment mounting block
Disconnect the negative battery terminal
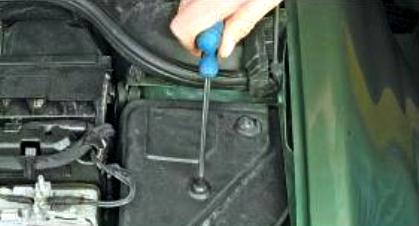
We unscrew the two screws securing the cover of the mounting block

Remove the cover
Remove the battery
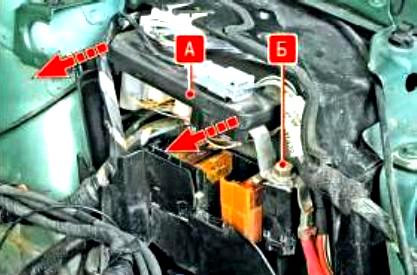
We unscrew the bolt B for fastening the switching unit and set aside the switching unit A
Disconnect all pads of the wiring harness from the connectors of the switching unit and remove it.
We remove the mounting block for the length of the attached wires.
Install the block in reverse order.


