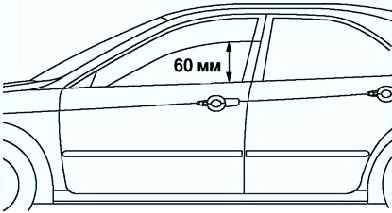
Install the front door glass so that the distance from the top of the front door glass to the window trim is 210 mm (fig. 1)
- - Disconnect the negative battery cable
- - Remove the front door trim.
- - Remove the cap.
- - Loosen the screws.
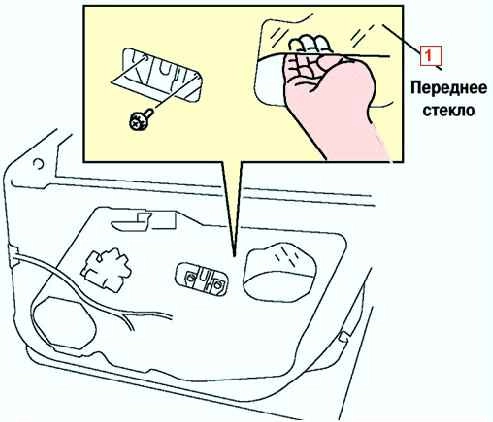
Insert your hand into the opening of the front door block and remove the glass (fig. 2)
Install in the reverse order of removal.
Removing and installing rear door glass
Pull the tailgate glass down completely.
Remove the tailgate trim
Remove the plug.
Tighten the rear door seal and remove the screw.
Remove the bolt.
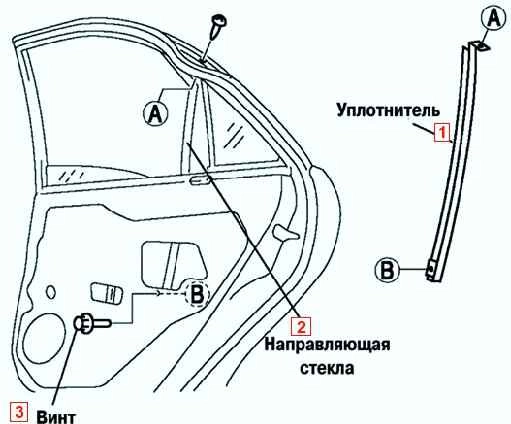
Remove the sliding glass guide from the rear door glass guide (fig. 3)
Raise the tailgate glass until the rear door glass screw is visible.
Remove the screw.
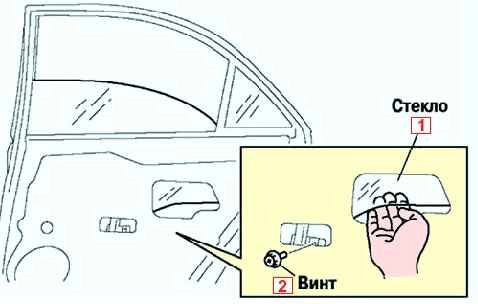
Insert your hand into the opening of the rear door unit and remove the glass (fig. 4)
Install in the reverse order of removal.
Removing and installing the front door unit
Remove the front door glass.
Remove the inner handle.
Remove the front door speaker.
Disconnect power window motor connector, door lock actuator front connector, outside mirror connector.
Remove the door harness from the front door assembly.
Remove the bolts.
Remove the screw.
Remove the front door actuator hook from the door assembly.
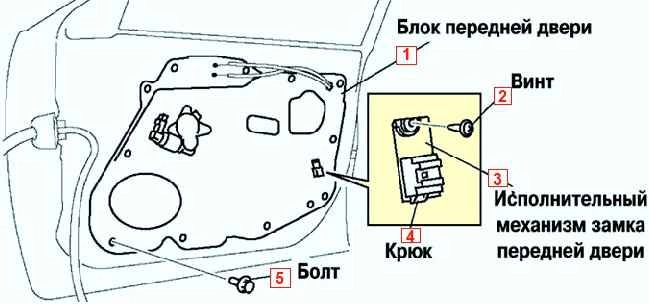
Pull the front door assembly slightly towards you, without letting the power window adjuster snap into place, remove the assembly from the door (fig. 5)
Remove the inner cable of the handle and the cable of the door lock button from the hole.
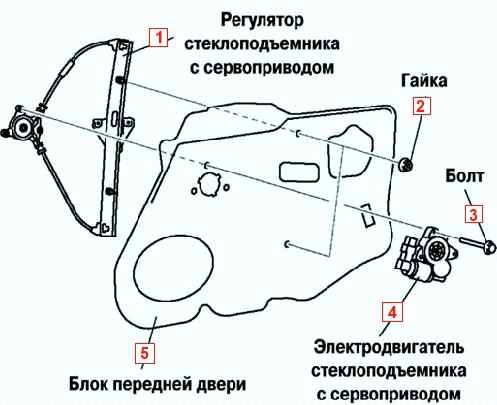
Remove the power window motor and power window regulator from the door assembly (fig. 6)
Install in the reverse order of removal.
Removing and installing the rear door unit
Remove the rear door glass.
Remove the inner handle.
Remove the rear door speaker.
Disconnect the power window motor connector and the door lock actuator auto connector.
Remove the tailgate harness from the tailgate assembly.
Remove the bolts.
Remove the door lock actuator hook from the door unit.
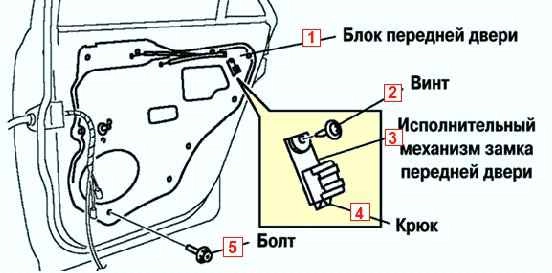
Pull the rear door assembly slightly towards you, without letting the power window adjuster snap into place, remove the assembly from the door (fig. 7)
Remove the inner handle cable and the door lock button cable from the hole.
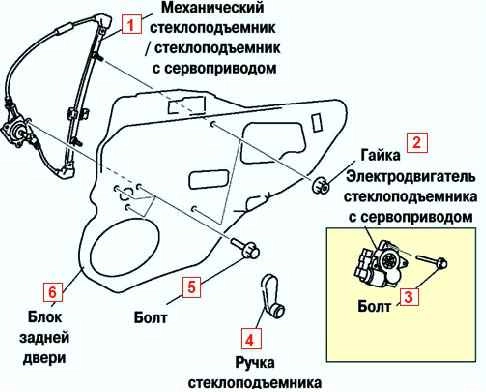
If your vehicle is equipped with a power window system, remove the motor and power window regulator from the door assembly
If the vehicle is not equipped with a power window system, remove the adjuster knob and power window (fig. 8).
Install in the reverse order of removal.


