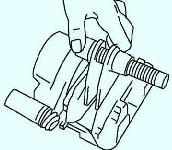
Remove the intake silencer mounting bolt (fig. 1).
Remove the intake silencer


Disconnect the brake booster vacuum hose from the intake manifold (fig. 2).
Be careful not to damage the suction pipe on the intake manifold. If the nozzle is broken, replace the manifold.
Remove the two air cleaner cover bolts.
Remove the filter element.
Replacing the air filter (F4R engine)

Remove the bolts securing the air filter housing cover.

Remove the cover and filter element

Install parts in reverse order
Torque tighten the battery cover bolts
Removing and installing the air filter housing (K4J engine)
Remove the top engine covers.
Disconnect the wires from the battery terminals, starting with the negative terminal.

Remove the gasket and plastic rivets

Remove the trim

Remove the wiper arms using the special tool

Remove the air intake grille.
Remove the fastening elements of the soundproofing material of the bulkhead and the soundproofing material of the bulkhead

Remove the intake silencer bolt
Remove the intake silencer.
Disconnect the brake booster vacuum hose from the intake manifold.
Remove the two air filter cover bolts
Remove the filter element
Do not damage the suction pipe on the intake manifold.
If the nozzle is broken, replace the manifold.

Disconnect the oxygen sensor connector and remove the holder

Remove the bolts securing the air distribution unit
Remove the air filter housing.
Installation
Replace the throttle body gasket each time you remove it, using a lubricant to ease installation.
Plastic rivets and holders should also be replaced after each removal.
Install in the reverse order of removal.
Torque tighten (9 Nm) the air filter assembly mounting bolts.
Connect the wires to the battery terminals, starting with the positive terminal.
Torque tighten (4 Nm) the bolts securing the battery cover.
Changing the air filter (K4M engine)
Remove the top engine covers.
Disconnect the wires from the battery terminals, starting with the negative terminal.
Remove the battery pack.
Disconnect the injection computer connectors.

Remove the bolts securing the battery shelf and remove the wiring harness flange
Disconnect the harnesses from the battery tray.
Remove the battery tray.

Remove the injection computer together with the bracket.

Remove the air intake pipe and air ducts.
Remove the air filter housing.
Installation
Install in the reverse order of removal.
Tighten the battery shelf bolts (21 Nm).
Connect the wires to the battery terminals, starting with the positive terminal.
Torque tighten (4 Nm) the bolts securing the battery cover.
")
")
")
")
")
")