Removing the heater core
Disconnect the wires from the battery terminals, starting with the negative terminal.
The heater is shown in Figure 1.
When removing the heater core, follow Figure 1.
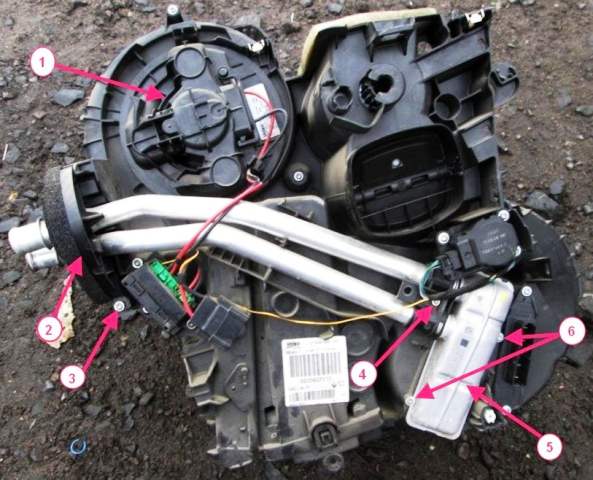
Heater assembly: 1 - fan electric motor, 2 - pipeline flange, 3 - flange mounting bolt, 4 - heater radiator connection clamp bolt, 5 - heater radiator, 6 - heater radiator mounting screws
Clamp the heater hoses at the exit from the bulkhead to the engine compartment with clamps.
Remove the cover of the access hatch to the lower casing.
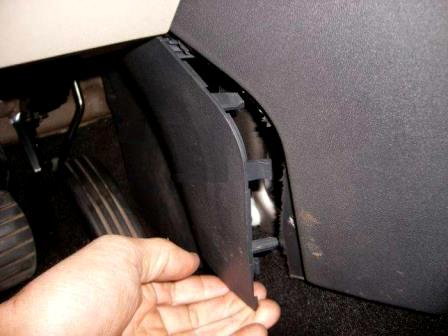
Remove the instrument panel side shield by depressing the spring clips.
Remove the wiring harness from the headlight range control panel.
On vehicles with a manual heating or air conditioning system, set the air temperature switch to the position corresponding to the minimum temperature of the air supplied to the passenger compartment (turn the switch to the extreme left position).
This will allow you to raise the control lever located above the heater radiator as far as possible.
Remove the lid.
Disconnect the duct.
Bend the duct down.
Remove the front air distribution duct.
Move aside the wiring harness attached to the reinforcement plate of the dashboard beam.
Remove the lower part of the casing that covers the reinforcement plate of the dashboard beam and partially the carpet.
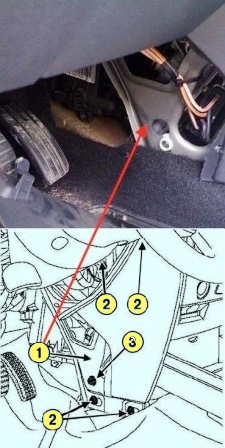
Removing the reinforcement plate of the dashboard beam: 1 - reinforcement plate of the beam; 2 - bolt for fastening the elastic connecting insert between the block and the reinforcement plate of the dashboard beam; 3 - bolts for fastening the reinforcement plate of the dashboard beam
Loosen the fastening bolt of the elastic connecting insert between the block and the reinforcement plate of the dashboard beam (Fig. 3).
Remove the four bolts securing the reinforcement plate of the dashboard beam.
Remove the reinforcement plate of the beam by sliding it towards the front of the car.
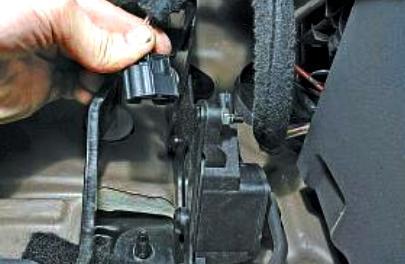
Remove the wiring harness from the accelerator pedal assembly (fig. 4)
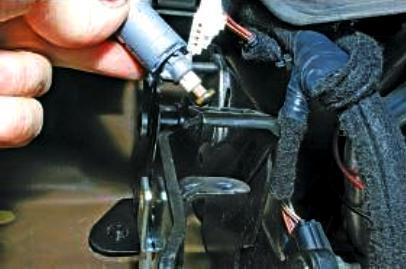
Remove the brake light switch (fig. 5)
Remove the bolt 3 of the flange of the interior heater radiator pipes and remove the flange 2 of the interior heater radiator pipes (Fig. 1).
Unlock the flange, then lift it up to remove it from the air distribution unit.
Unscrew the two bolts securing the heater radiator 6 and two bolts securing the clamps of the heater radiator connections 4 (Fig. 1).
Place a container to collect the spilled coolant.
Move the heater core with pipes.
Displace the heater core pipe clamps.
Remove the heater core pipes by pulling them towards the front of the vehicle and the heater coil.
Installing the heater core
Be sure to replace the gaskets when replacing the radiator.
Installation is performed in the reverse order of removal.
Restore the original shape of the duct by working through the outlets and straightening the bends by pressing perpendicular to the bend.
Torque tighten:
- - beam reinforcement bolts (210 Nm);
- - bolt for fastening the elastic connecting insert (2 Nm).
Fill the cooling system with fluid.
Bleed air from the engine cooling system.
Check the cooling system for leaks using tool (Ms. 554-07).


