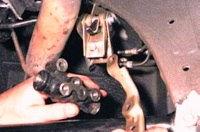
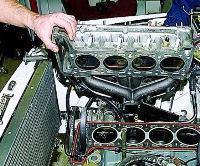
You will need: a screwdriver, wrenches "for 8", "for 10", "for 13", a special key for turning the crankshaft
Setting the piston of the fourth cylinder to the TDC position of the compression stroke
The piston of the 4th cylinder is set to the TDC (top dead center) position of the compression stroke so that when carrying out work related to the removal of the camshaft drive chain, the valve timing is not disturbed.
If the valve timing is disturbed, the engine will not work normally.
Set the TDC according to the mark on the camshaft sprocket (when setting according to the marks on the crankshaft pulley and on the front cover of the camshaft drive chain, the piston of either the 1st or 4th cylinder can be in this position).
After that, make sure that the marks on the crankshaft pulley and the cover match.
If at the same time the shaft marks do not match, it means that the installation of the gas distribution phases is violated (the piston of the 4th cylinder is not set to TDC).
In this case, it is necessary to remove the camshaft drive chain from the camshaft sprocket and turn the crankshaft until the marks are aligned.
You can turn the crankshaft in the following ways.
Purchase a special wrench for turning the crankshaft by the pulley nut.
This wrench can also be used to rotate the crankshaft from above the engine compartment.
Engage 4th gear and slowly roll the car in the desired direction until the mark on the camshaft sprocket matches the mark on the camshaft bearing housing.
Shift into 4th gear and hang out one of the rear wheels.
Then turn the suspended wheel in the desired direction until the mark on the camshaft sprocket matches the mark on the camshaft bearing housing.
TDC marks location
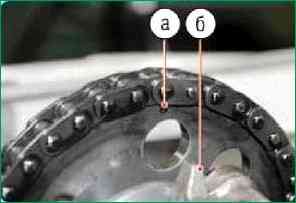
The marks are located on the camshaft sprocket (hole "a") and on the camshaft bearing housing (protrusion "b").
Cylinder head cover removed.
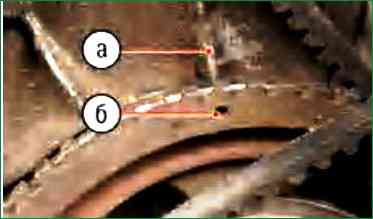
In addition, the marks are applied in the casting on the cover of the camshaft drive chain (protrusion "a") and on the ring gear of the crankshaft pulley (hole "b" on the edge of the crown)
Remove the cylinder head cover (see "How to replace the Niva Chevrolet cylinder head cover gasket")
Turning the crankshaft, align the marks on the camshaft sprocket and on its bearing housing.
If the chain is installed correctly, the mark on the crankshaft pulley should line up with the long mark on the timing chain cover.
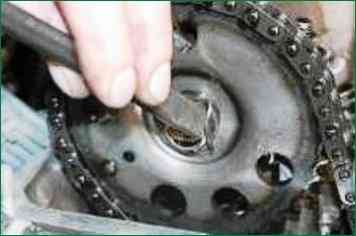
If the marks do not match, straighten the tabs of the lock washer of the camshaft sprocket bolt.
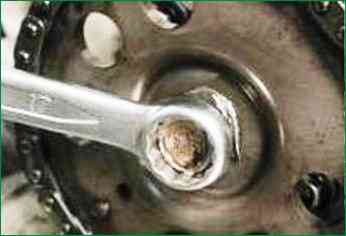
Engage first gear to secure the crankshaft from turning, unscrew the bolt and remove it along with the lock and thrust washers.
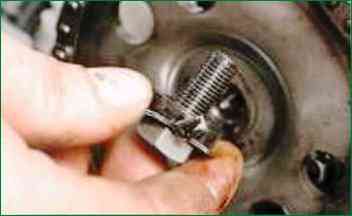
The lock and thrust washers are not fixed on the bolt in any way and can be easily removed from it.
Be careful not to drop them into the engine sump.
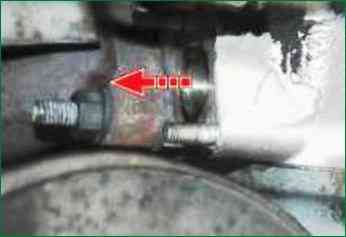
Dismantle the chain tensioner (see "Replacing the Niva Chevrolet hydraulic chain tensioner").
If you have the necessary skills, you can leave the hydraulic tensioner on.
It is enough to press the hydraulic tensioner plunger with a large screwdriver or mounting spatula.
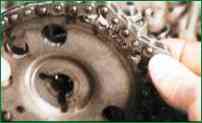
Remove the sprocket along with the chain, remove the chain from the sprocket and then reinstall it on the sprocket, changing the position of the chain on the sprocket teeth in the desired direction.
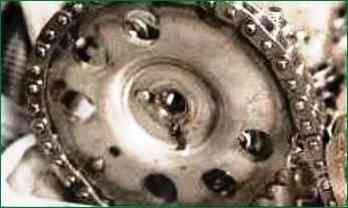
It is recommended to move the chain one tooth at a time.
Put the sprocket together with the chain on the camshaft flange, pulling the drive branch of the chain.
Since changing the position of the chain on the sprocket, the hole in the sprocket no longer matches the locating pin in the flange, rotate the crankshaft a little in the right direction until the hole and the pin coincide.
Install the sprocket bolt together with the thrust and lock washers and tighten it until it stops without completely tightening it.
After turning the crankshaft two turns, repeat the check of the position of the marks, as we did before.
If the marks match, tighten the bolt and bend the tab of the lock washer onto the edge of its head.
If the marks do not match, repeat the installation of the valve timing.
Install all previously removed parts in reverse order. Replace the cylinder head cover gasket to prevent oil leakage.


