Removing and installing windshield washer motor
Disconnect the negative cable from the battery.
Remove the washer reservoir.
Remove the windshield washer motor.
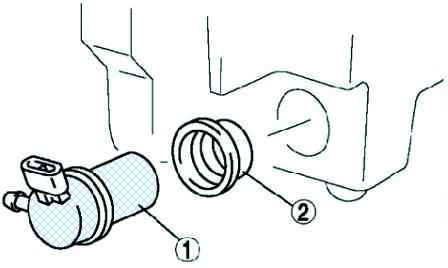
- 1 - windshield washer motor;
- 2 - sealing ring
Remove the O-ring (fig. 1).
Install in the reverse order of removal.
Checking the windshield washer motor
Disconnect the negative cable from the battery.
Remove the washer reservoir.
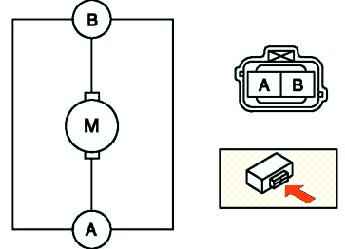
Apply voltage from the positive battery terminal to motor terminal (B) and motor terminal (A) to body ground (fig. 2.).
Make sure the windshield washer motor is running.
If the motor does not work, replace it.
Removing and installing windshield washer jet
Remove the hood insulator. Remove the washer hose from the washer jet fitting.
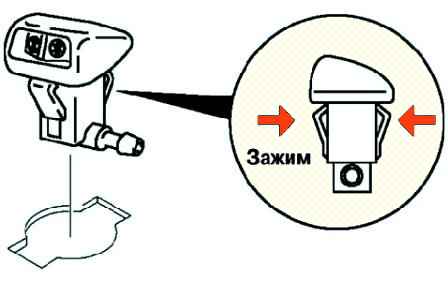
Squeeze the windshield washer jet retainers (fig. 3).
Remove the windshield washer jet from the hood opening.
Install in the reverse order of removal.
Cleaning the windshield washer jet
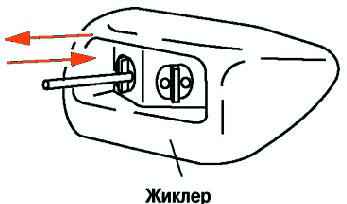
Clean the washer jet with a needle or similar object by moving it back and forth (fig. 4).
If the jet becomes clogged again after cleaning, remove the hose from the jet fitting.
Make sure there is enough liquid in the reservoir.
Turn on the washer and rinse the inside of the hose with a jet of liquid.
Removing and installing windshield washer hose
Remove the hood insulator.
Partially remove the right mudguard.
Remove the clamp and connecting tube.
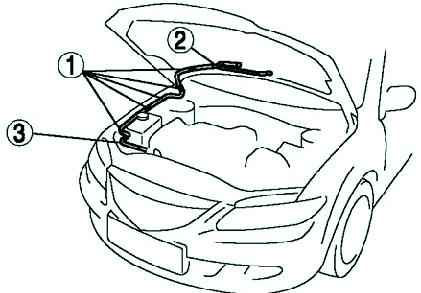
Remove the windshield washer hose (fig. 5).
Install in the reverse order of removal.
Removing and installing the rear window washer motor
Disconnect the negative cable from the battery.
Remove the washer reservoir.
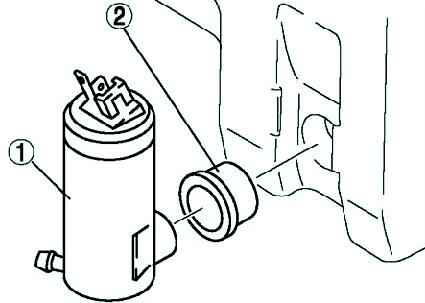
Remove the rear window washer motor and O-ring (fig. 6).
Install in the reverse order of removal.
Removing and installing rear wiper arm with brush
Remove the lever cover.
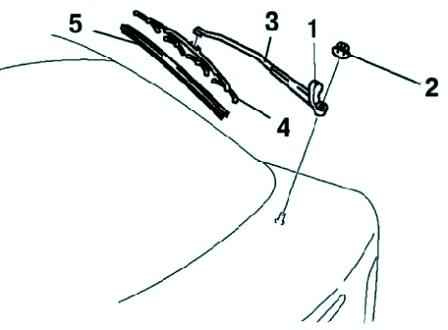
Unscrew the rear window wiper arm nut and remove the arm (fig. 7).
Remove the brush holder.
Remove the brush.
Install in the reverse order of removal.
Clean the rear wiper arm splines using a wire brush before installing the rear wiper arm.
Adjust the rear wiper arm with blade.
Adjusting the rear wiper arm with a brush
Turn on the rear wiper motor with flow and return the wiper arm to its original position.
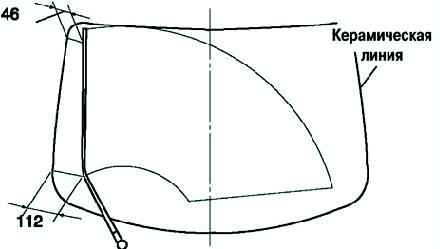
Install the rear wiper arm on the ceramic edge (fig. 8).
Removing and installing the rear window washer jet
Disconnect the negative cable from the battery.
Remove the tailgate top trim.
Remove the rear window washer hose from the washer jet fitting.
Squeeze the latches on the rear window washer jet.
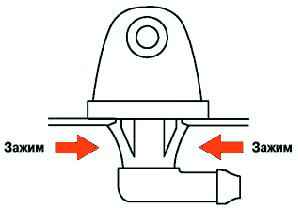
Remove the rear window washer jet from the hole (fig. 9).
Install in the reverse order of removal.
Adjust the rear window washer jet.
Rear window washer jet adjustment
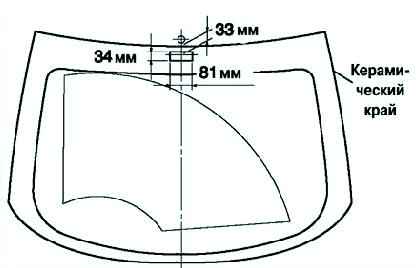
Insert the needle into the hole of the rear window washer jet and adjust the direction of the nozzle as shown in Figure 10.
Removing and installing the headlight cleaner motor
Disconnect the negative cable from the battery.
Remove the washer reservoir.
Remove the fluid level sensor in the washer reservoir.
Disconnect the connector.
Remove the mounting bolt and remove the bracket and the headlamp cleaner motor.
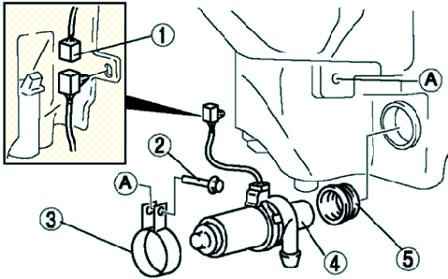
Remove the O-ring (fig. 11).
Install in the reverse order of removal.


