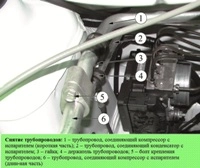
Removal of headlights, repeaters and taillights was discussed in the relevant articles
Remove additional brake signal
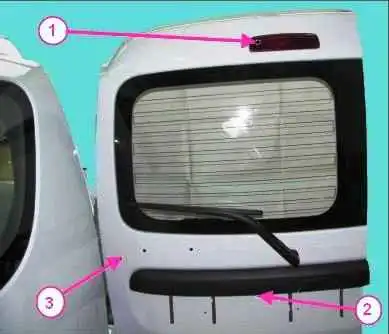
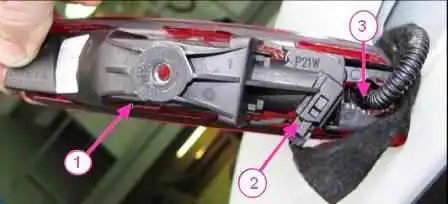
An additional brake light is installed on the rear left door.
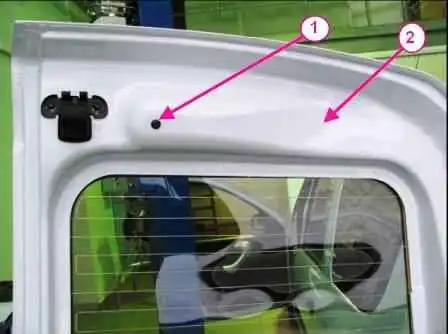
Using a Torx 30 screwdriver, unscrew the screw 1 securing the brake signal. Extracting an additional signal
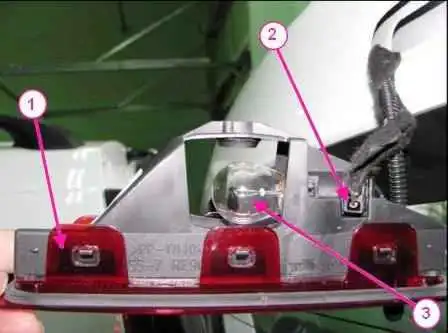
Disconnect block 2 of the additional brake signal harness
Use a flat screwdriver to squeeze out the jet holders and disconnect the rear window washer jet
To replace the lamp, turn it a quarter of a turn counterclockwise and remove the lamp from the housing.
The lamp for the additional signal is P21W 21W.
Removing the trunk light
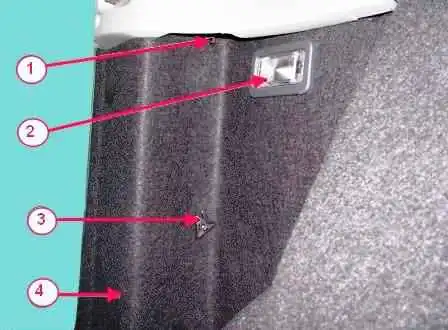
Using a flat screwdriver, disconnect the trunk light 2 from the car body
Disconnect the rear wiring harness connector from the trunk light connector and remove the trunk light.
To replace the lamp, press the contacts and pull the lamp towards you.
Install the auxiliary brake light by turning it clockwise.
Install the auxiliary brake light and the trunk light in the reverse order of removal.
Removing and installing license plate lighting
We prepare the car and disconnect the negative battery terminal.
The license plate light is integrated into the outer trim of the left rear loading door.
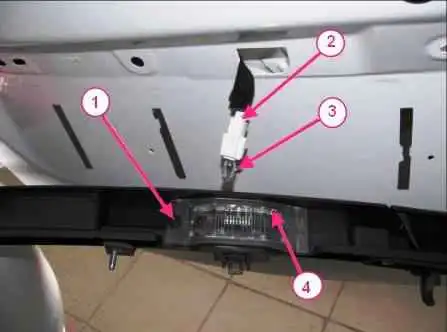
Using a TorxT20 screwdriver, unscrew screw 1, fastening the diffuser 4 of the license plate light to the lining of the left rear loading door.
We disengage the latch and remove the license plate light from the socket in the lining of the left rear loading door of the car.
Disconnect the block 2 of the wiring harness from the lamp 3 of the license plate lighting.
Turn and pull the lamp towards you.
Install the license plate light in the reverse order of removal.
Removing the dome light and replacing the bulb
Withdrawal
Place the car in the workplace, brake with the parking brake, turn off the ignition.
Raise the hood, disconnect the ground wire terminal from the battery.
Cover light
Open the front door of the car.
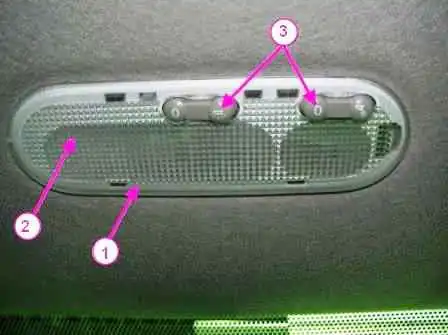
Remove with a flathead screwdriver diffuser 2
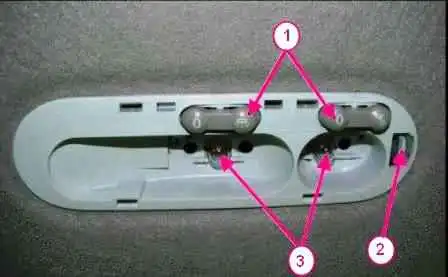
Press the latch 2, and remove the dome light from the car roof upholstery.
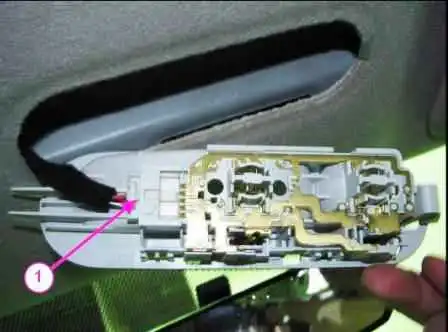
Disconnect connector 1, instrument panel wiring harness from interior light.
To replace the lamp 3, figure 2, pull it towards you and remove it from the housing 1, figure 8, the ceiling lamp.
The lamp used for the W5W lampshade
Plafon for lighting the cargo compartment (for a van)
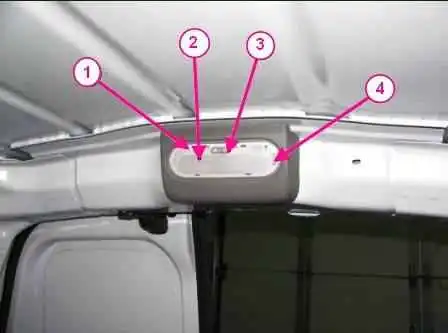
Remove diffuser 2 with a flat screwdriver.
Press the latch 4 and remove the load compartment light from the upholstery of the car body.
Disconnect the wiring harness connector from the cargo area light and remove the interior light.
To replace the lamp, pull it towards you and remove it from the body of the dome light in the cargo area.
Use only a certified W5W lamp for replacement
Installing the lamp and the dome light and the dome light for the cargo area should be done in the reverse order of removal.
Removing the glove box light
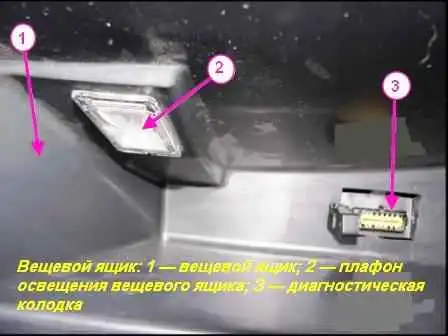
Disengage retainer 1, Figure 2, and remove cover 2, Figure 1, of glove box lighting 1.
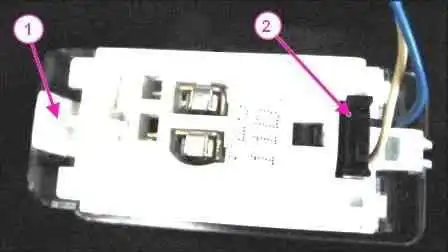
Disconnect connector 2, Figure 2, of the instrument panel wiring harness from the glove box light.
To replace the glove box dome light bulb, you must remove it and replace the burned-out bulb.
Install the bulb and the glove box light in the reverse order of removal.
Use only a certified C5W lamp for replacement


