If a constant knock of valves is heard when the engine is idling, the hydraulic bearings of the drive levers are faulty. Replace defective hydraulic bearings
You will need: keys "for 10", "for 13", "for 17", "for 24"
Remove the cylinder head cover (see Replacing the cylinder head cover gasket).
Check the hydraulic bearings, for which press the valve drive levers one by one, trying to drown the plungers of the bearings.
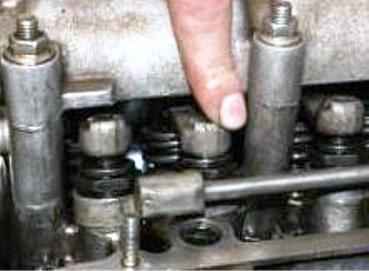
The force of sinking the plunger of a serviceable hydromount is quite large, while for a faulty one, on the contrary, the plunger is easily pushed in.
While turning the crankshaft, align the mark on the camshaft sprocket with the mark (lug) on the camshaft bearing housing (see Checking and setting the valve timing by marks).
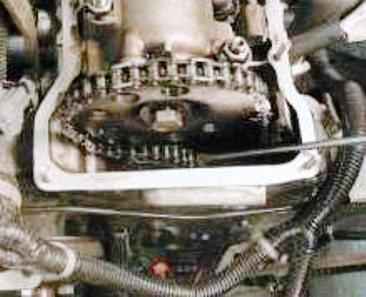
Use a metal rod (for example, a screwdriver) to push the plunger of the chain tensioner
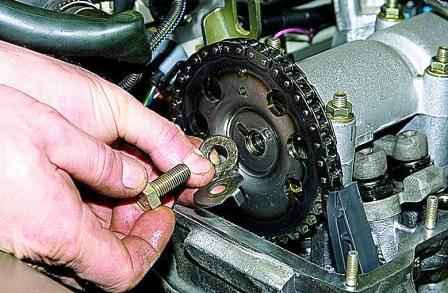
- unscrew the camshaft sprocket mounting bolt (see Replacing the camshaft drive chain damper)
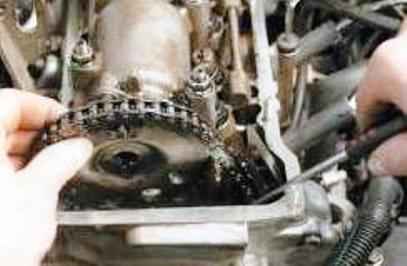
- and, holding the tensioner plunger, remove the sprocket from the camshaft without separating it from the chain.
Make sure the chain does not disengage from the oil pump drive shaft sprocket.
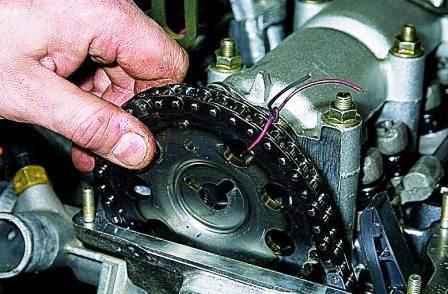
Attach the sprocket and chain to the engine.
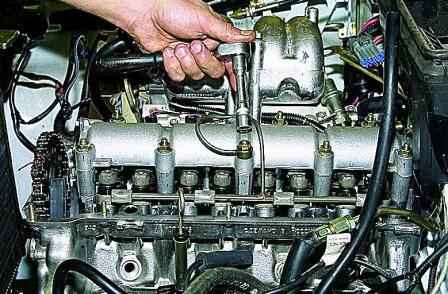
Unscrew the nut of the stud fastening the camshaft bearing housing, which simultaneously fastens the fitting of the oil supply pipeline to the hydraulic bearings
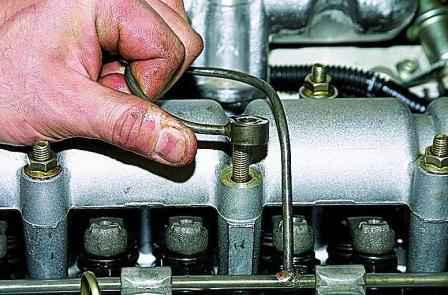
- and remove the fitting from the stud
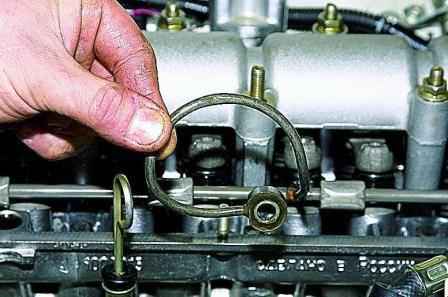
Pull the pipeline aside by gently turning it in the rubber o-rings of the ramp legs.
Unscrew the remaining nuts securing the camshaft bearing housing, remove the flat washers located under them
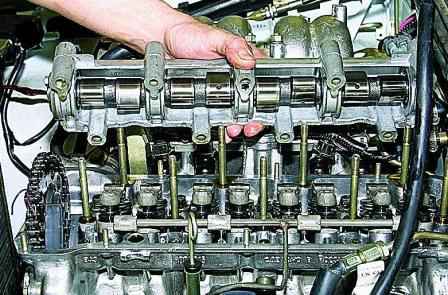
Remove the bearing housing together with the camshaft from the cylinder head studs.
To facilitate the reinstallation of the bearing housing with the camshaft, after removing them, try not to turn the shaft in the housing.
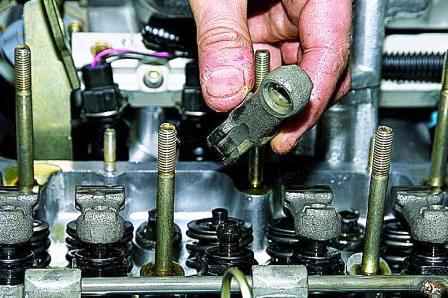
Remove the valve actuator lever.
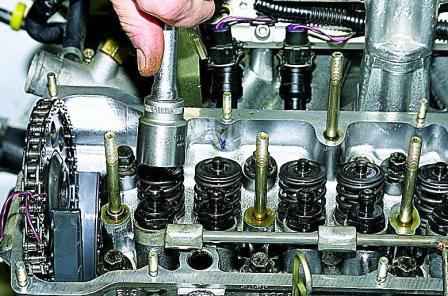
Unscrew the hydraulic support
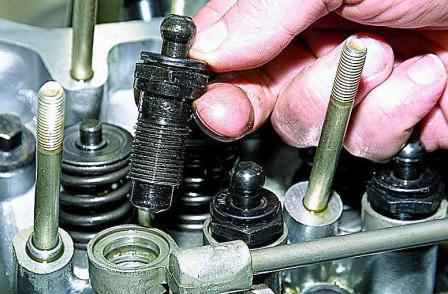
Remove it from the holes in the cylinder head and ramp post.
In the same way I will dismantle I eat hydraulic supports of levers of other valves.
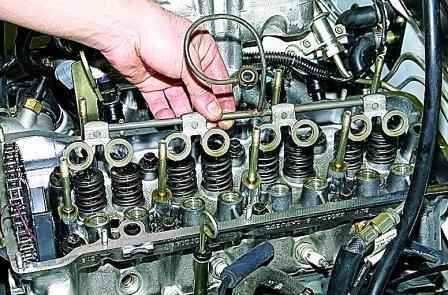
Remove the frame for supplying oil to the hydraulic bearings.
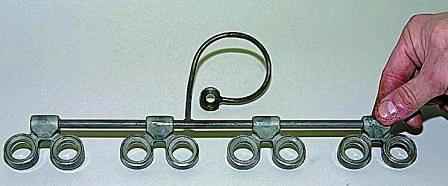
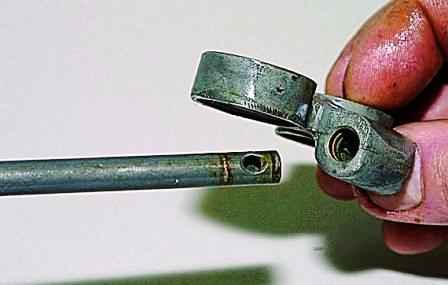
We move the oil-supplying sleeve of the hydraulic support from the frame tube and remove it.
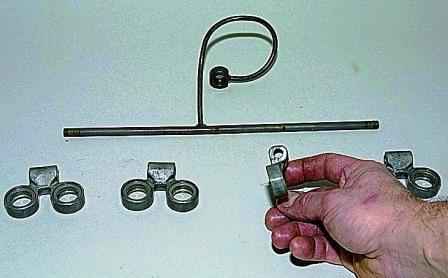
Similarly, we remove three more hydraulic bushings
The tightness of the connection between the frame tube and the oil supply bushings is ensured by rubber sealing rings installed in the bushings.
In the extreme bushings, one sealing ring is installed, in the other - two.
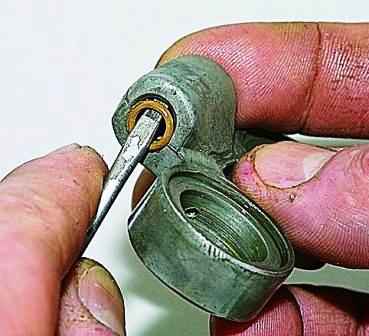
To replace the sealing ring, pry it with a screwdriver and remove it from the sleeve.
Before assembling, we clean, rinse with gasoline and blow with compressed air the channels in the tube and oil bushings of the frame.
We install new sealing rings in the bushings and lubricate them with engine oil.
Carefully, so as not to damage the rings, we put the bushings on the tube.
Before installing a new hydraulic bearing, pump out the accumulated oil from the hole in the cylinder head.
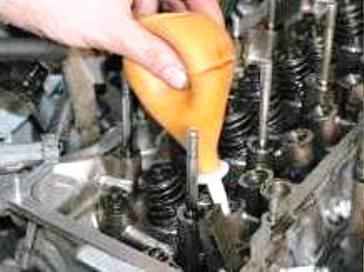
If the oil is not removed from the hole in the head of the block, the hydraulic support cannot be completely screwed in, and the valve actuator will not work normally.
Install the valve actuator lever and camshaft in the reverse order of removal.
Tighten the camshaft bearing housing nuts in the sequence shown in Figure 23.
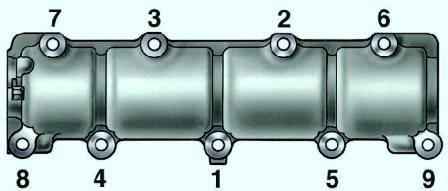
Sink the plunger of the replaced hydraulic bearing, as was done during the test, until there is a gap between the valve lever and the camshaft cam.
Install all previously removed parts in the reverse order of removal.


