We install the car on a viewing hole or on a lift
Remove the front bumper.
Disconnect the battery.
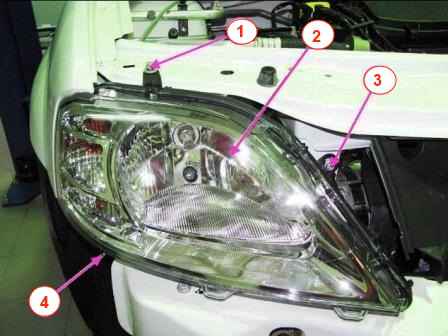
With a head of 10, we unscrew the three bolts 1, 3, 4 (Fig. 1) fastening the headlight to the car body
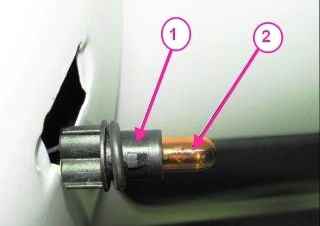
Remove cover 3 (Fig. 2) of the high and low beam lamp socket
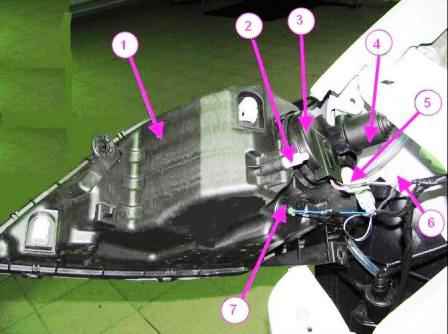
Disconnecting the lamp connectors.
We move the sealing cover 4 of the headlight corrector along the cable sheath.
We remove the headlight corrector actuator from the headlight housing (see Fig. 3).
Remove the marker lamp socket.
Remove the block headlight.
Installing the headlight unit
Install the headlight in the reverse order of removal.
In this case, it is necessary to ensure the uniformity of the gaps between the headlight and the mating parts of the car body.
If it is necessary to replace the lamps of the headlight, remove the protective cap from the side of the engine compartment of the corresponding lamp, Figure 2, and replace the lamp.
Do not touch the halogen bulb with your fingers. The remaining traces of fat can lead to overheating of the included lamp and its explosion.
If the lamp glass is touched, wipe it with a lint-free cloth. Replace lamps with clean cloth gloves.
Installing the front bumper.
Adjust the direction of the headlights.
To remove the headlight range control actuator:
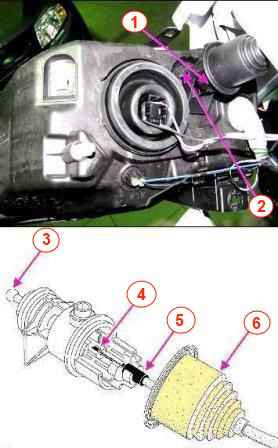
Disconnect the cover 3, figure 2, of the high and low beam lamp socket.
Slide the sealing cover 6 along the cable sheath (Figure 3)
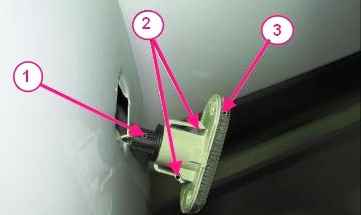
We press the latch 2 fastening the corrector housing and, turning it, remove the corrector housing from the headlight.
Push the pusher 3 of the drive so that a small gap forms at the tip of the cable 4.
Disconnect cable sheath tip 5.
Disconnect the cable from the drive.
Installing the headlight range control drive
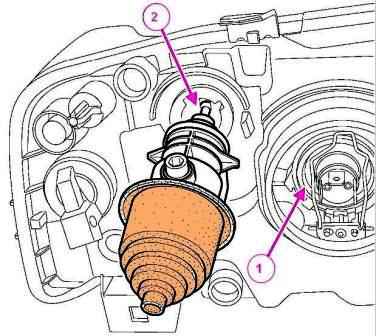
Pull the reflector 1, figure 4, so as to bring the slot of the holder as close as possible to the corrector pusher.
Fix the pusher in the slot of holder 2.
Fix the corrector drive with a latch.
Install tip 4, figure 3, of the corrector drive cable into the pusher.
Pull back and fix the tip of the sheath 5 of the cable in the corrector drive housing.
Reinstall sealing boot 6.
Install cover 3, figure 2, of the high and low beam lamp socket.
Removing the turn signal
Install the car on the workplace.
Raise the hood, disconnect the ground wire terminal from the battery.
We squeeze two clamps 2 (Fig. 5) and remove the case 3 of the repeater with the seal assembly from the front fender of the car
We remove the cartridge 1 from the case 3 (Fig. 6) of the repeater, turn it a quarter of a turn counterclockwise and pull the lamp 2 towards you
Installation decree perform the side turn switch in the reverse order of removal.
")
")
")
")
")
")